Create a Dev-Store
Development stores are used to integrate, configure & customize the experience in a limited environment before going live.
Steps in creating a Dev-Store:
- Duplicate your current theme
- Create a new shop group
- Create a new shop
Step 1: Duplicate your current theme
- Download your current theme onto your computer and rename it.
- Make a .zip file with a new theme and upload it to your PrestaShop store.
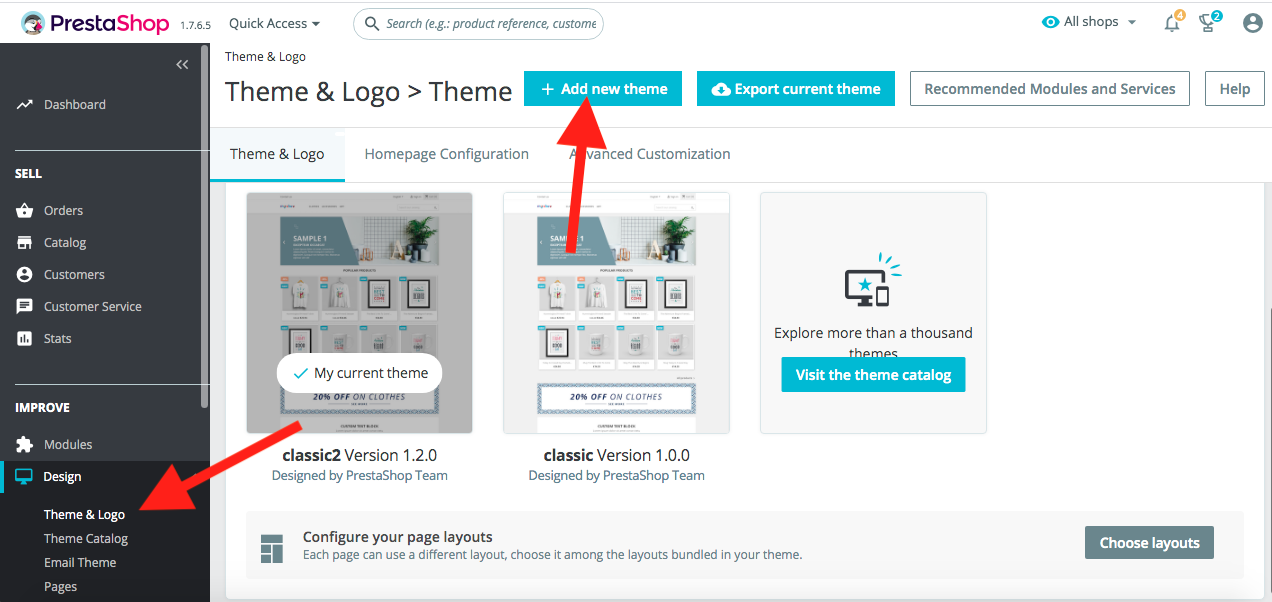
- Click 'Browse' and choose your_theme.zip

-
Click on the 'save' button.
-
If 'import from your computer' is not working, you may upload your theme using FileZilla in the 'themes' folder.
-
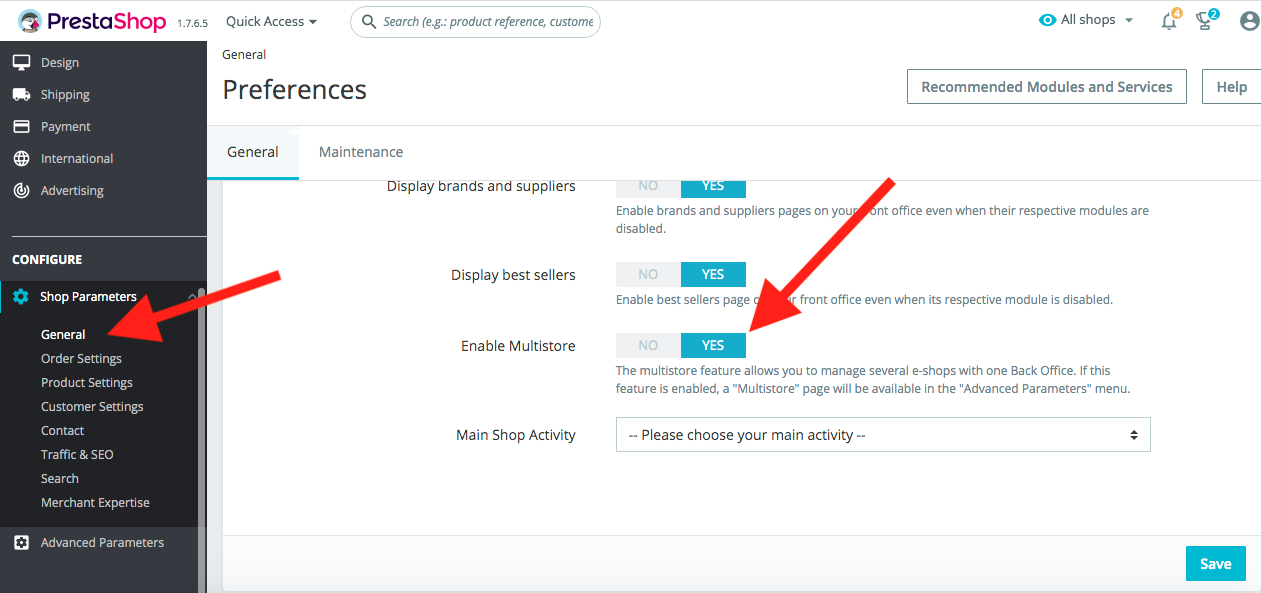
Enable multistore feature if it is disabled on your store, and save changes.
Step 2: Create a new shop group
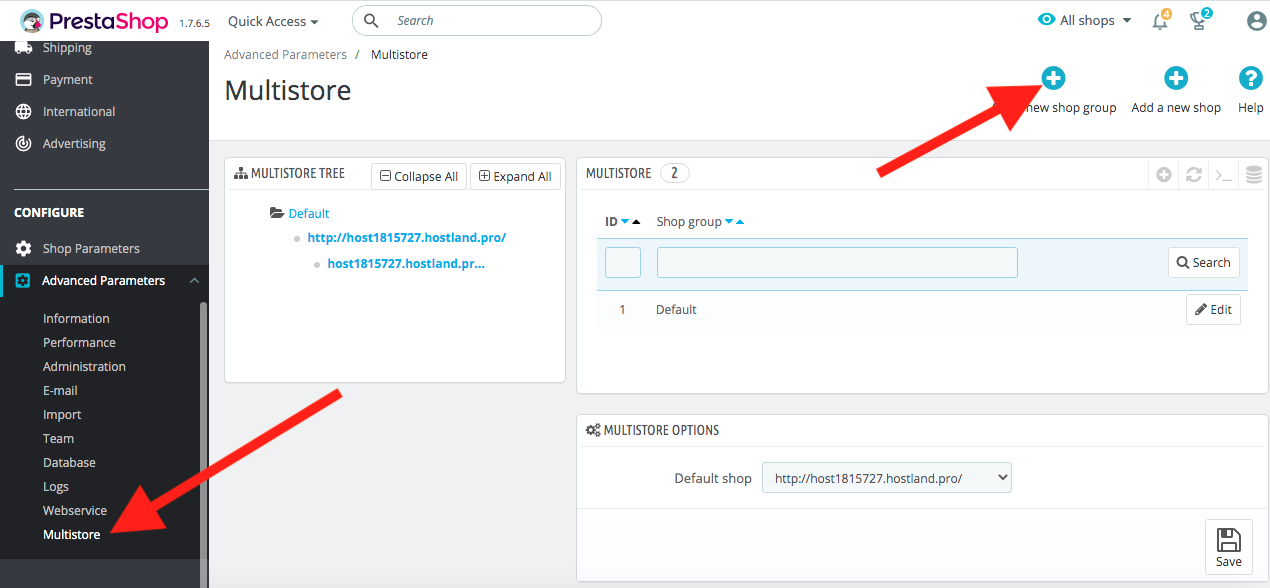
- Go to 'Advanced Parameters' > 'Multistore' and create a new shop group.
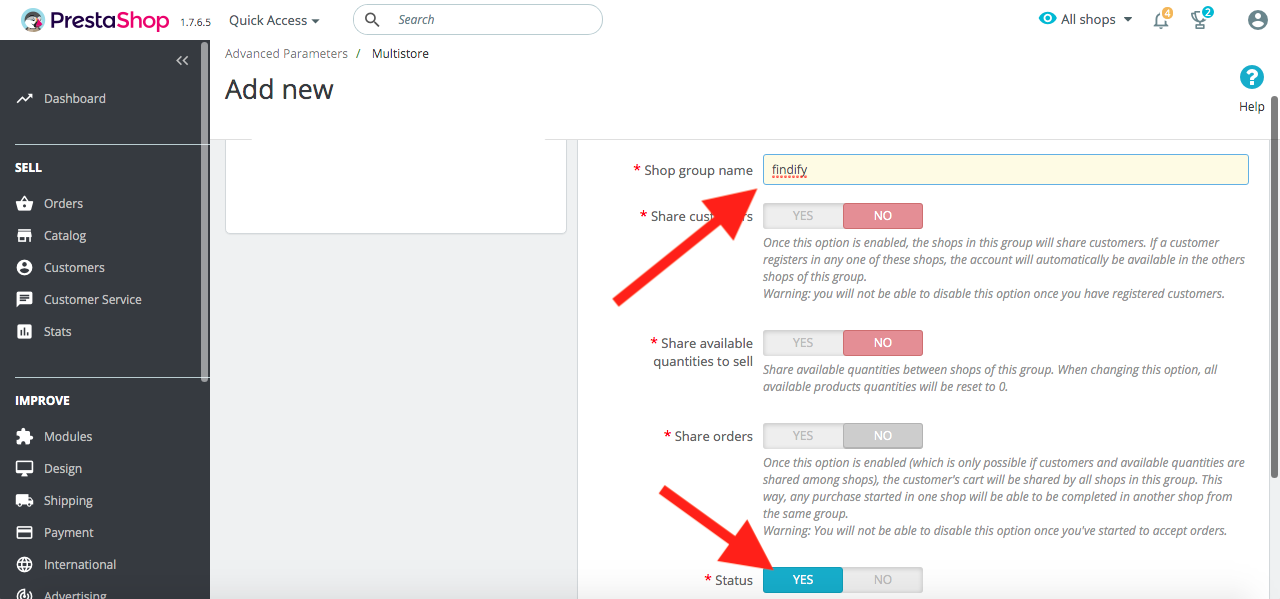
- Enter your shop group name, enable status, and save changes.
Step 3: Create a new shop
-After you have created your new shop group, you need to create a new shop.
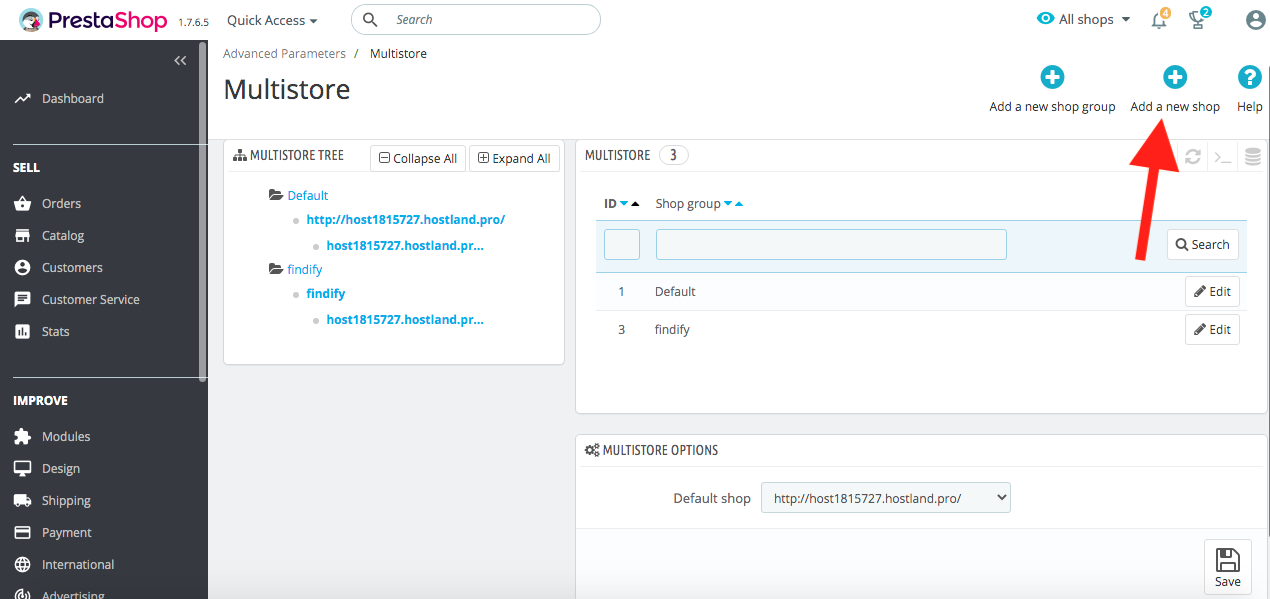
- Click on 'Add a new shop'.
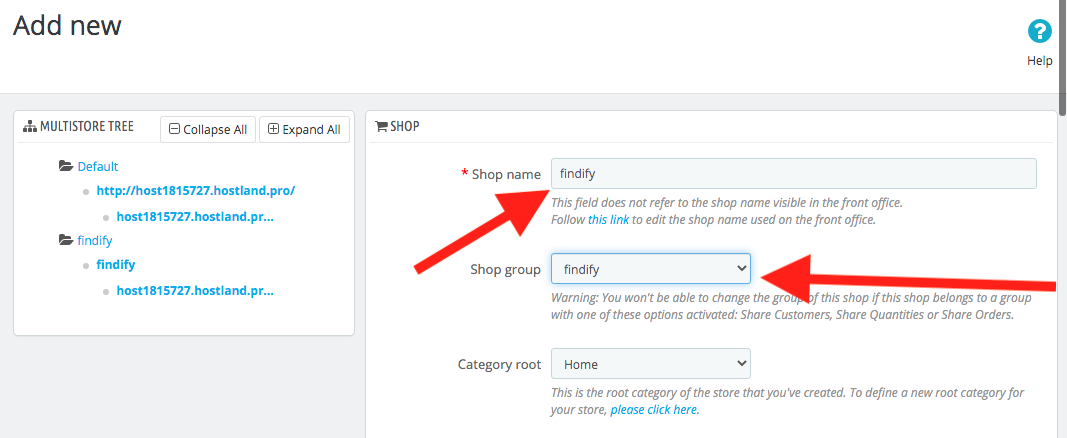
-Enter the name of your test store, for example, 'findify', and select the 'Shop group' that you created earlier.
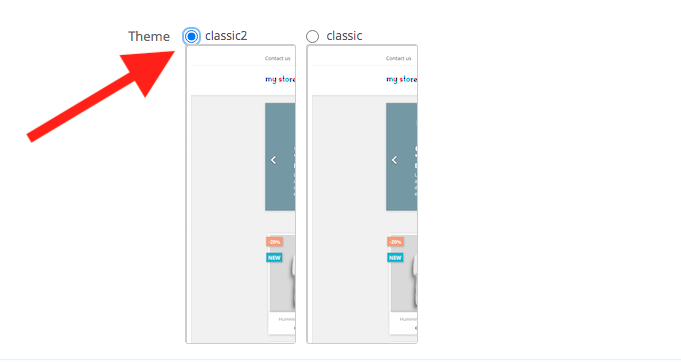
- Select your new theme, which is where you want to integrate Findify.
-Save changes.
-Set a URL for the shop you created.
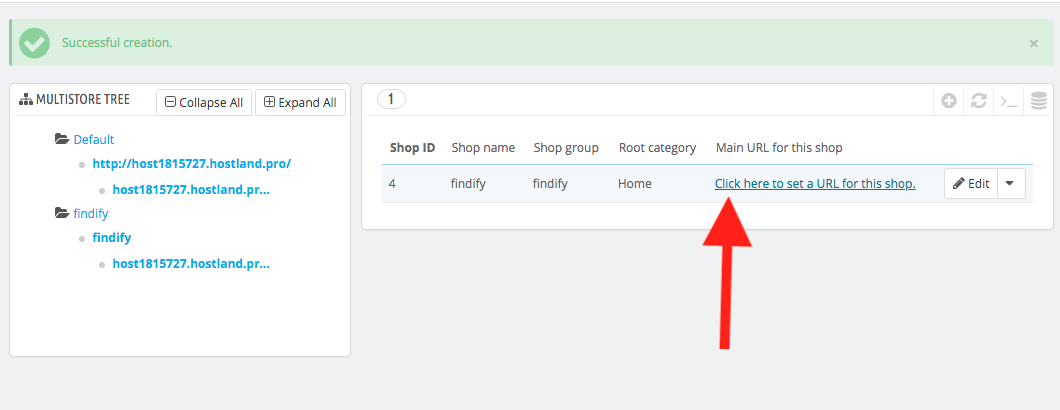
- Set a virtual URL.
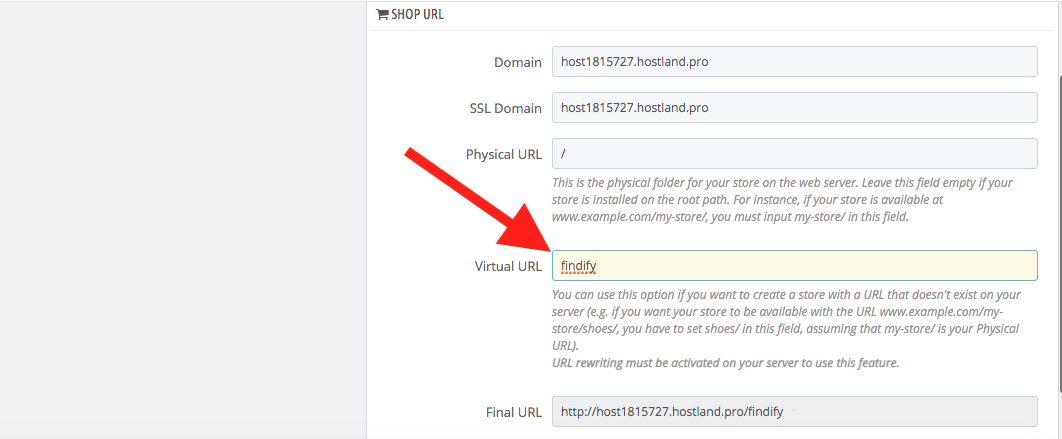
-
Save changes once again.
-
In a newly opened window you will see a link to your new store.
-
You can copy it and open it in a new window.
-
If your new store works with the old theme, go to 'Advanced Parameters' > 'Performance' and disable the cache, set 'Template compilation' as 'Force compilation' and clear cache.
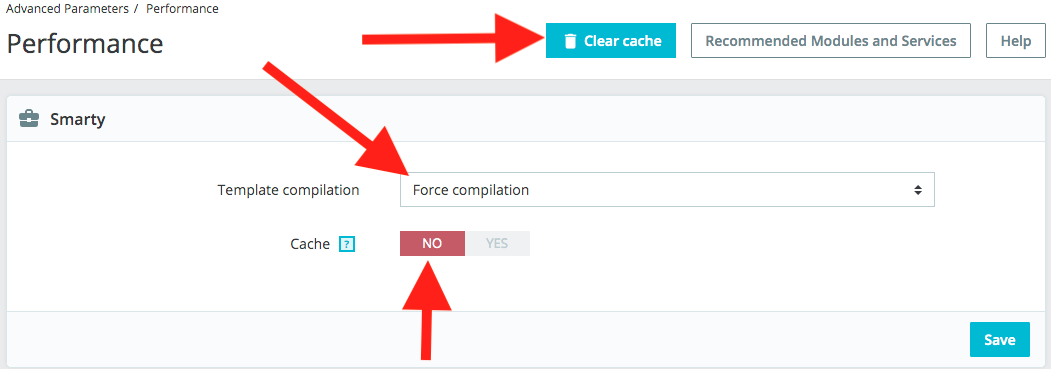
- Finally, save changes again, and you're finished. Well done!
Updated over 1 year ago
