How to Install Findify in Liquid
Guiding you through the installation process
Welcome to the start of your Findify journey!
Findify is a powerful tool for merchandising and AI-driven personalization within search, categories, and recommendations. By combining store-specific trends with each visitor’s individual behavior, Findify guides your shoppers to find the products they want to buy.
Ecommerce merchants can integrate with Findify in a number of ways. For merchants utilizing Shopify, the best way to integrate with Findify is via our dedicated native Shopify app, built using Liquid - the exact same language as Shopify uses.
Here, you’ll find a video guide explaining this installation process on a step-by-step basis. If you prefer to read the text version, you'll find it below. If you have any questions, don't hesitate to reach out to us on [email protected]!
Step 1: Install the Findify Search & Merchandise app
First, go to the Shopify app store and search for Findify Search & Merchandise.
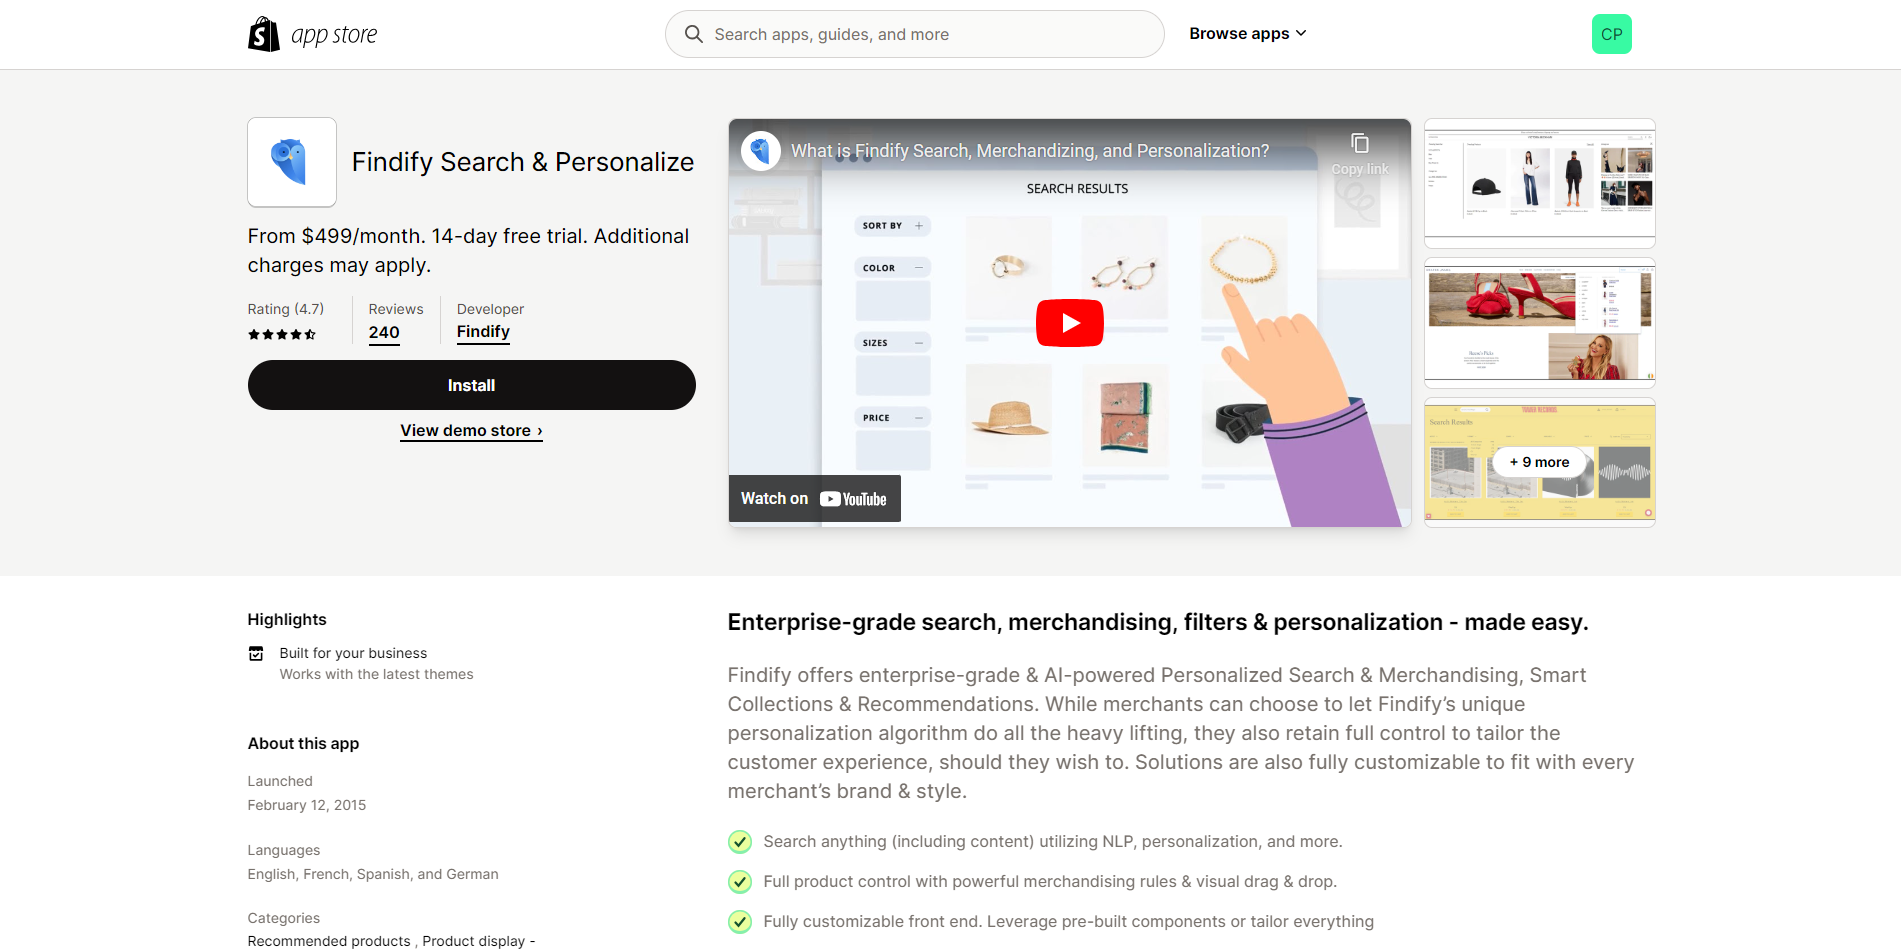
Click the 'Install' button which appears to the left of the video.
If you are already logged into Shopify, you will be redirected to your Shopify store (if not, you will be prompted to log in). On the next screen, you will need to click the 'Install app' button which appears on the top right of the screen.
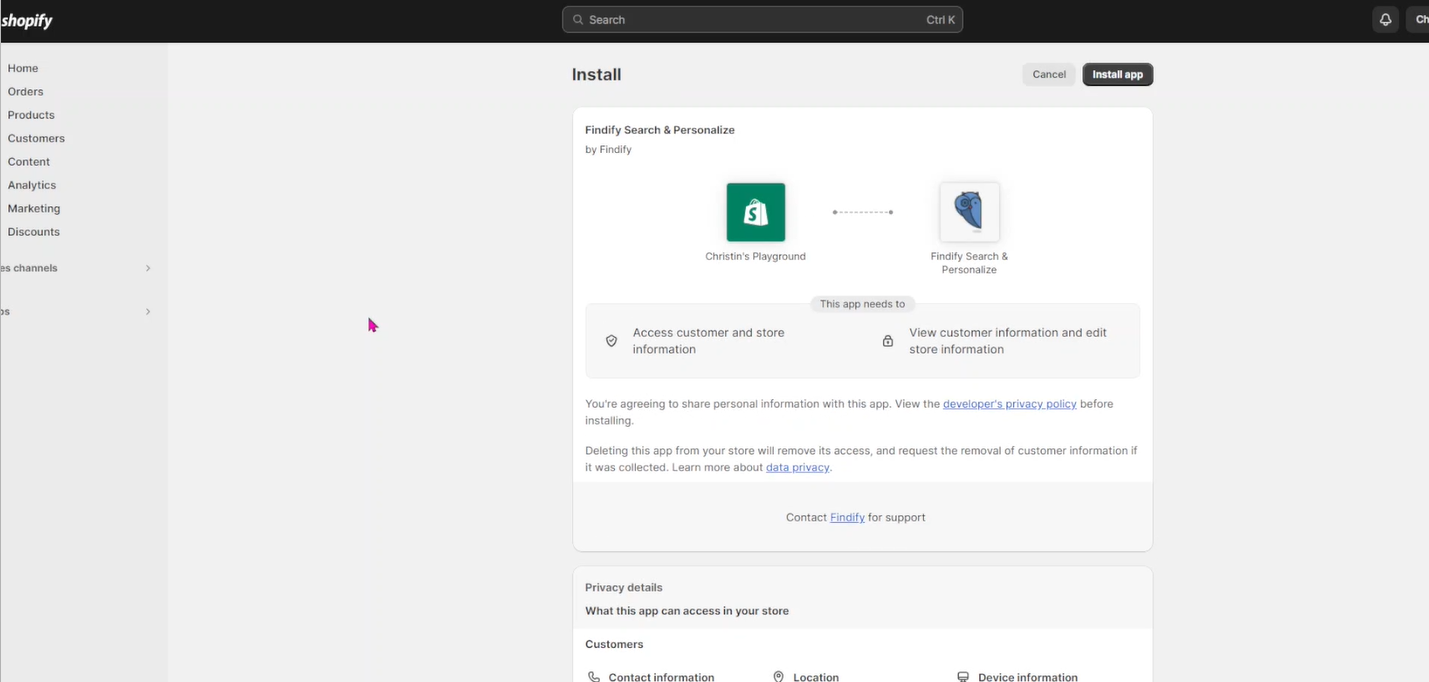
Step 2: Log into your new Findify Merchant Dashboard
After installing the app, you will be redirected to the Findify log in page, which looks like this:
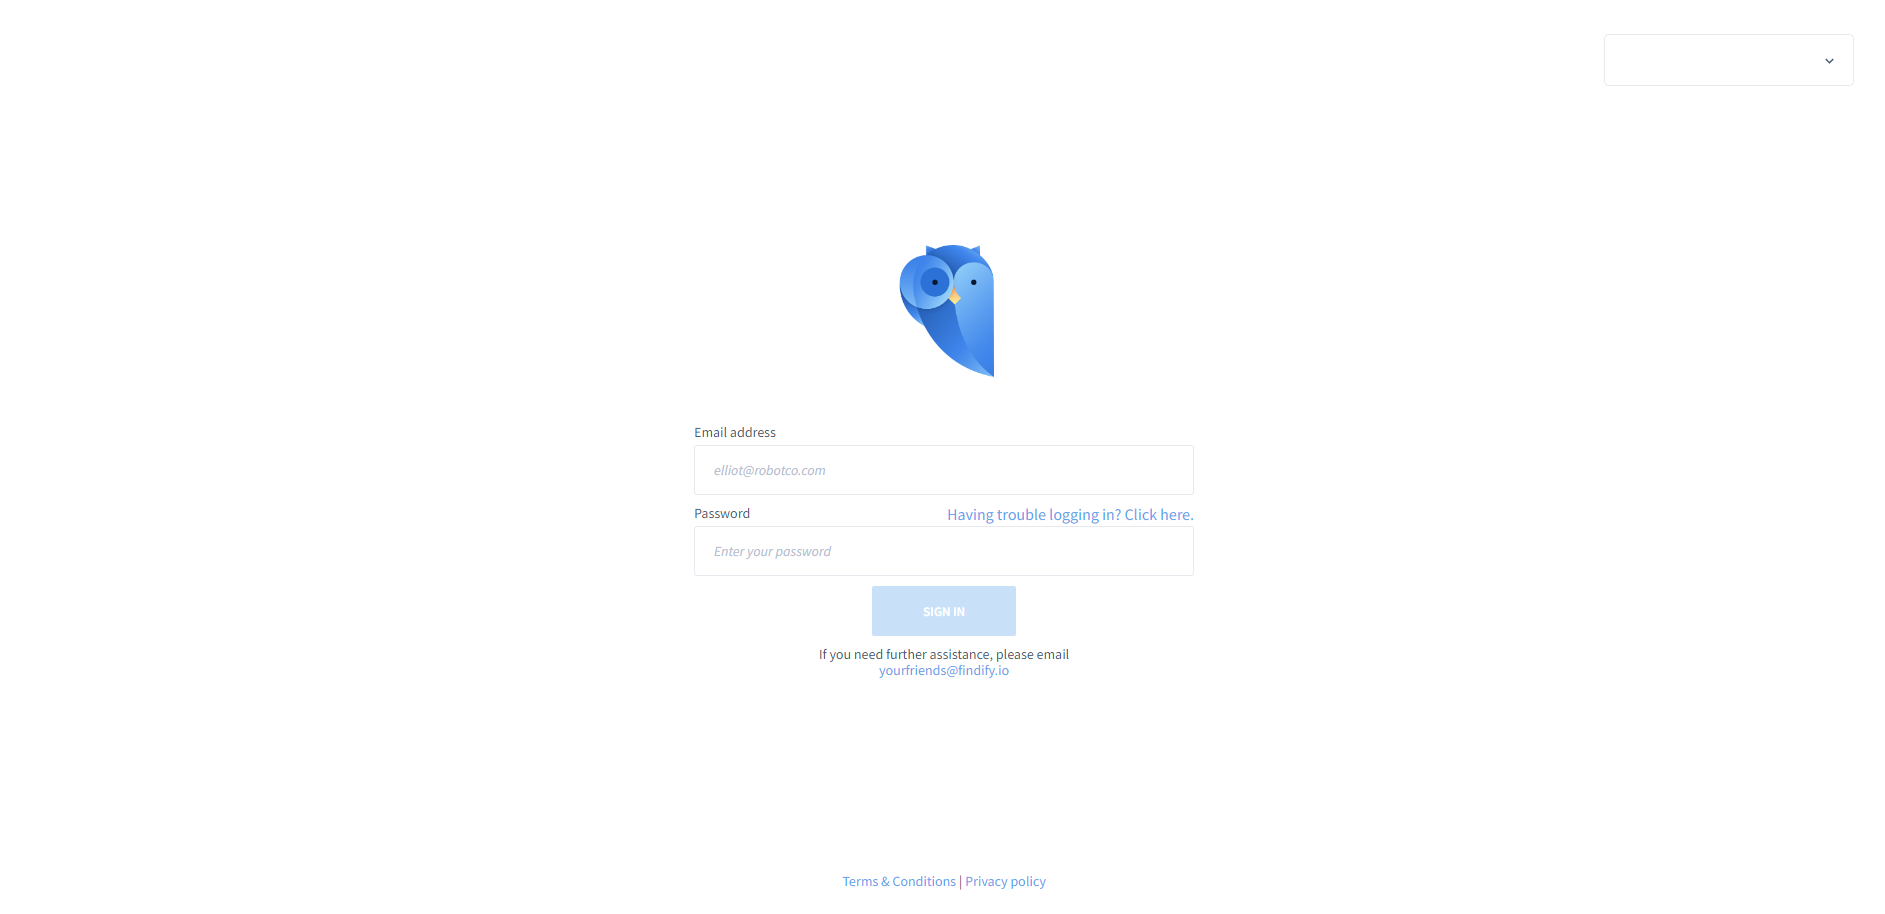
To continue, you must log into your new Findify Merchant Dashboard. Installing the Findify app should have already triggered an email to have been sent to your email address (the one associated with your Shopify account). Follow the instructions within the email you received in order to log in with your new credentials.
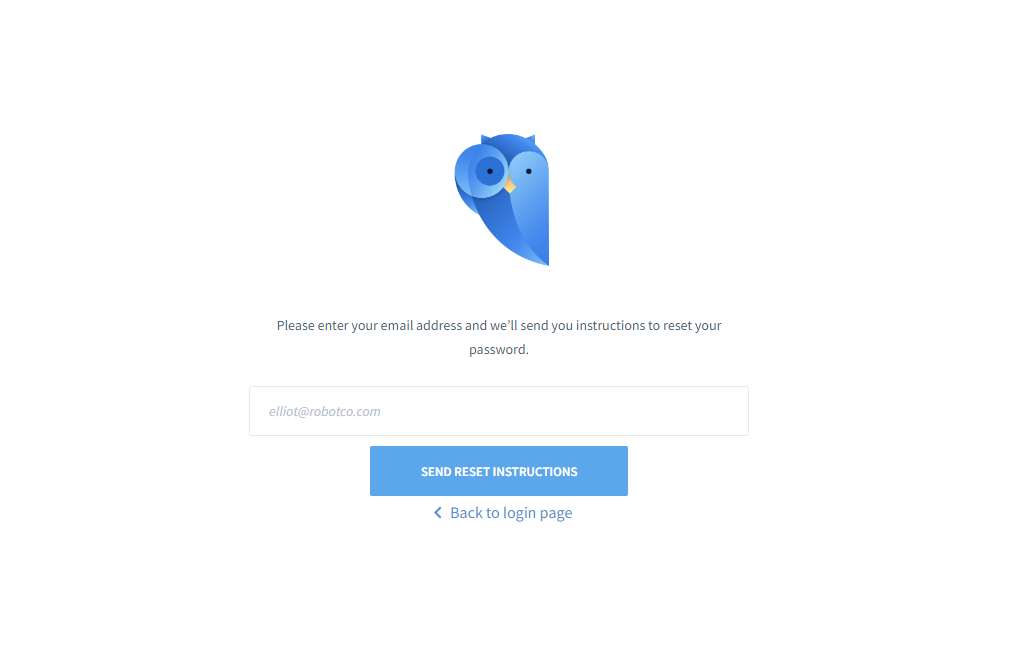
If you did not receive an email in your inbox, make sure to check the spam folder. If you experience any issues logging in, click on the hyperlinked text which reads "Having trouble logging in? Click here." You will then be prompted to enter your email address again in order to receive your credentials.
Step 3: Select your plan
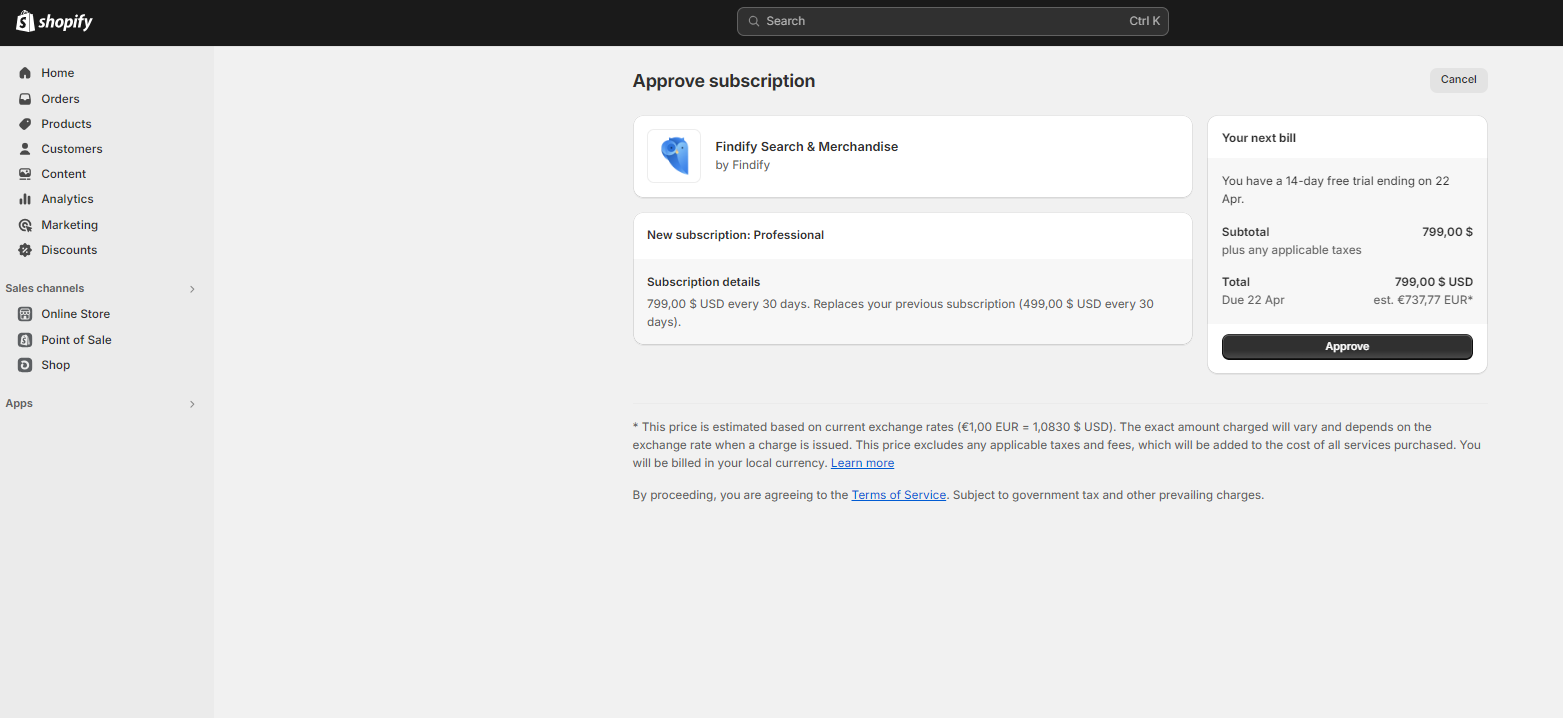
Next, you will be redirected to Shopify's portal where you'll be able to select your preferred Findify plan.
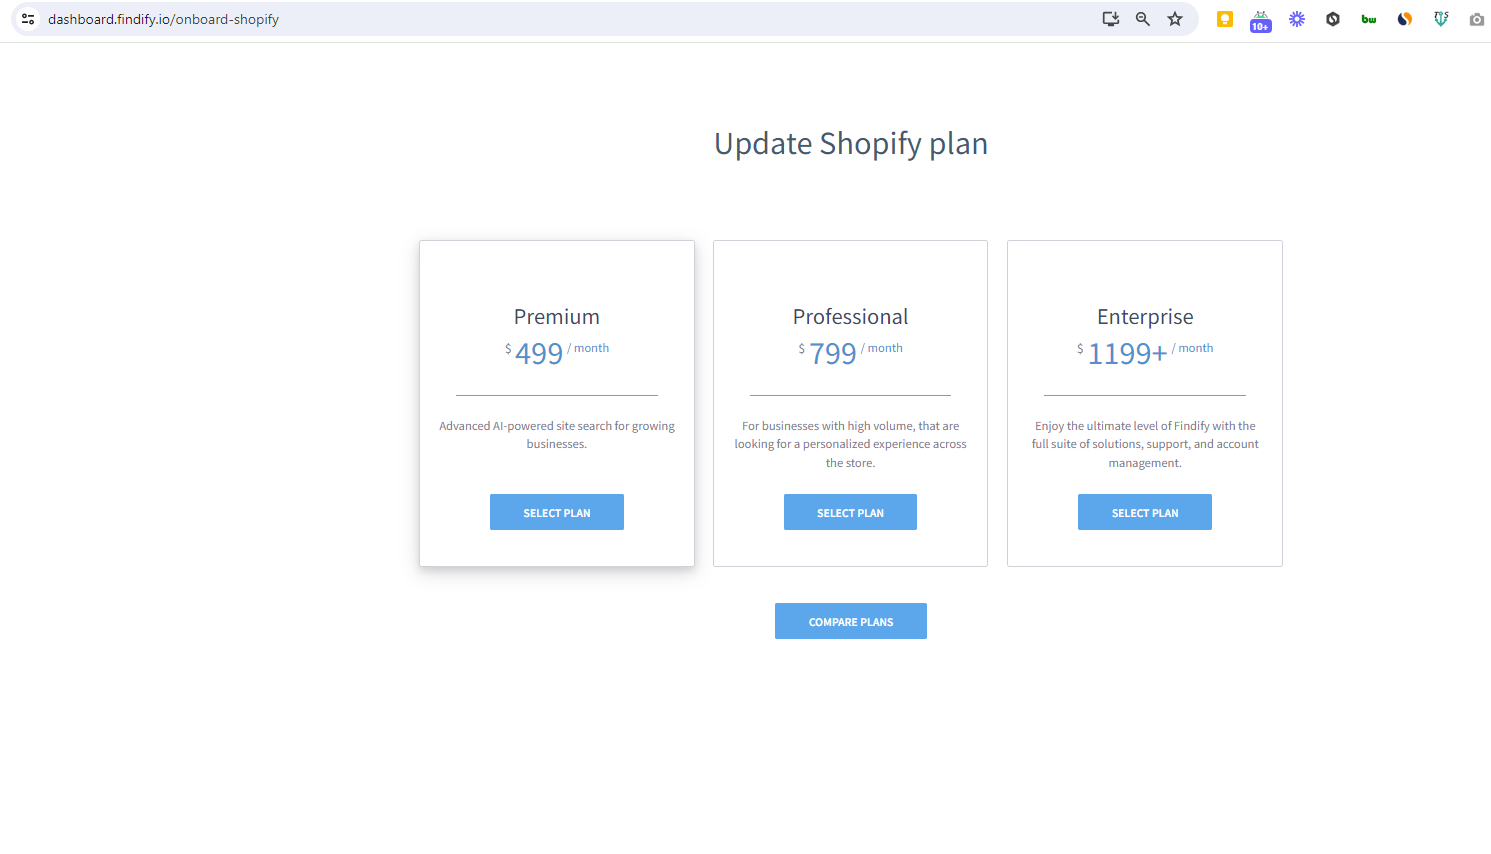
Once selected, you will be asked to confirm the app charge (as shown below).
Step 4: Sync your products
The next step involved syncing your products between Shopify and Findify solutions.
Please note that an initial full product sync might take some time, depending on how many products you have in your store. Subsequent syncs will be a lot faster than this.
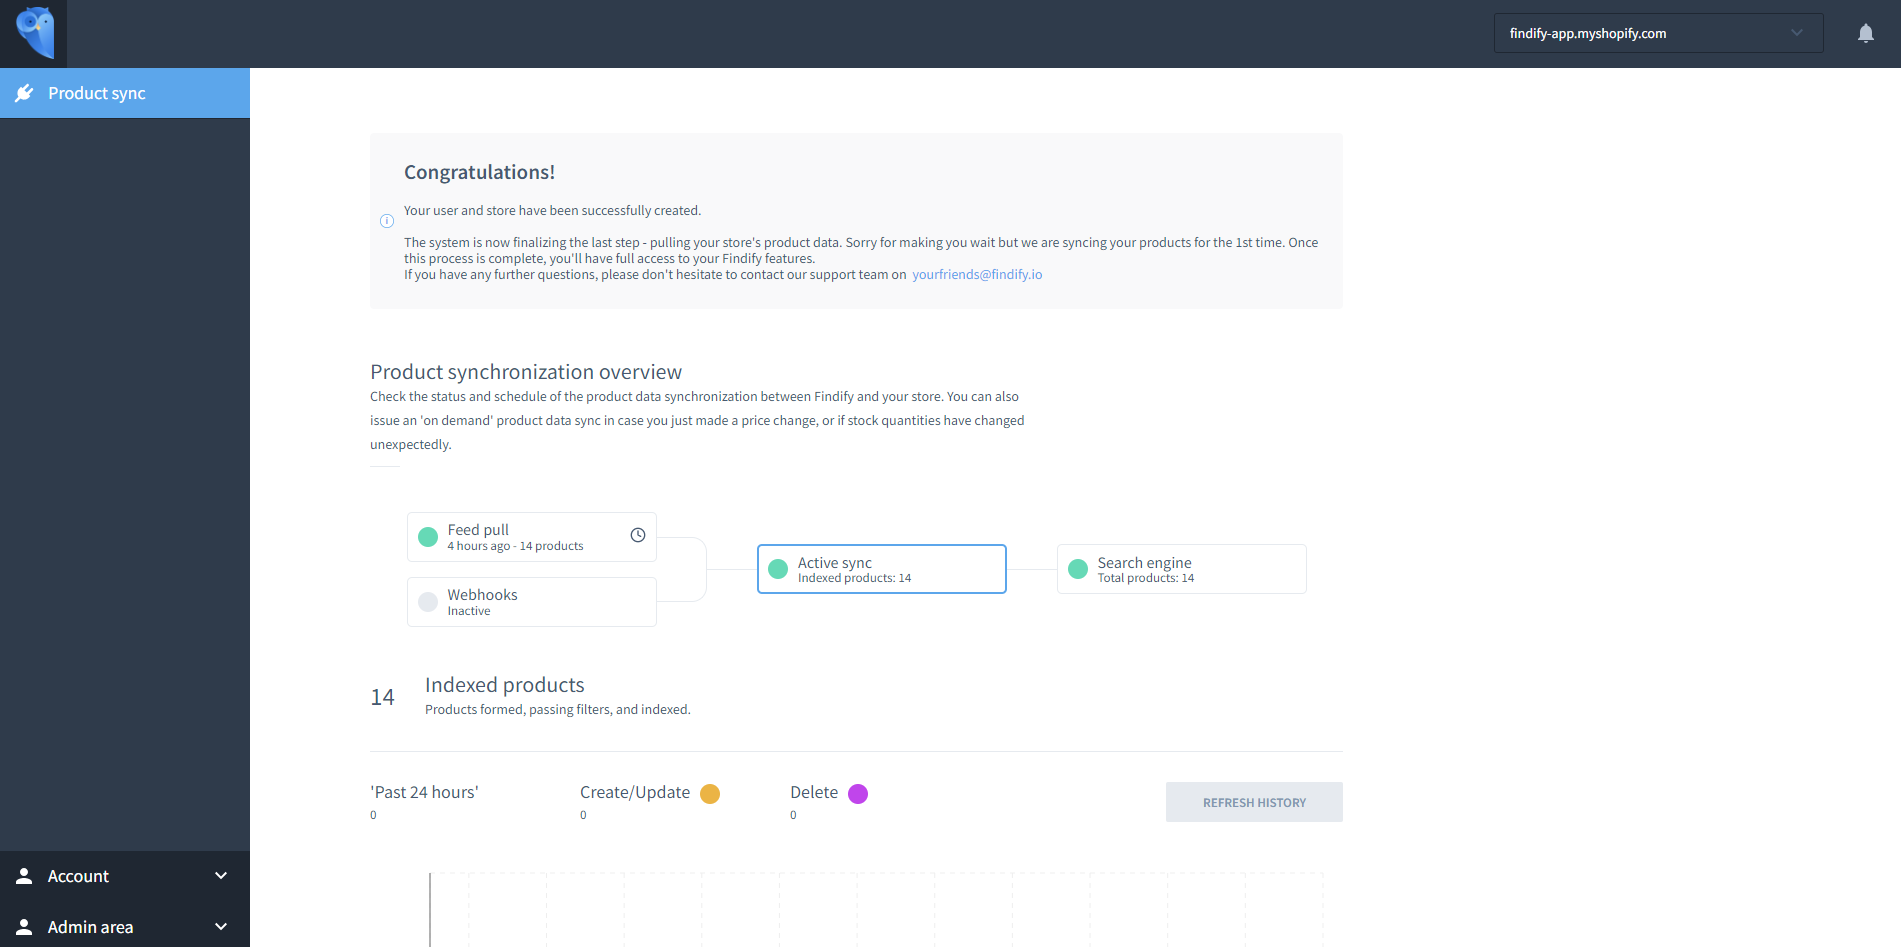
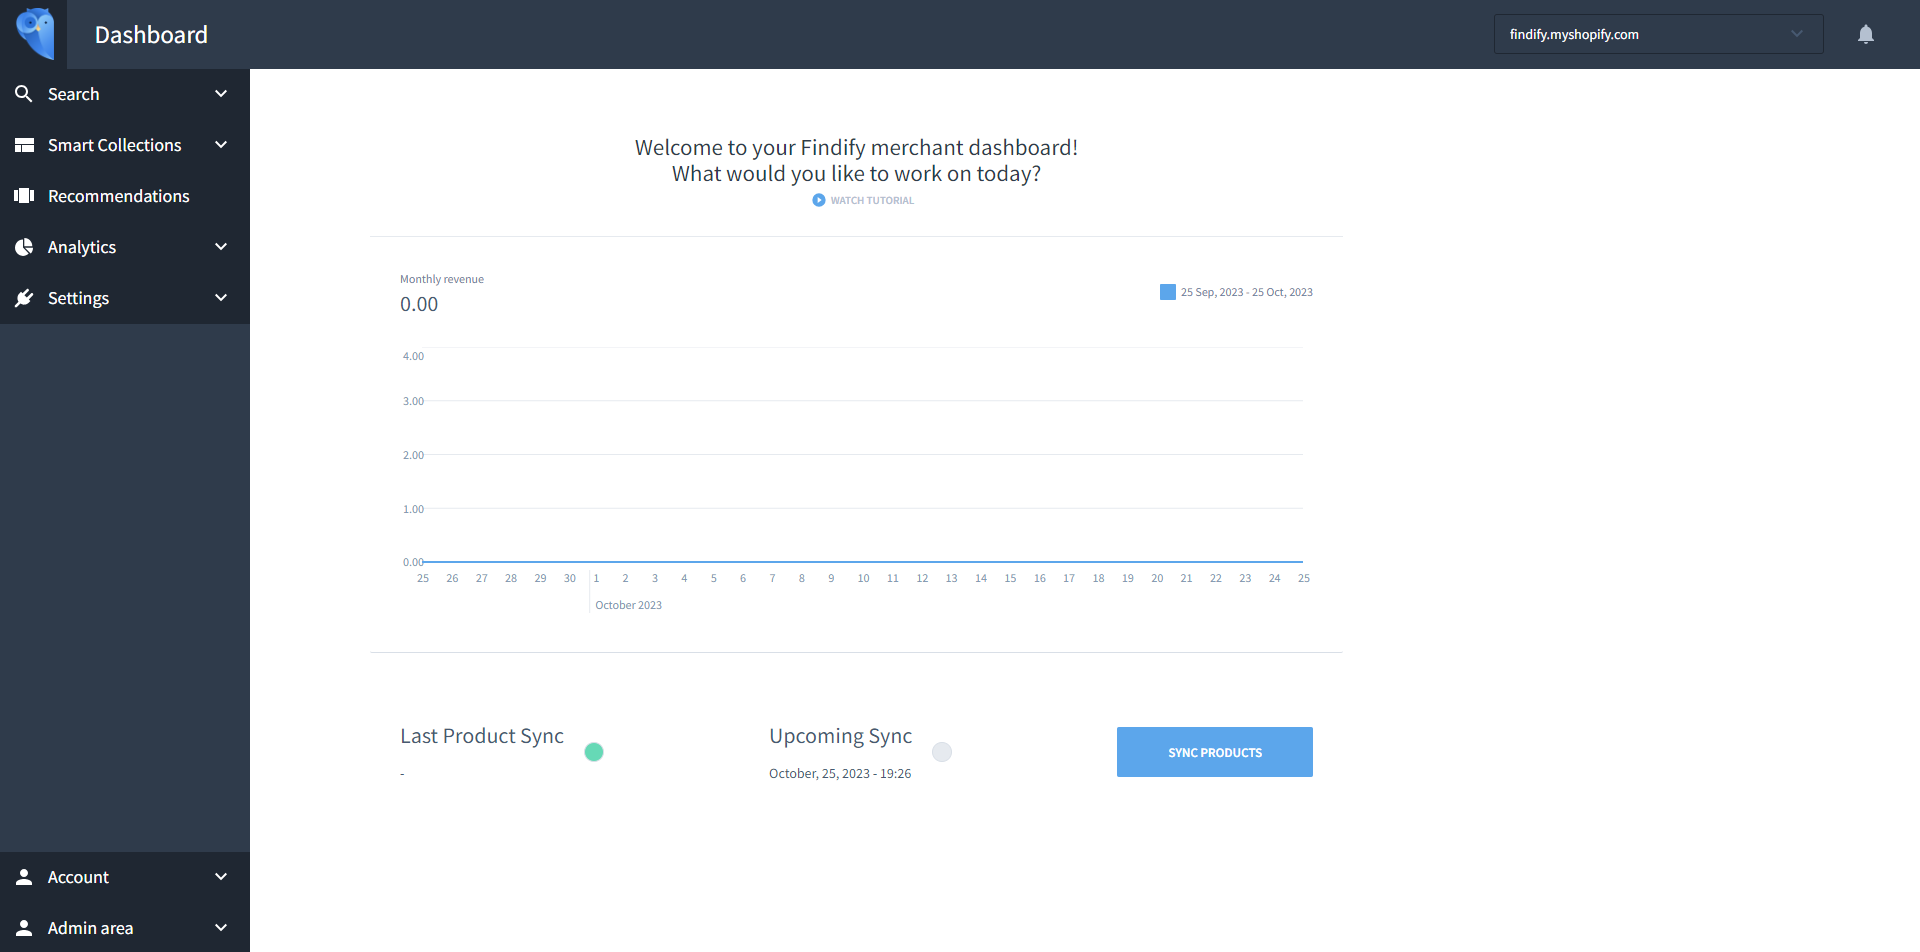
Once your products have all been synchronized, you will be able to access all of Findify's solutions. This is the screen you will be presented with upon logging in going forward:
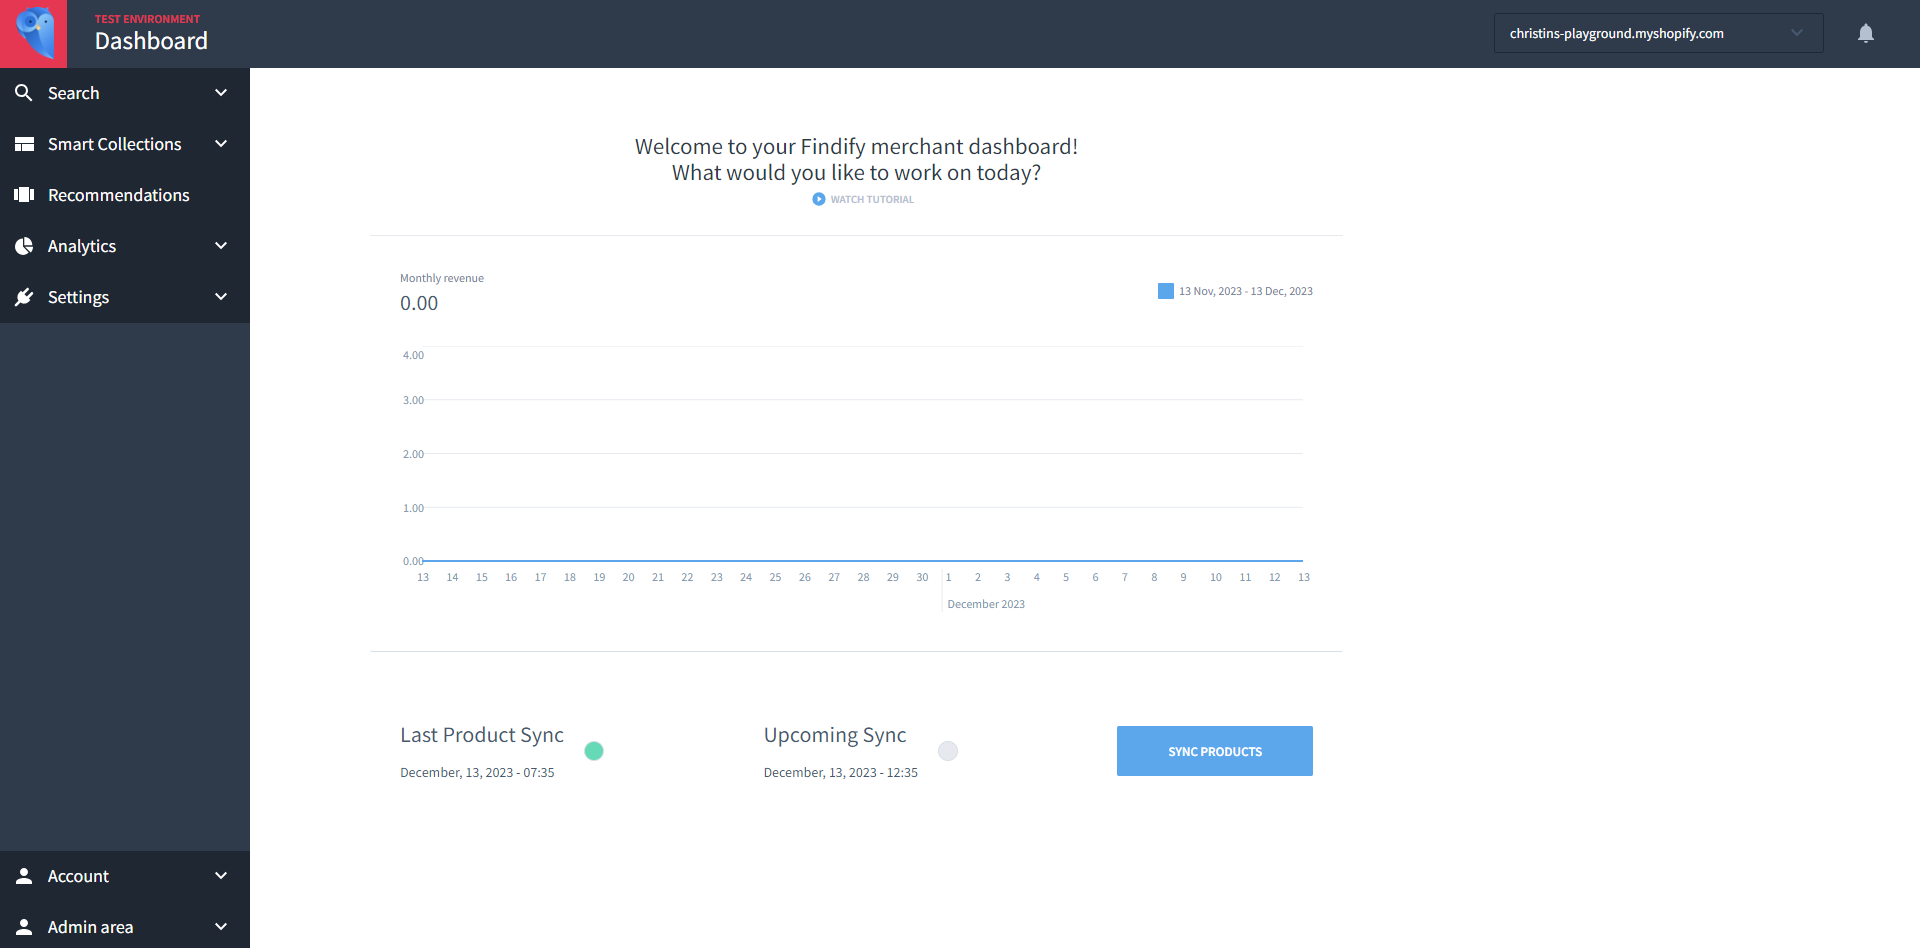
Here is where you can manage your Search settings, your Smart Collections, your Recommendations settings, and view your Findify-specific Analytics.
Learn More
To learn more about what you can do with Findify, and how to do it, navigate to the 'Findify Dashboard' section of this guide. If you get stuck at any point, please email [email protected] and we will provide a helping hand!
Step 5: Add Findify to a Shopify Theme
Go back to your Shopify Merchant Dashboard. Within the menu on the left hand side of the screen, click 'Apps'. In the dropdown menu that appears, click on Findify. The Findify app will now appear on the left. Underneath, you will see an arrow and the text 'Import into Themes'. Click on this, and you will see the following screen:
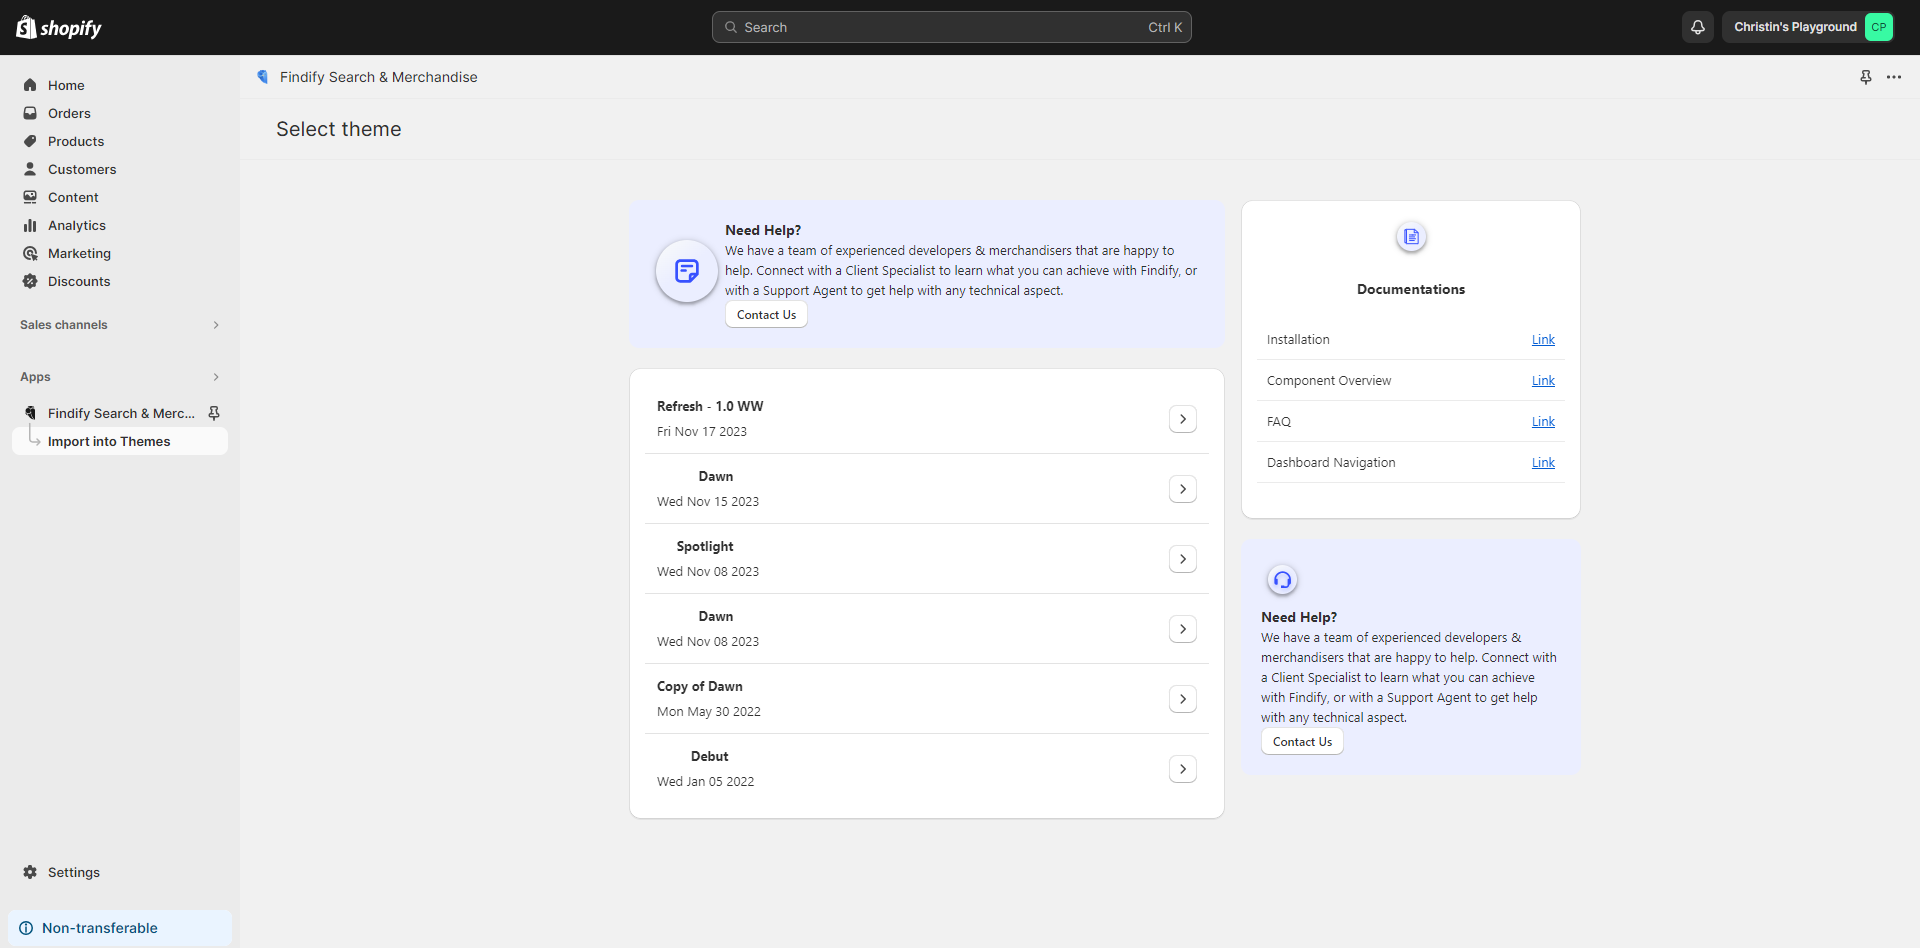
Select the theme you wish to add Findify to. You will be presented with the following screen:
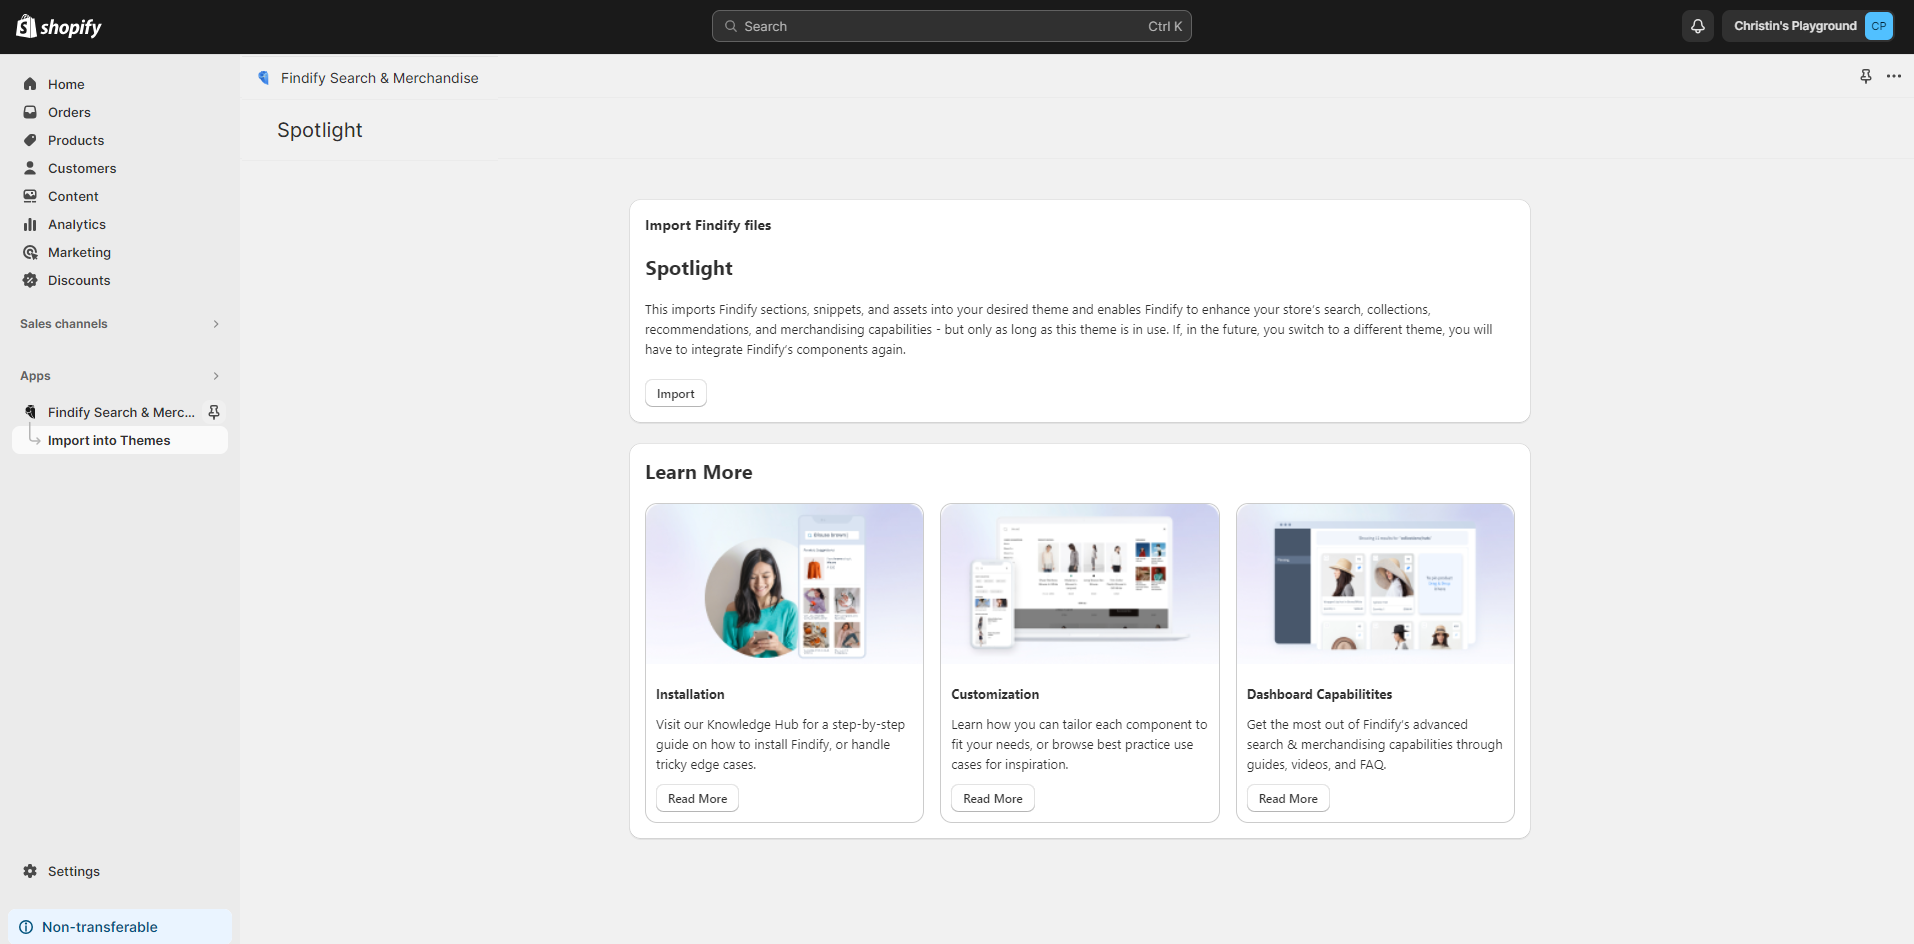
Click 'Import'.
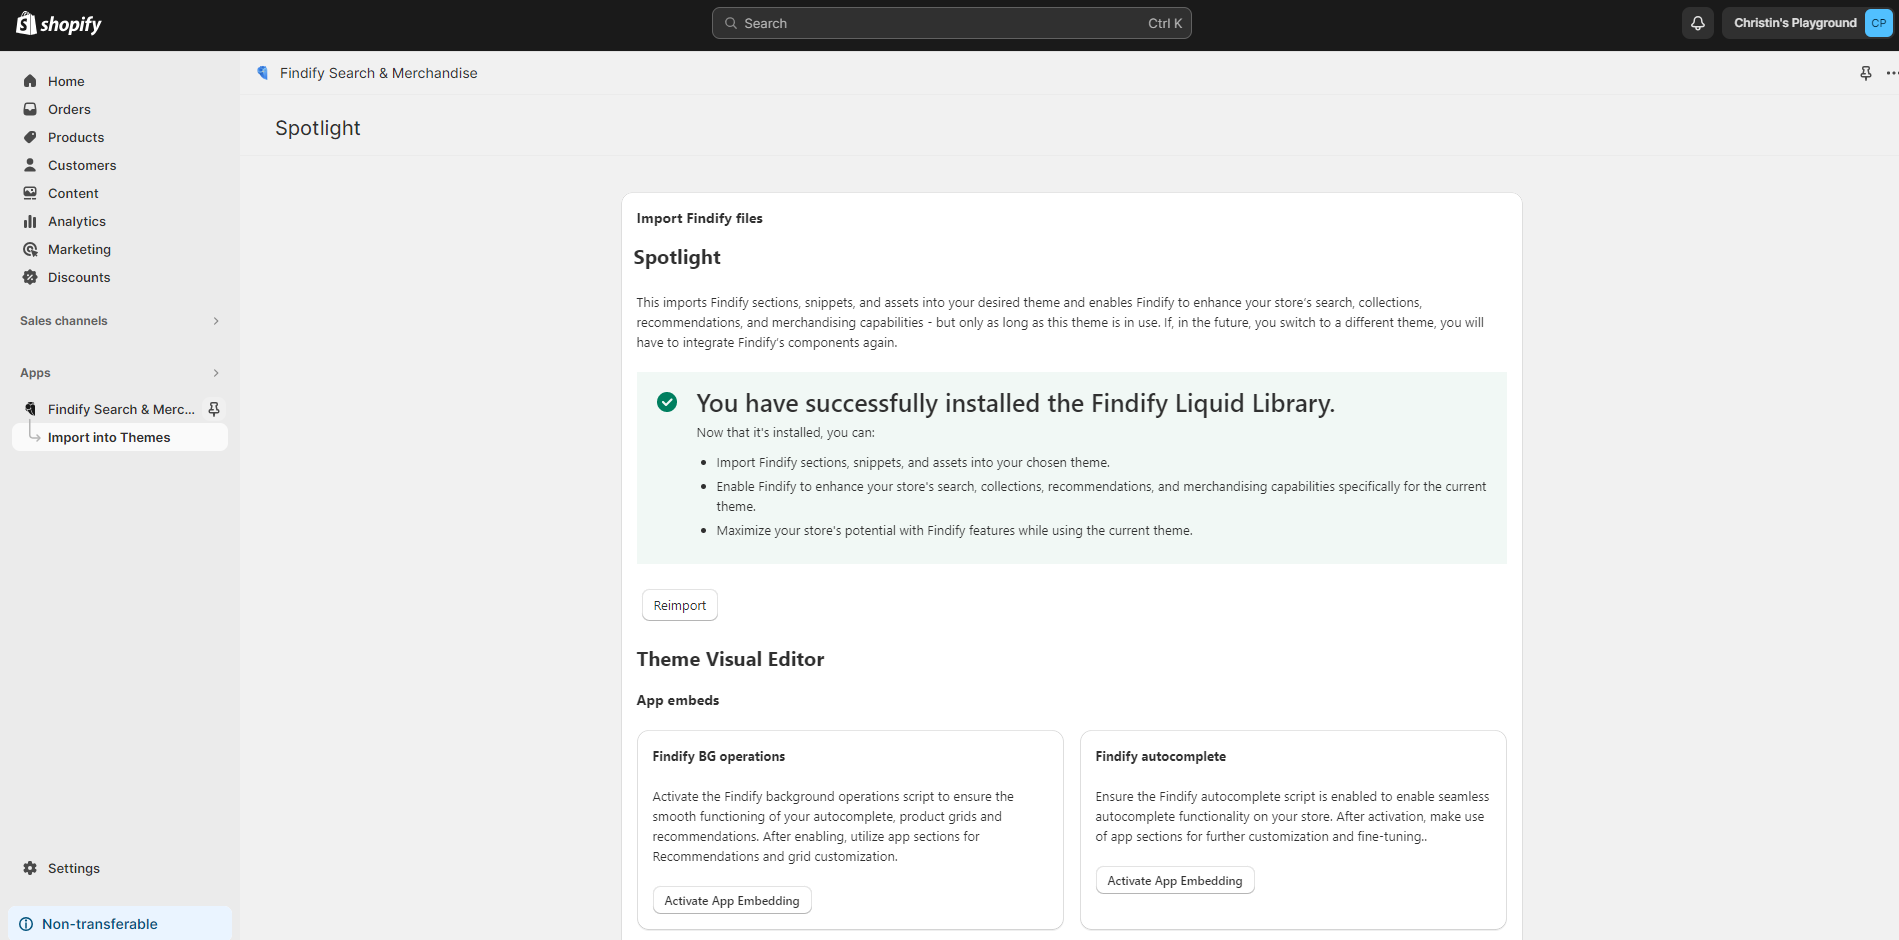
The import may take a few minutes. When it is done, you will see a screen similar to the following:
Step 6: Activate App Embeds
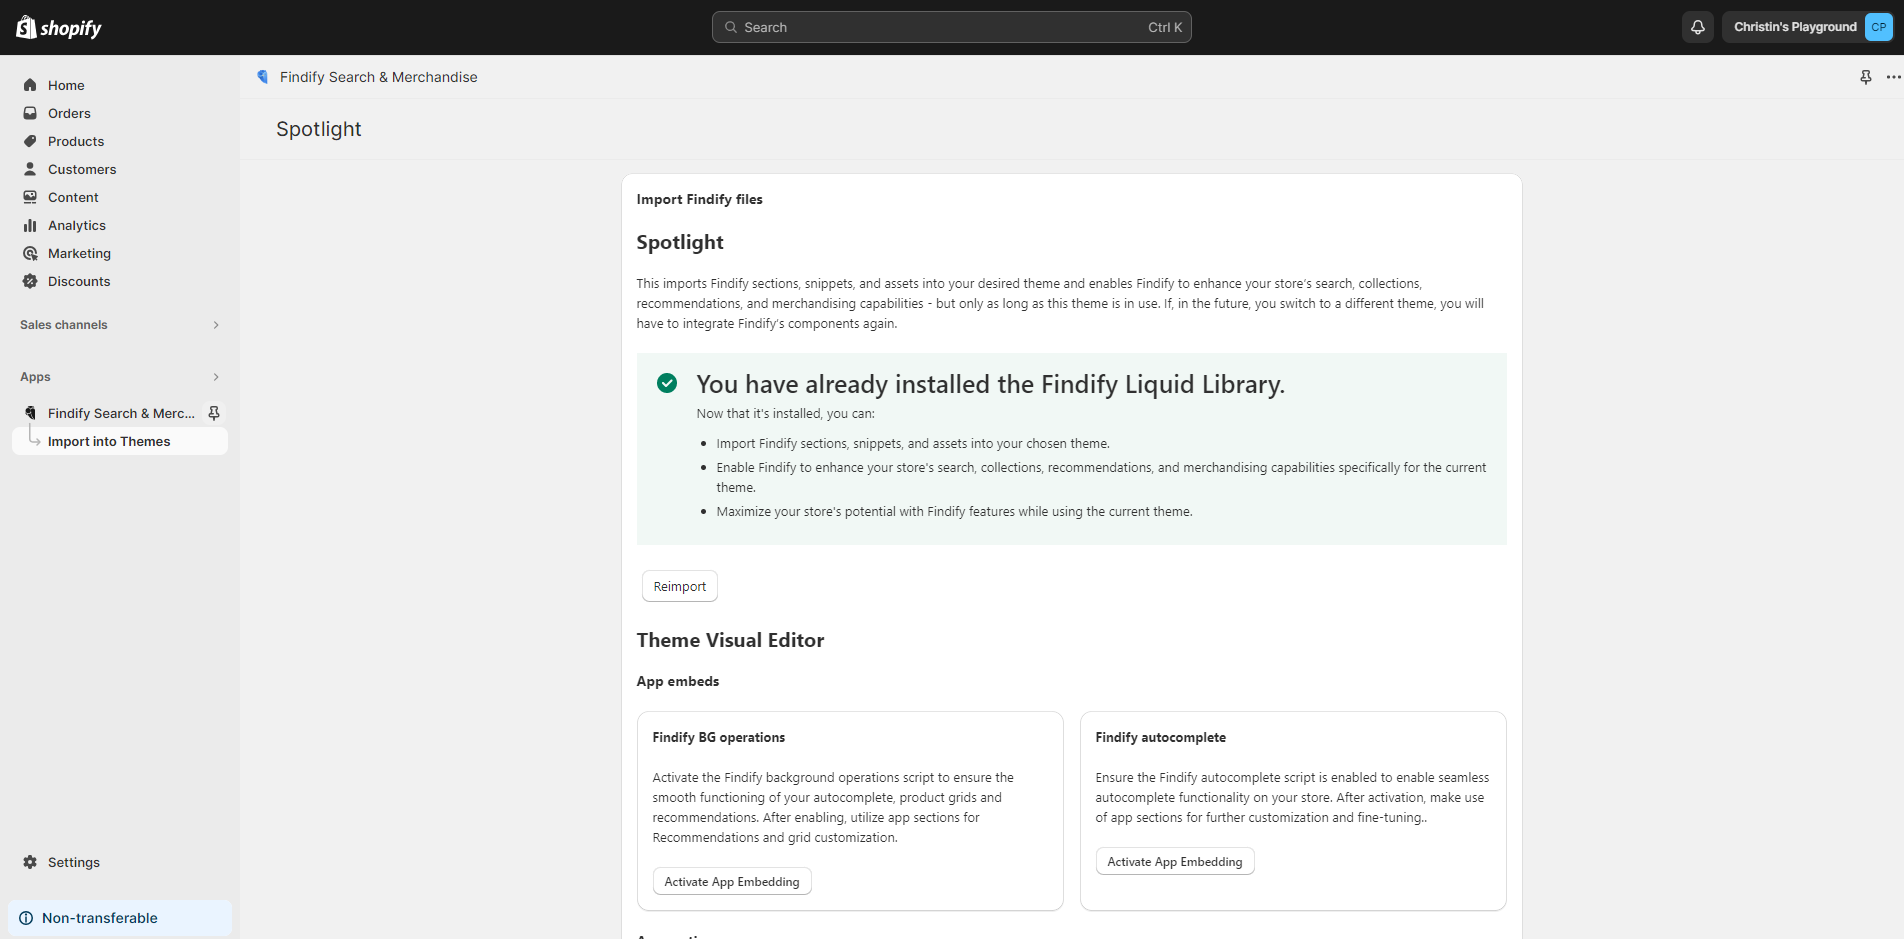
After your screen displays the 'You have successfully installed the Findify Liquid Library' confirmation message, you will see a section directly below this which reads 'Theme Visual Editor'.
This is split into two parts - 'App embeds', and 'App sections'. First, under 'App embeds', click 'Activate App Embedding' under either 'Findify BG operations' as well as 'Findify autocomplete' (both buttons bring you to the same new window, which you can see below).
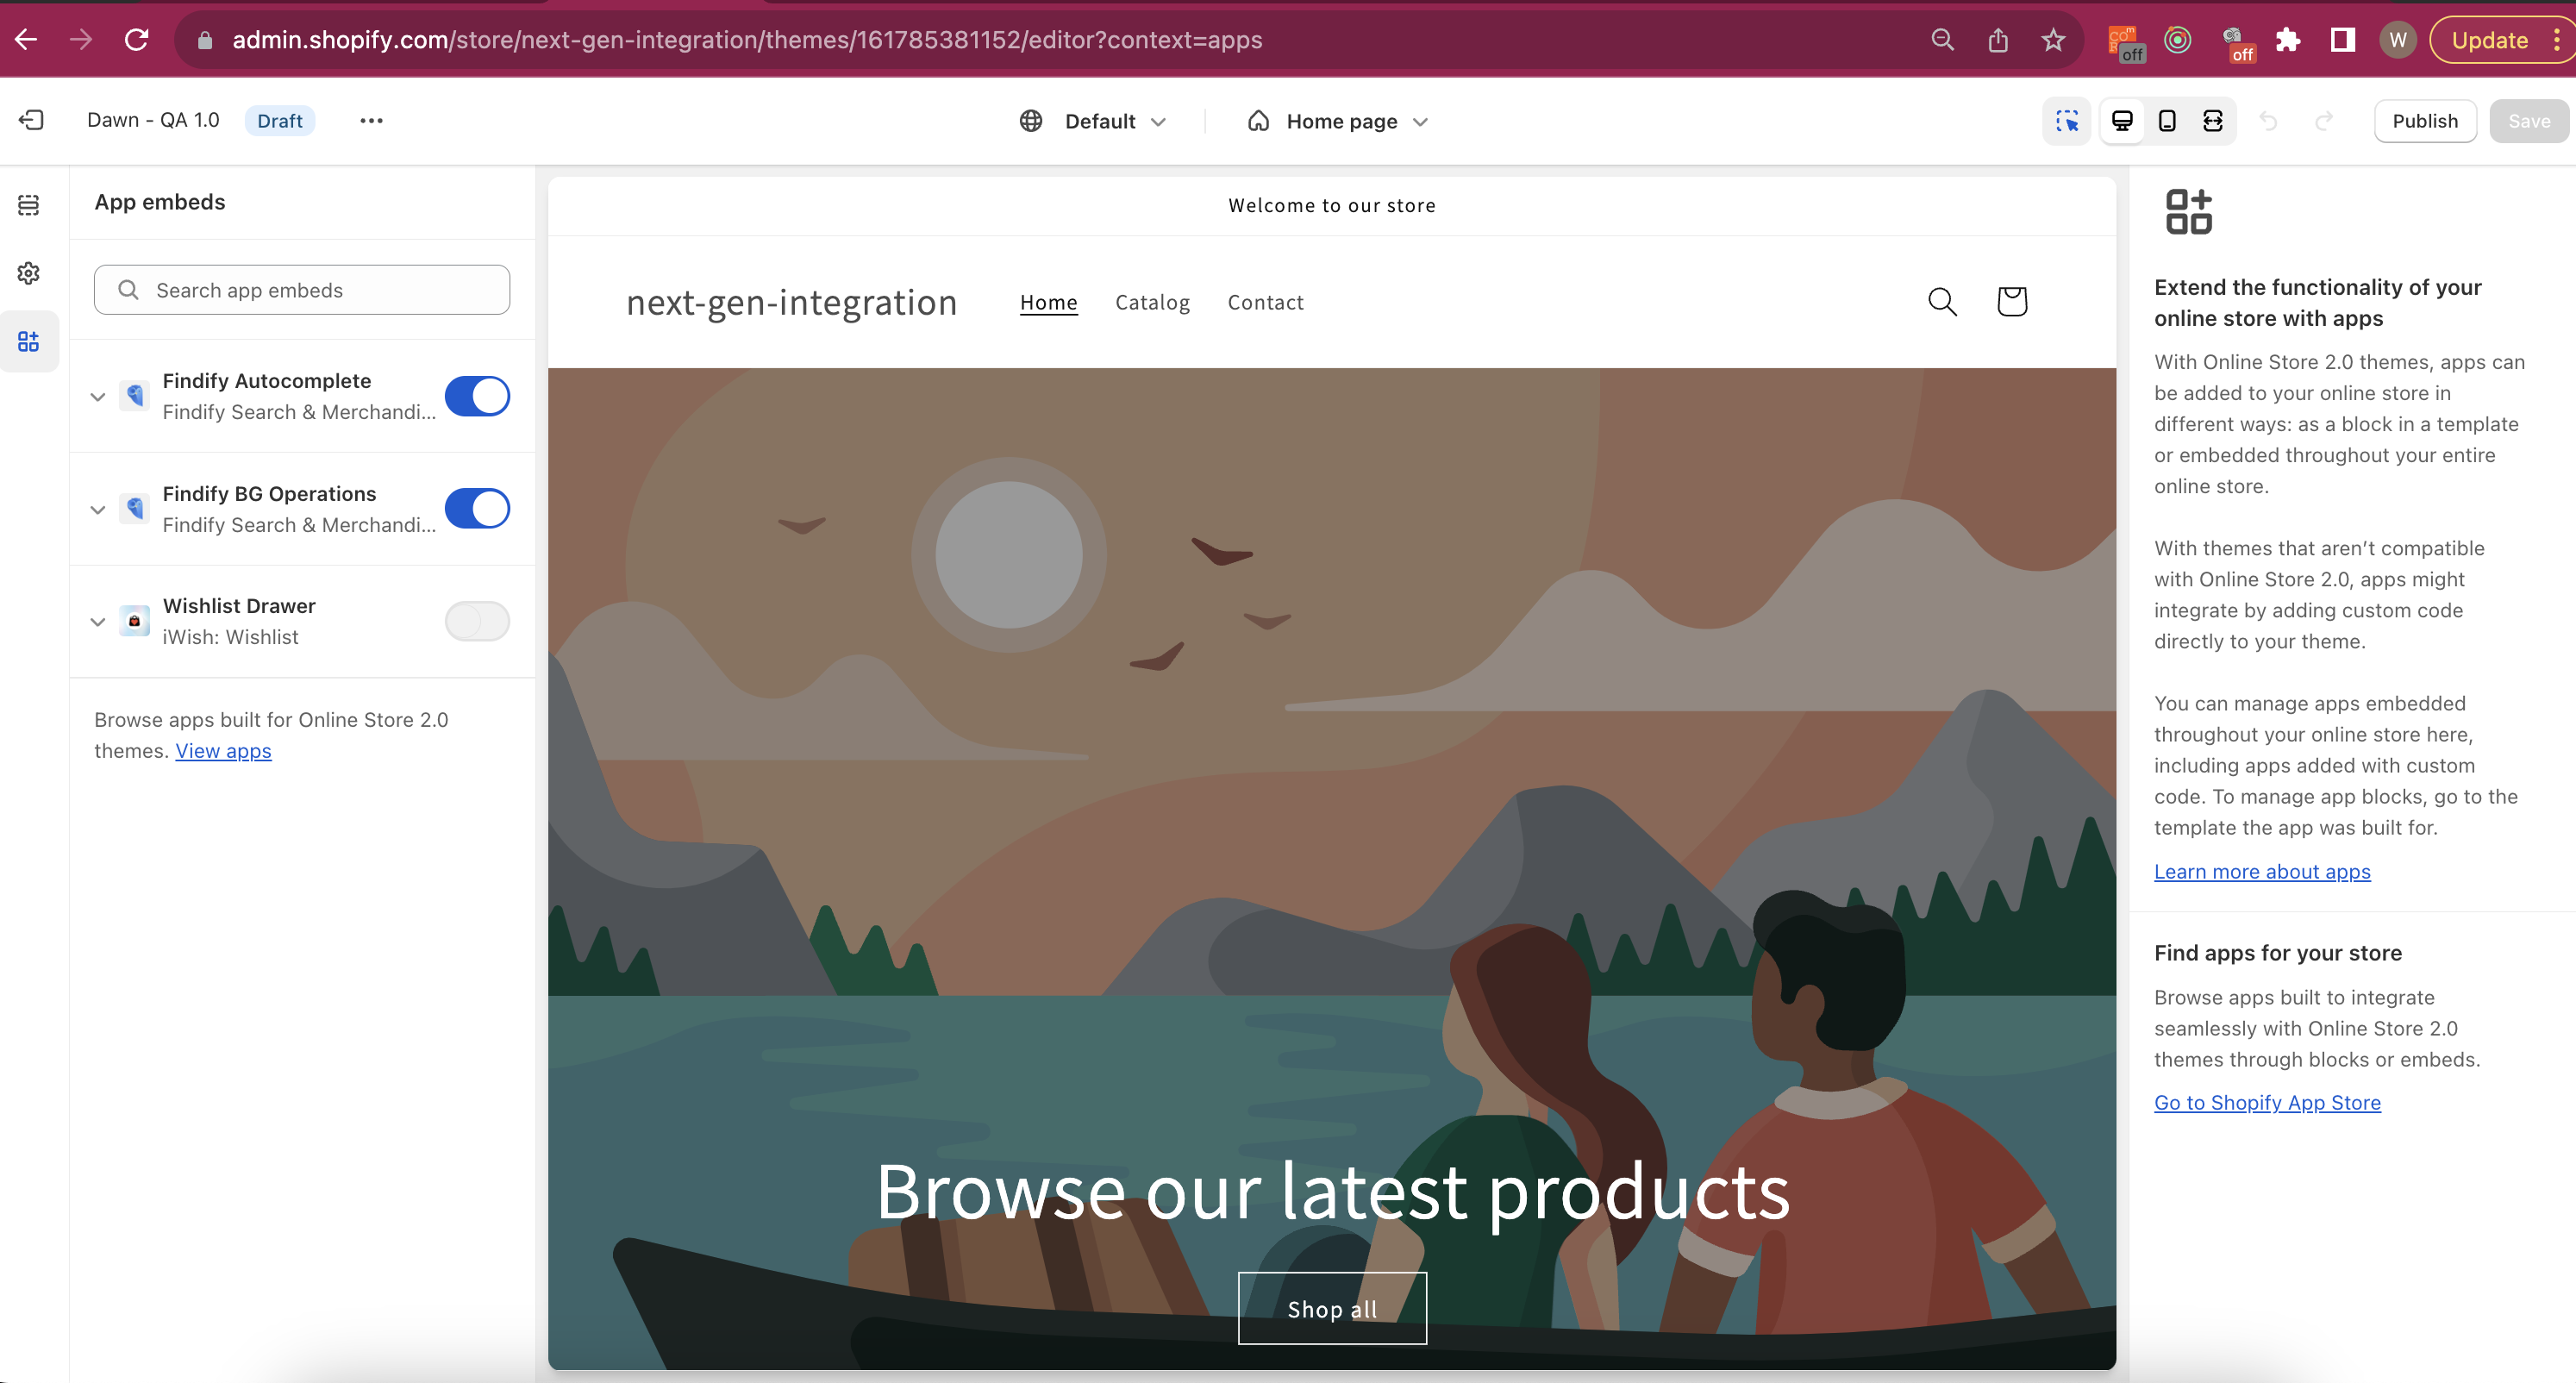
Here, you need to toggle each Findify-related app embed to the 'on' position.
Next, hit the 'Save' button in the top right hand corner of the screen.
Once your changes have been saved, close this tab and return to the previous one and look once again at the 'Theme Visual Editor' section.
Step 7: Activate Findify Search Grid
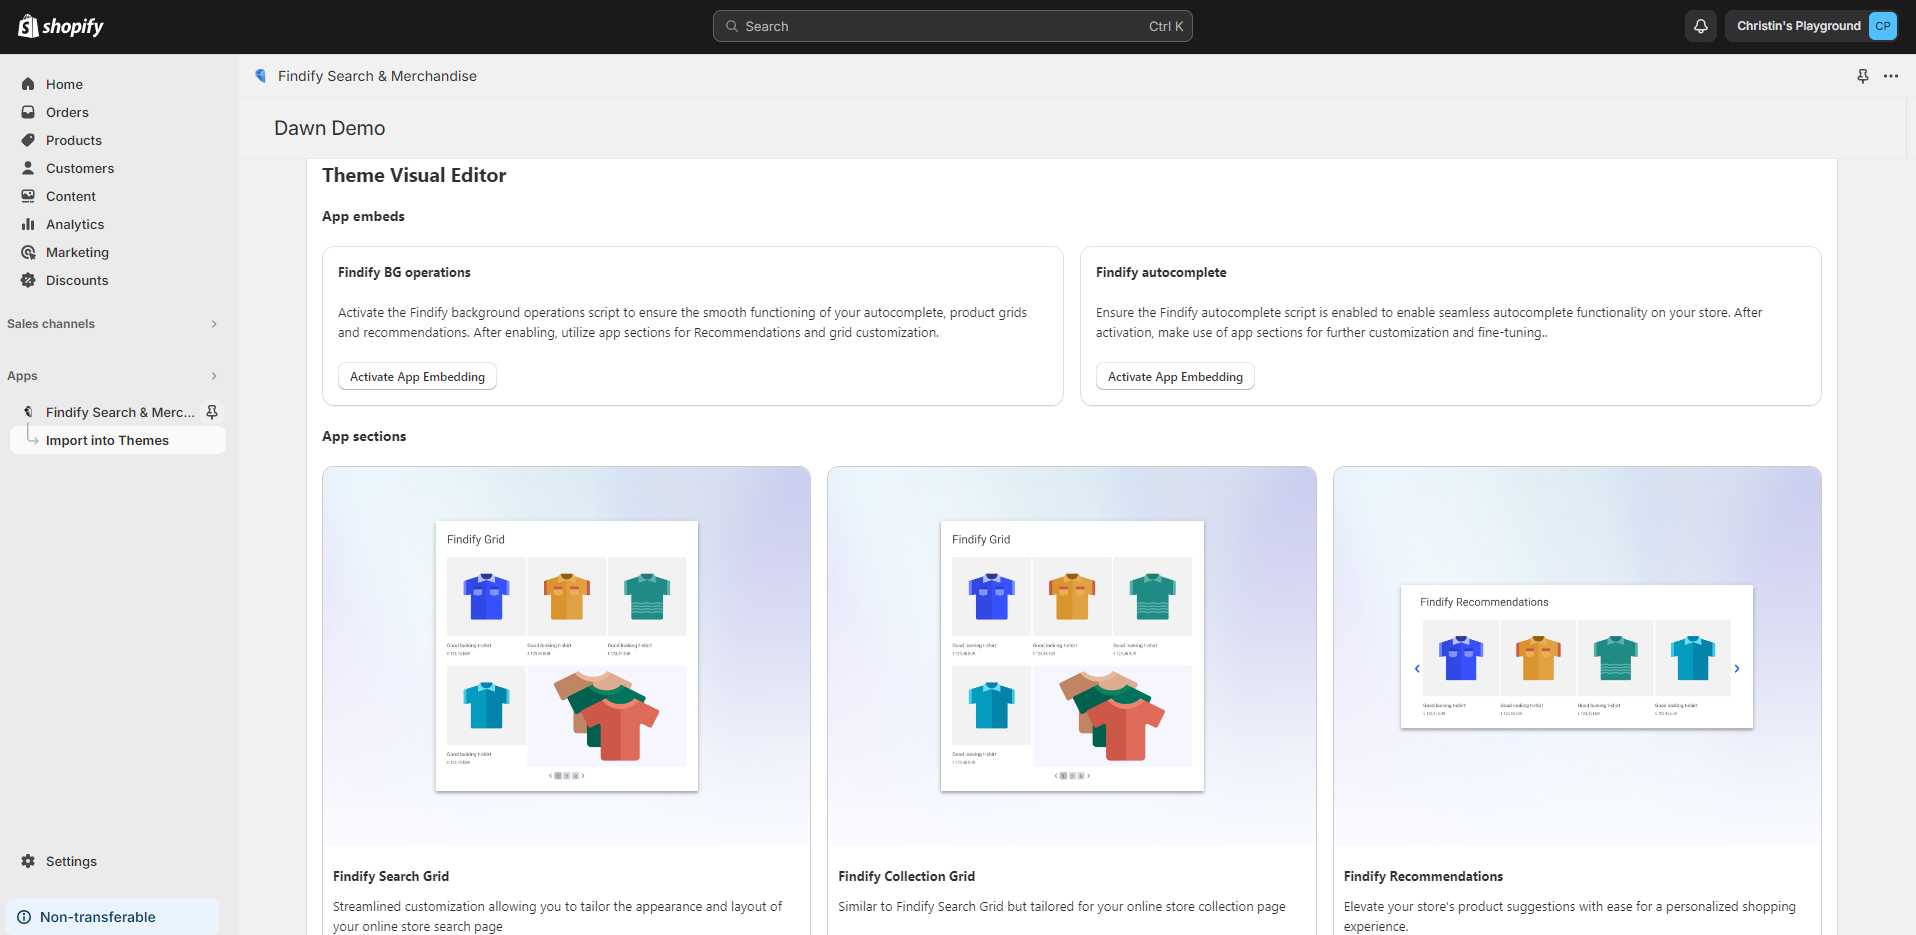
Next, you need to activate your Findify Search Grid.
To do this, go to 'App sections' --> 'Findify Search Grid' --> 'Start Editing'.
Here, you can activate the Findify Search Grid app block for search results and also change both the appearance and layout of your store's search.
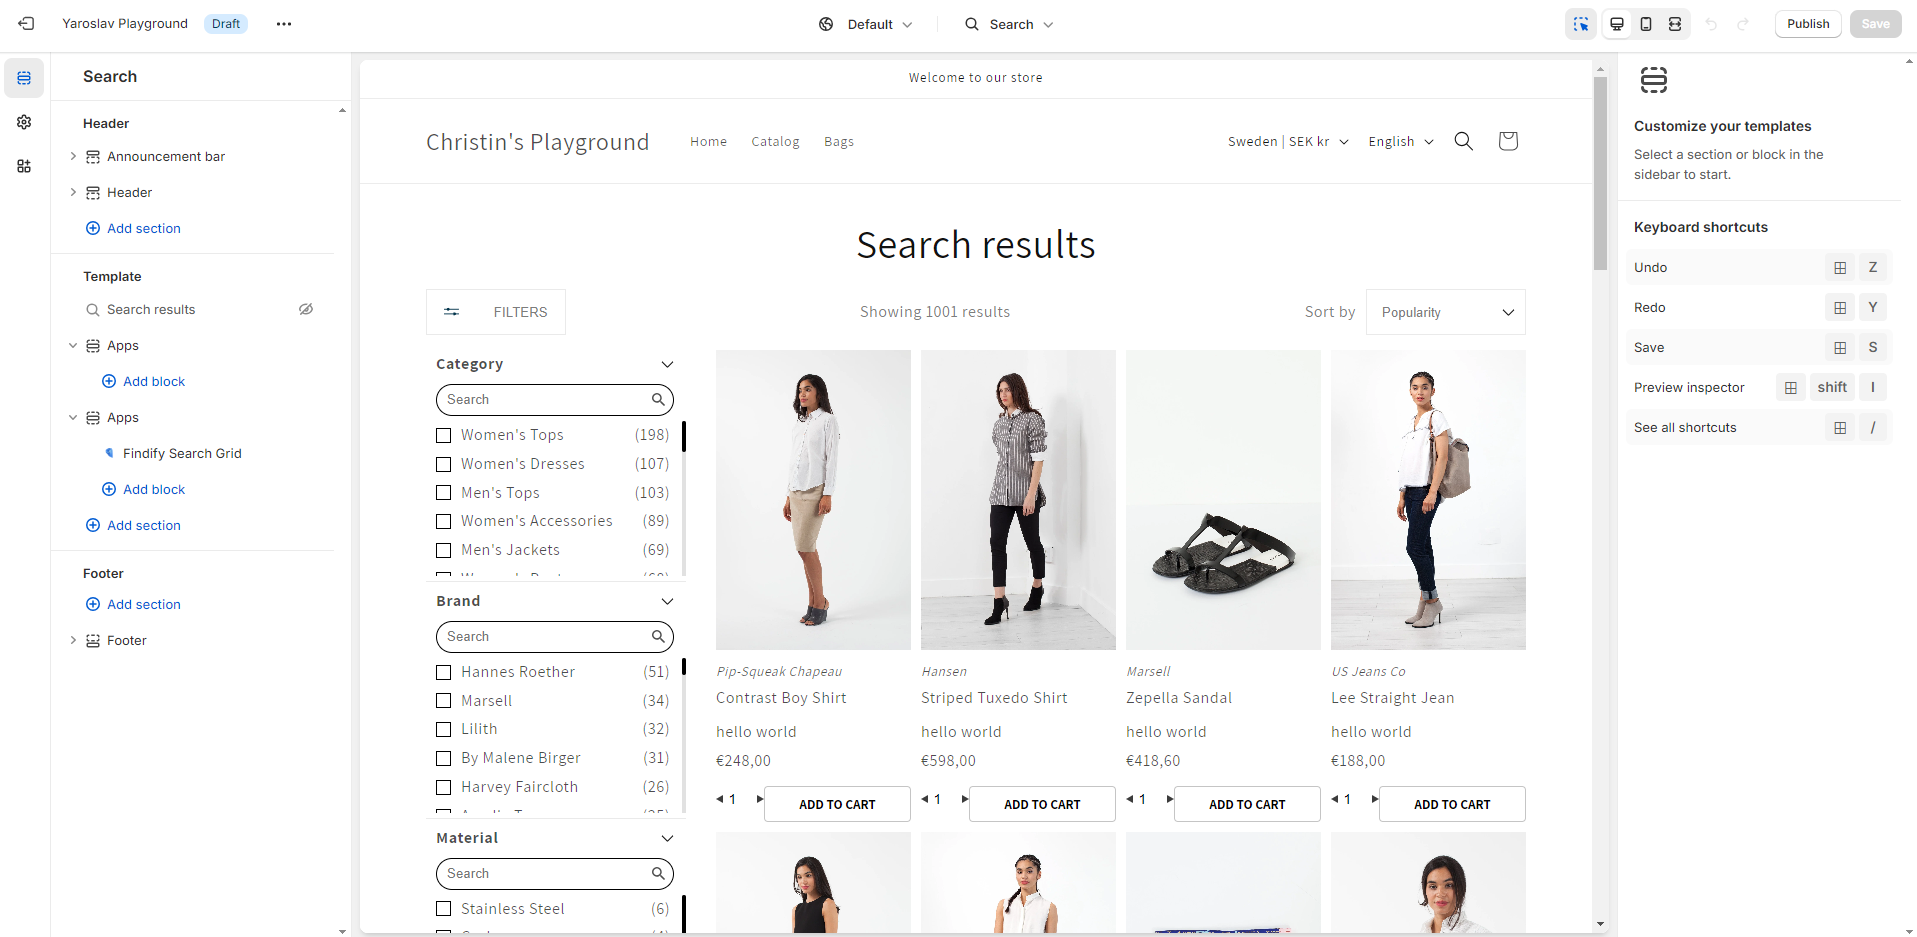
Using this app blocks method, merchants and their developers can more easily work with and customize Findify solutions without having to directly edit theme code. Blocks can be moved up or down on the desired page by simply dragging and dropping the block (using the left hand side menu).
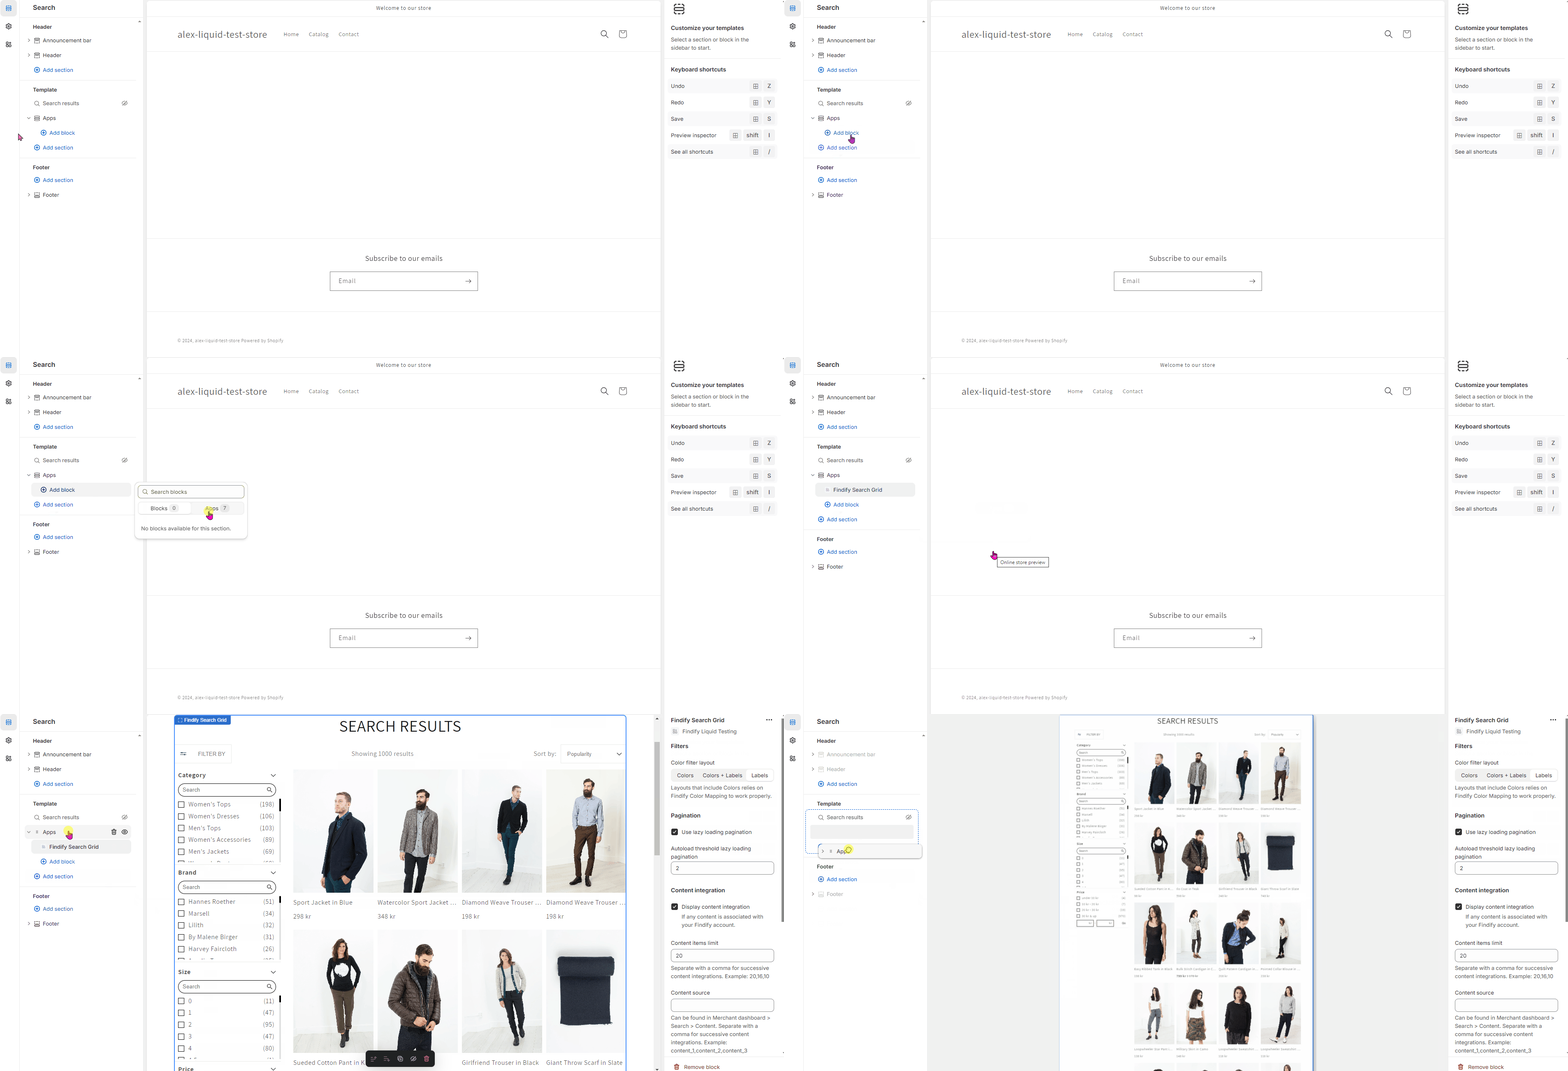
Step 8: Activate Findify Collection Grid
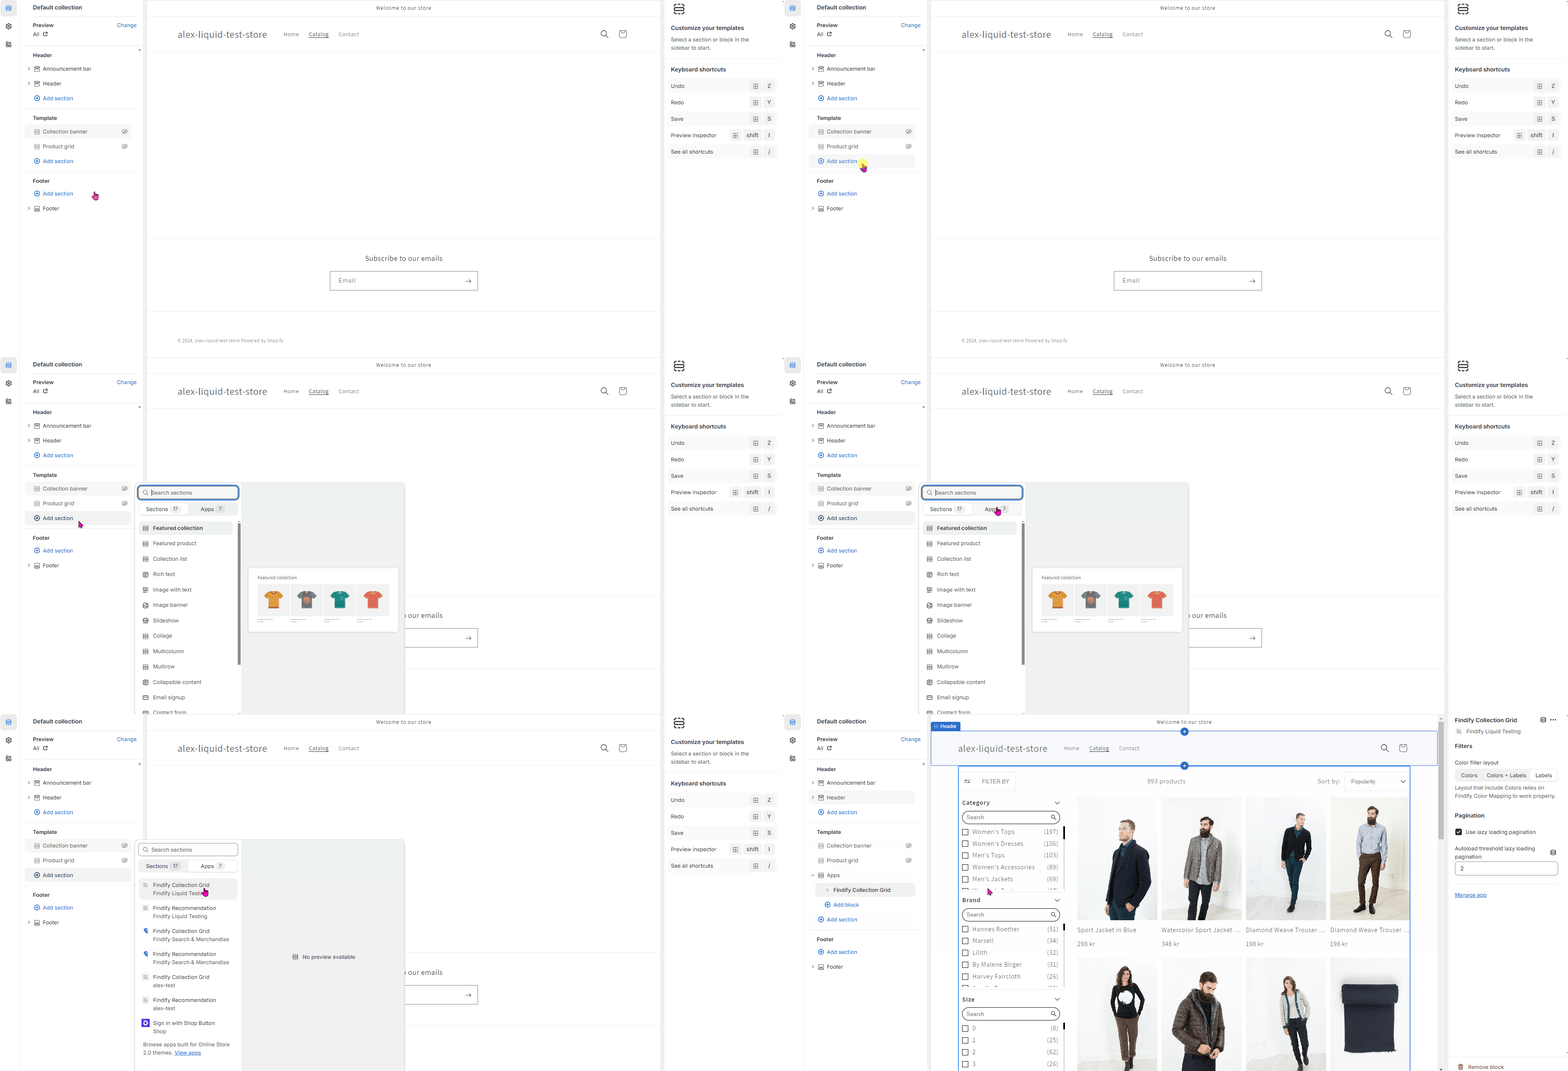
Those using Findify Smart Collections will next need to activate this solution in much the same way as Step 7 above.
Go to 'App sections' --> 'Findify Collection Grid' --> 'Start Editing'.
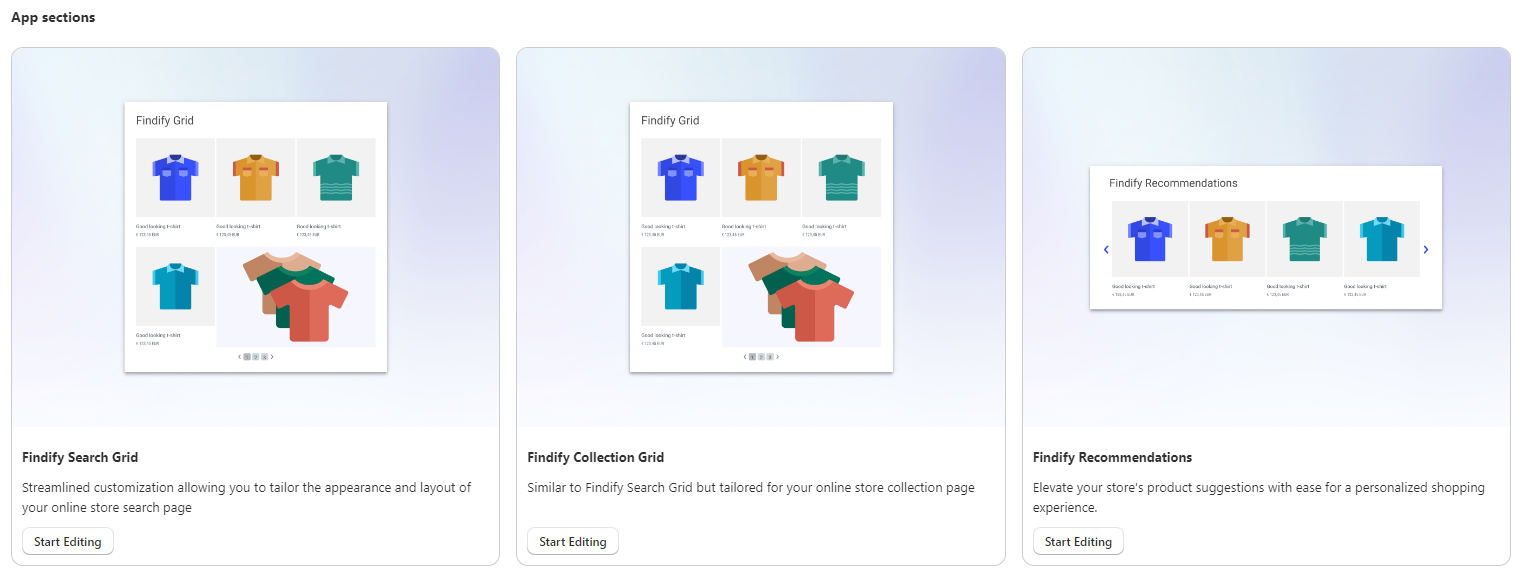
Here, you can activate the Findify Collection Grid app block for collection results and also change both the appearance and layout of your store's collection pages.
This process also utilizes the drag and drop app block method, for ease of use.
Step 9: Activate Findify Recommendations
Merchants using Findify Recommendations will now want to activate the Recommendations app block.
Go to 'App sections' --> 'Findify Recommendations' --> 'Start Editing'.
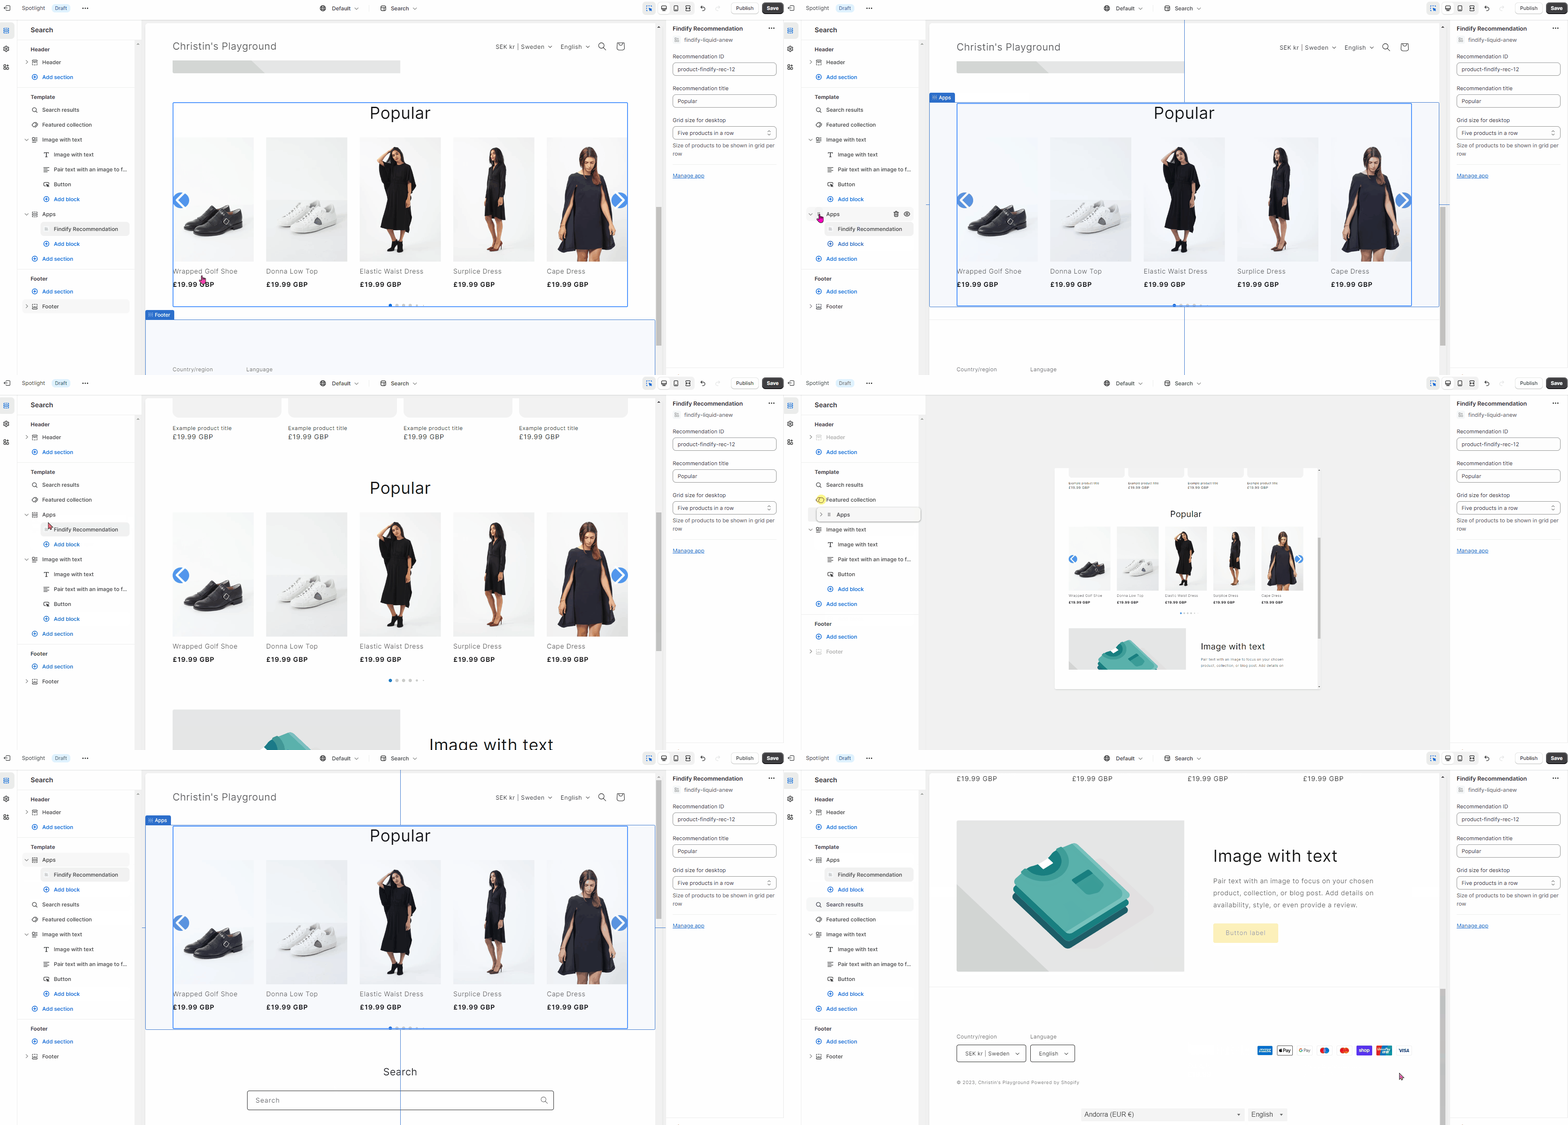
This Gif will show you the process:
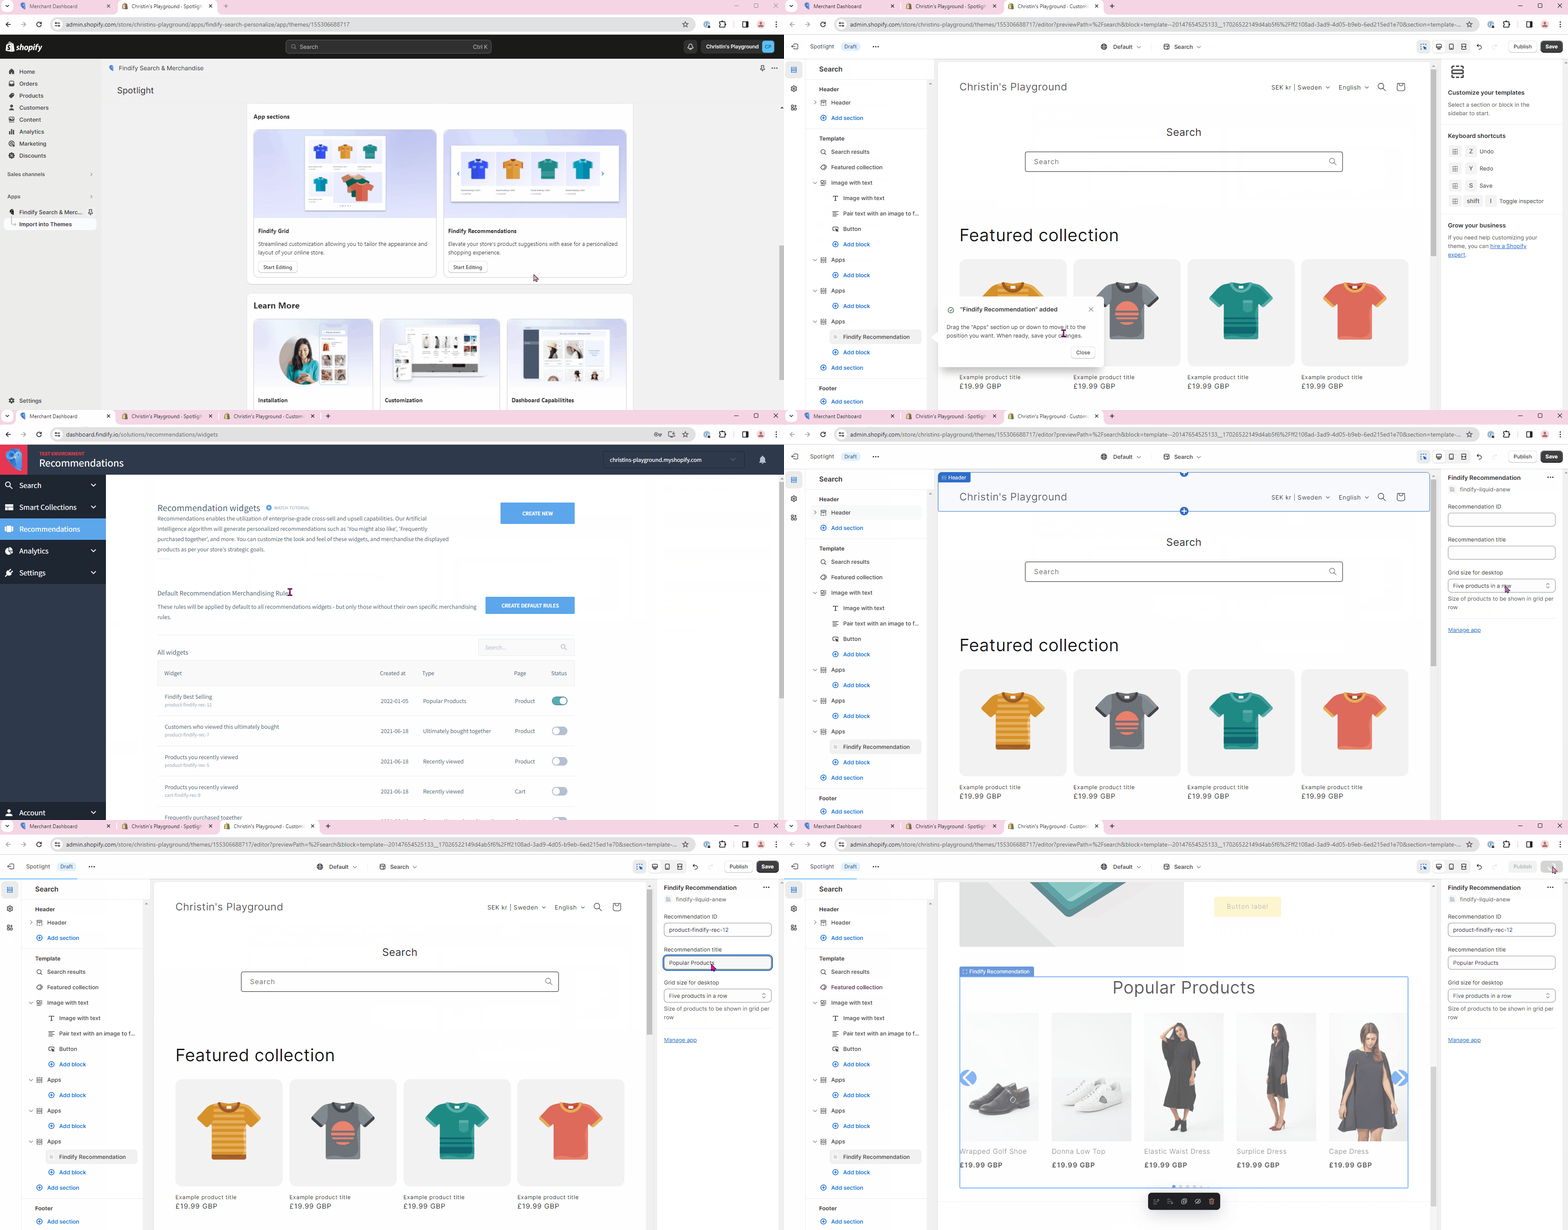
Within Shopify, click 'Start Editing' under the 'Findify Recommendations' section. This will open a new tab where you can view your store. On the left hand side of the screen, you will see your new Recommendations app block. On the far right, you will have a window where you will be prompted to add the Widget IDs from your desired Recommendations.
You will find the Widget ID of a Recommendation located with the 'Recommendations' section of your Findify Merchant Dashboard, here:
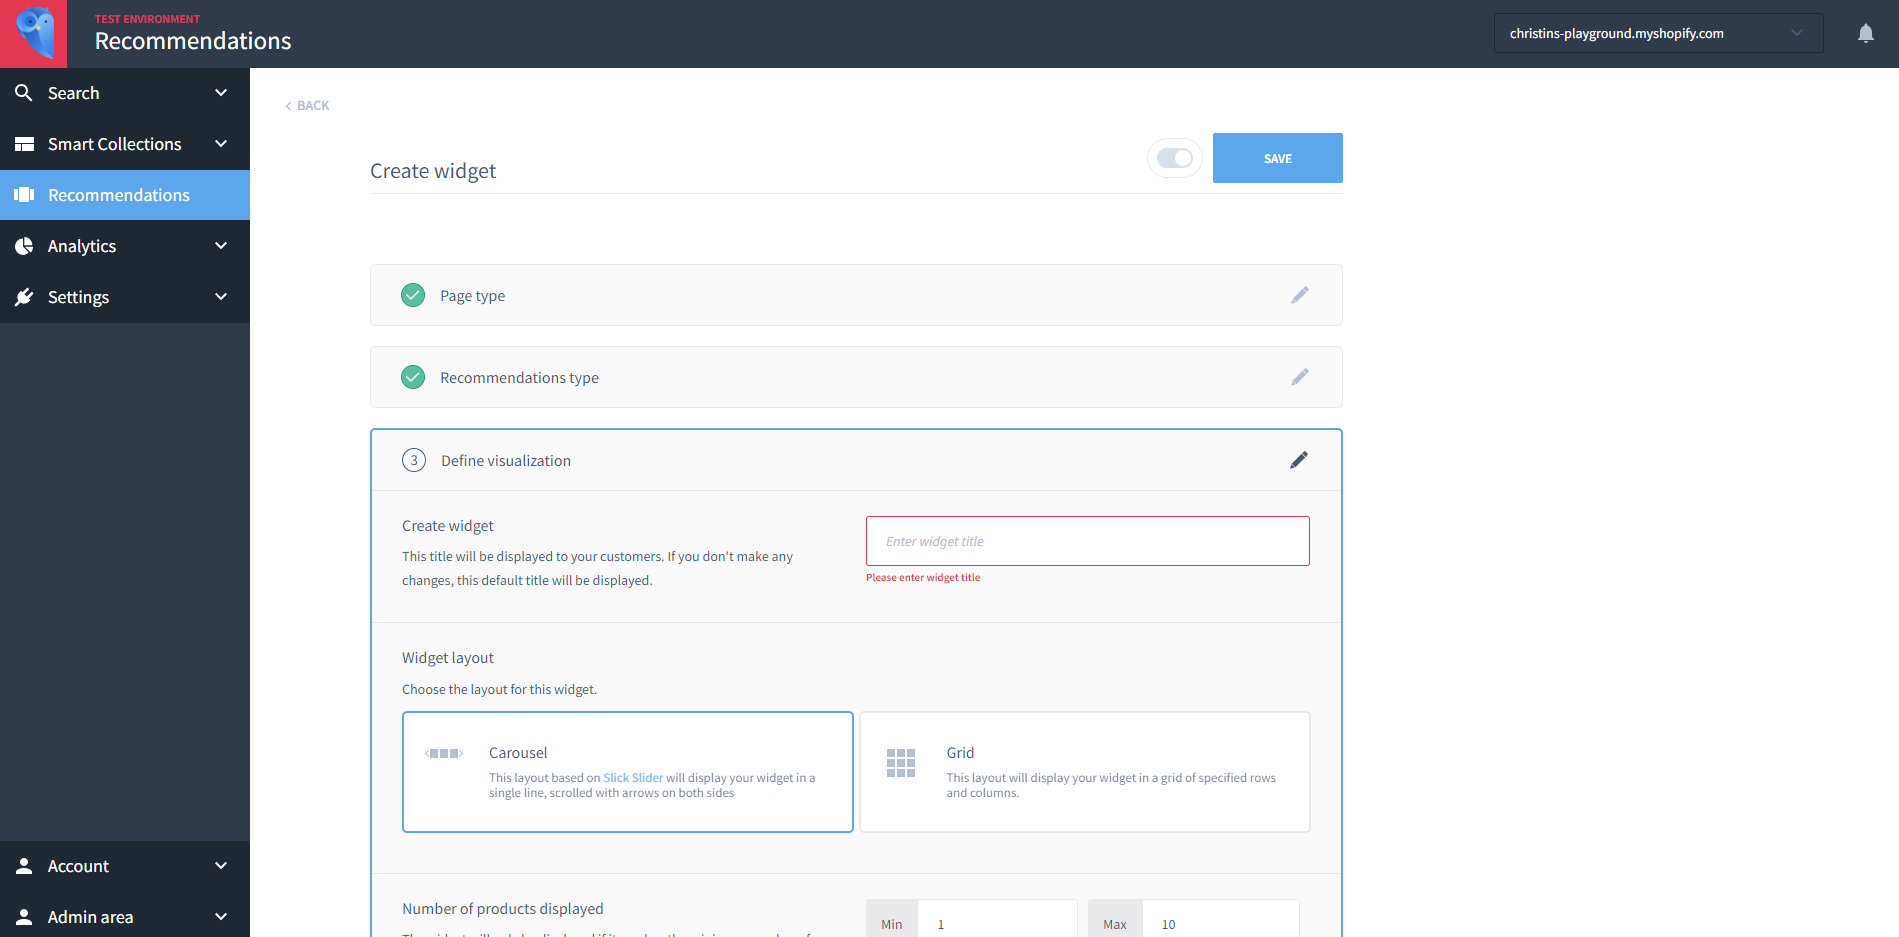
Once you have copied the Widget ID, paste it into the appropriate section, and then give your Recommendation an external name (visible to customers). Your Recommendation will populate in real time. You can then move the app block up or down on the page to ensure it's in exactly the place you want it to be.
After Integration
Following your successful installation of Findiy’s native Shopify app, you can use Findify’s app blocks within your Shopify dashboard to place Findify solutions on different pages.
Merchants need to manage these solutions, however, via their dedicated Findify merchant dashboard. This is where merchants can manage collections and recommendations, set powerful merchandising rules, gain insights from analytics, and much more.
Learn More
- To learn more about how to work with Findify Recommendations, view additional documentation here.
- To learn more about how to work with Findify Search, go here.
- For more about merchandising with Findify, click here.
If you need assistance at any point, please don't hesitate to reach out to us on [email protected].
Updated about 1 year ago
