Configure Autocomplete in Shopify Editor
This guide explains how to configure and customize the Autocomplete feature using Shopify's editor with Findify's Liquid integration. It covers the following:
- Templates for Autocomplete.
- Adding content to Autocomplete.
- Adding more than two content widgets.
1. Autocomplete Templates
Findify provides two main templates for Autocomplete:
- Default (Vertical): Displays results in a vertical layout.
- Horizontal: Displays results in a horizontal layout.
You can configure the templates in the Shopify Editor as shown below.
Selecting a Template
-
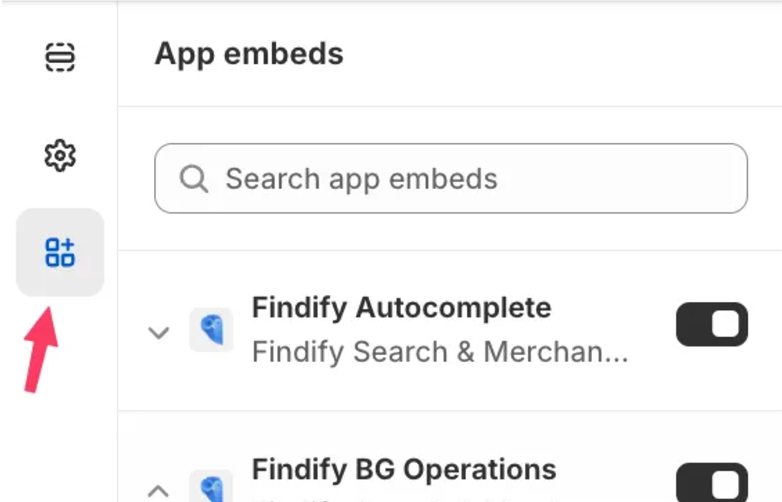
Go to the Autocomplete Settings in your Shopify Editor in app embeds section.
-
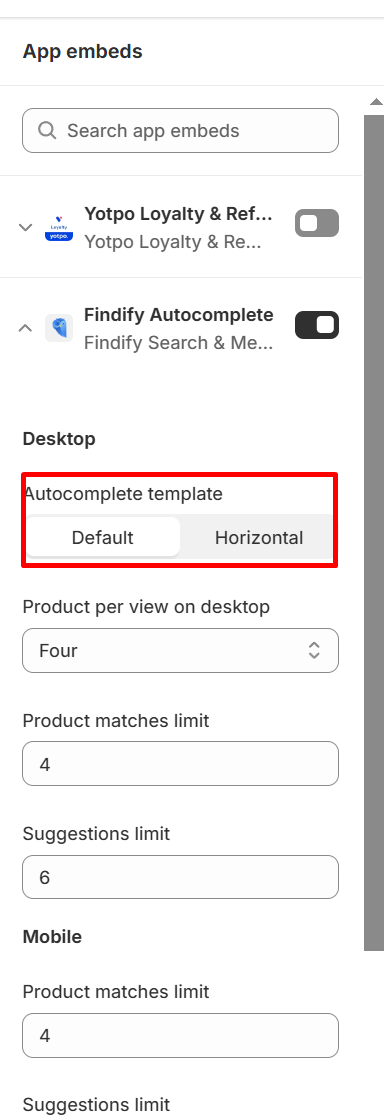
Choose your preferred template: Default or Horizontal.
Template 1: Default (Vertical)
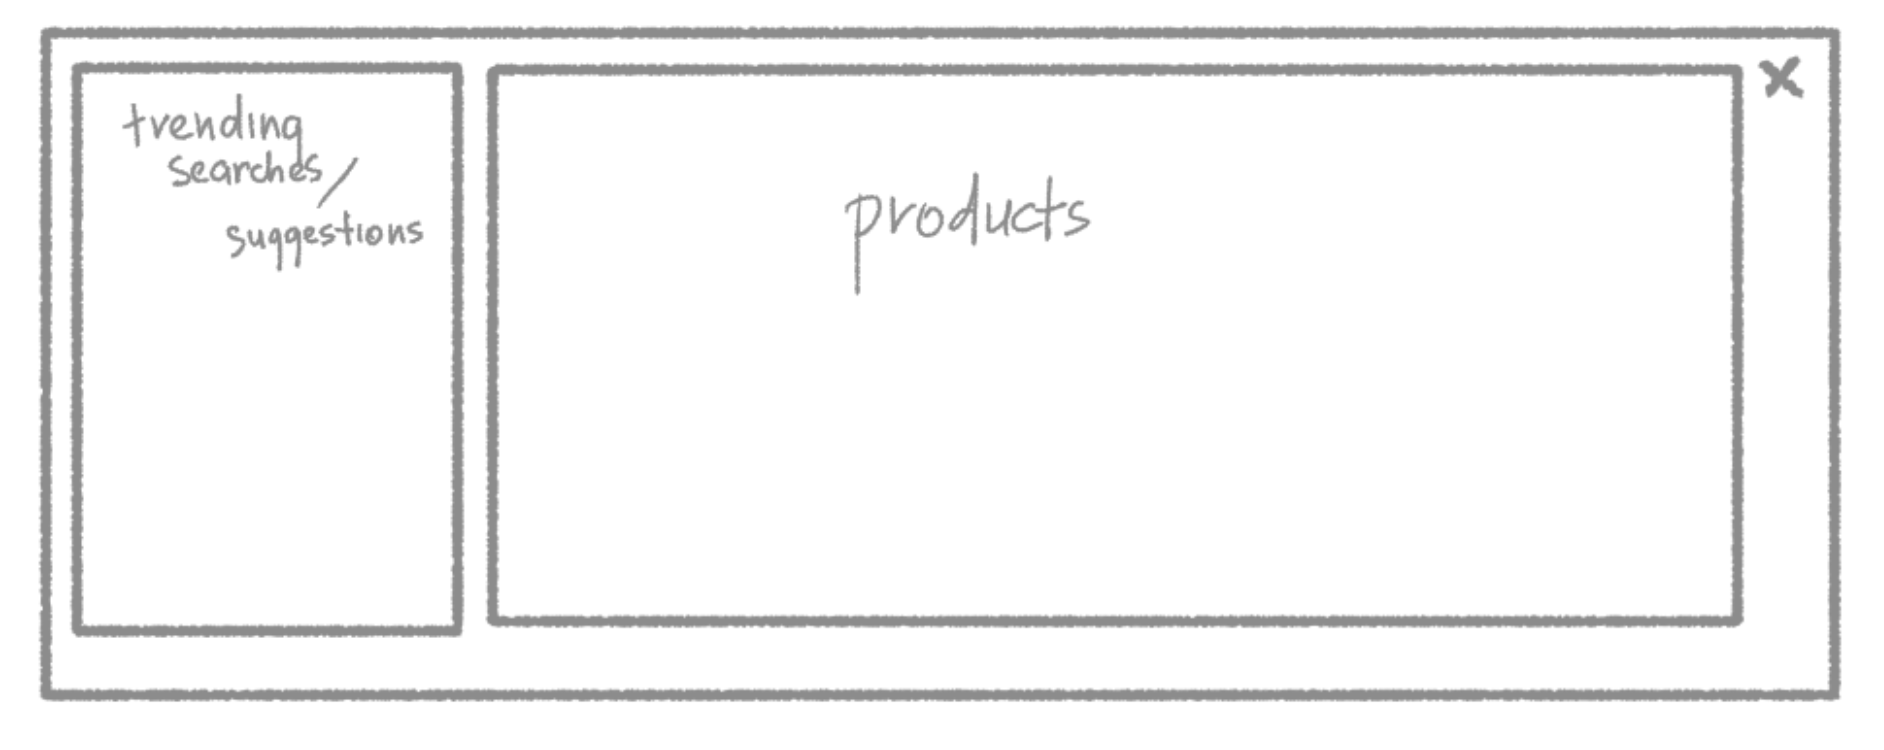
Without Content:
Displays trending searches or other dynamic results in a vertical stack.
Example without content:
With Content:
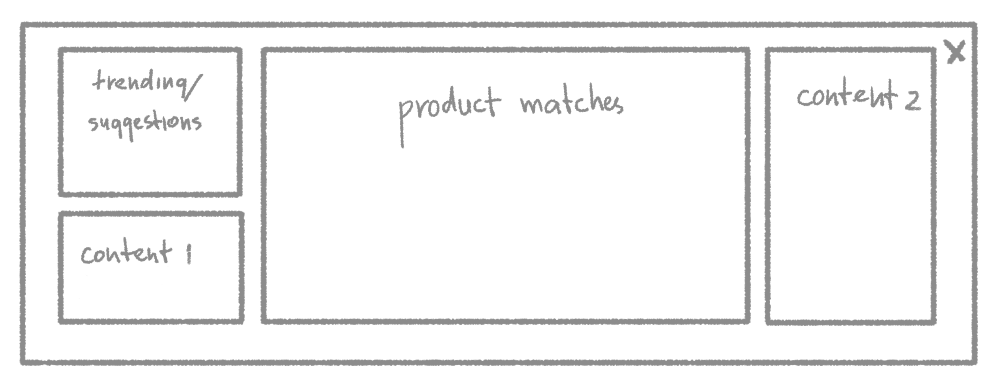
Content widgets can be added below trending searches. The placement of widgets depends on the source:
- Source 1 content appears below trending searches.
- Source 2 content appears on the right side.
Example with content:
Template 2: Horizontal
Without Content:
Displays trending searches or other dynamic results in a horizontal layout.
Example without content:
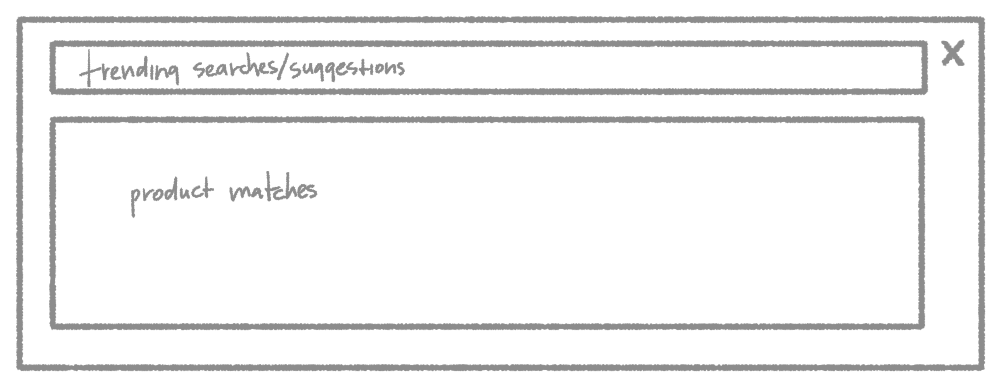
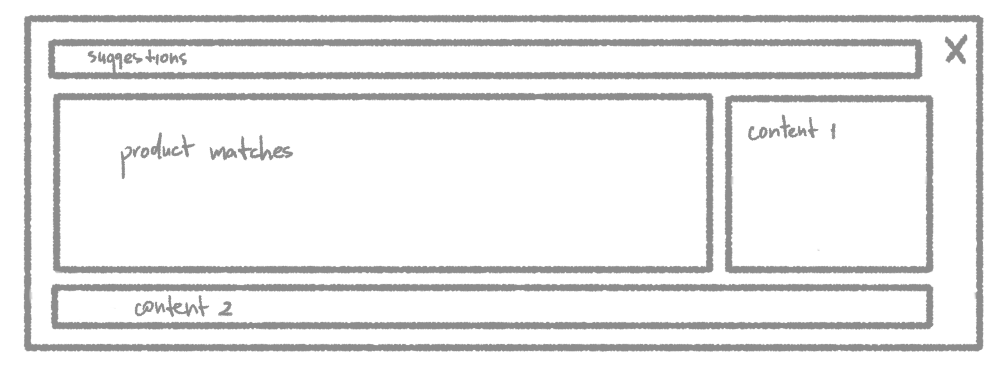
With Content:
Content widget placement depends on the source:
- Source 1 content appears on the right side.
- Source 2 content appears at the bottom.
Example with content:
2. Adding Content to Autocomplete
Content widgets can be added and customized in the Content Section of the settings in the Shopify Editor. Use this section to manage the content displayed in your Autocomplete.
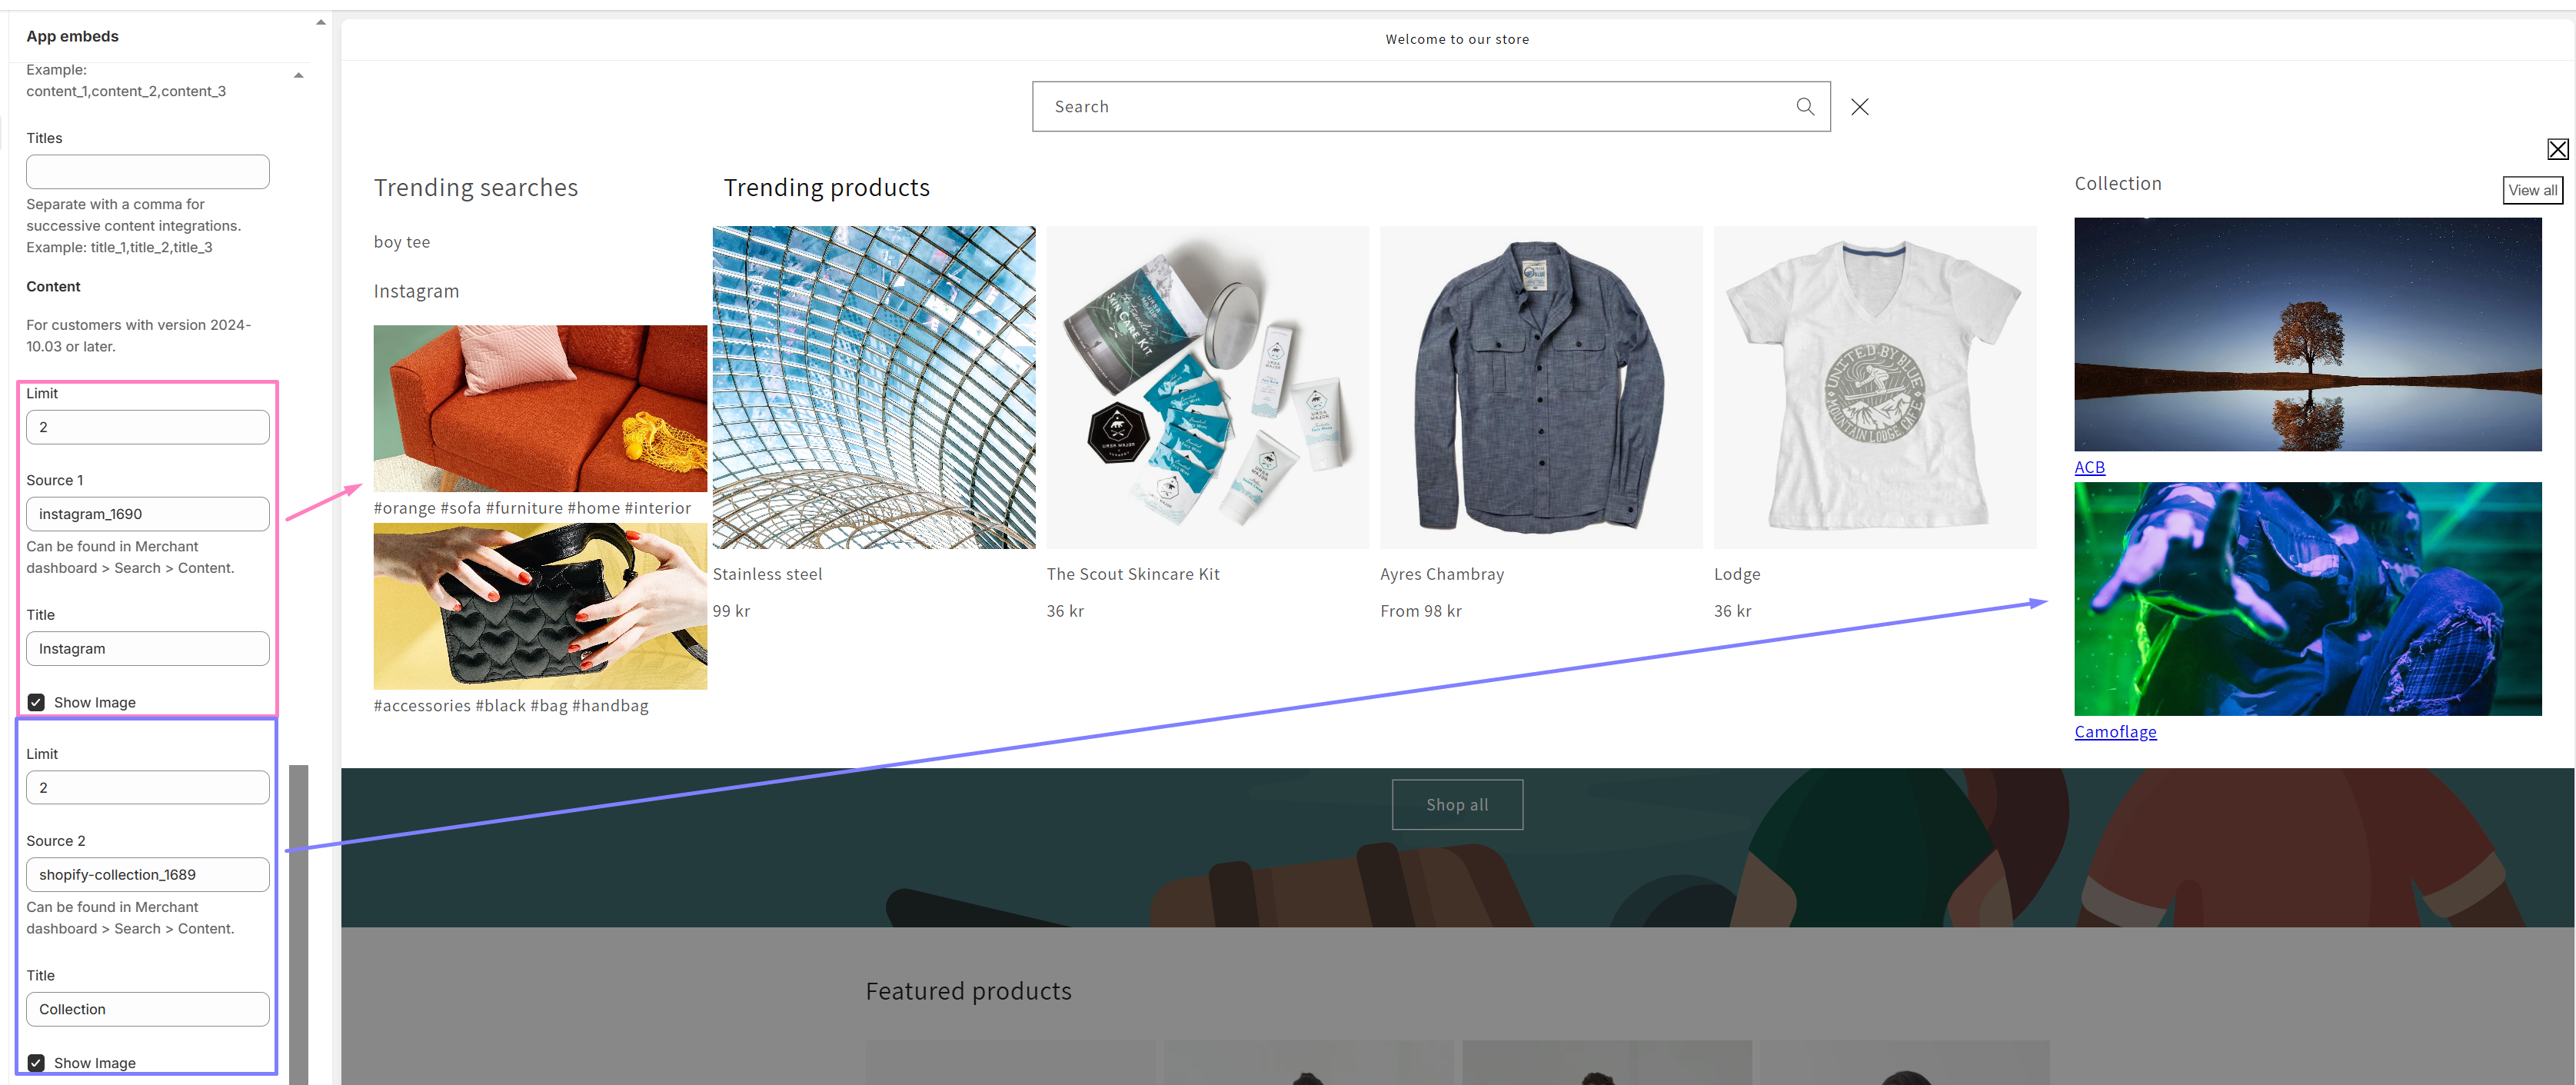
Note: For both templates:
- Content placement varies based on the source.
- Only up to two content widgets can be added directly via the Shopify Editor.
3. Adding More Than Two Content Widgets
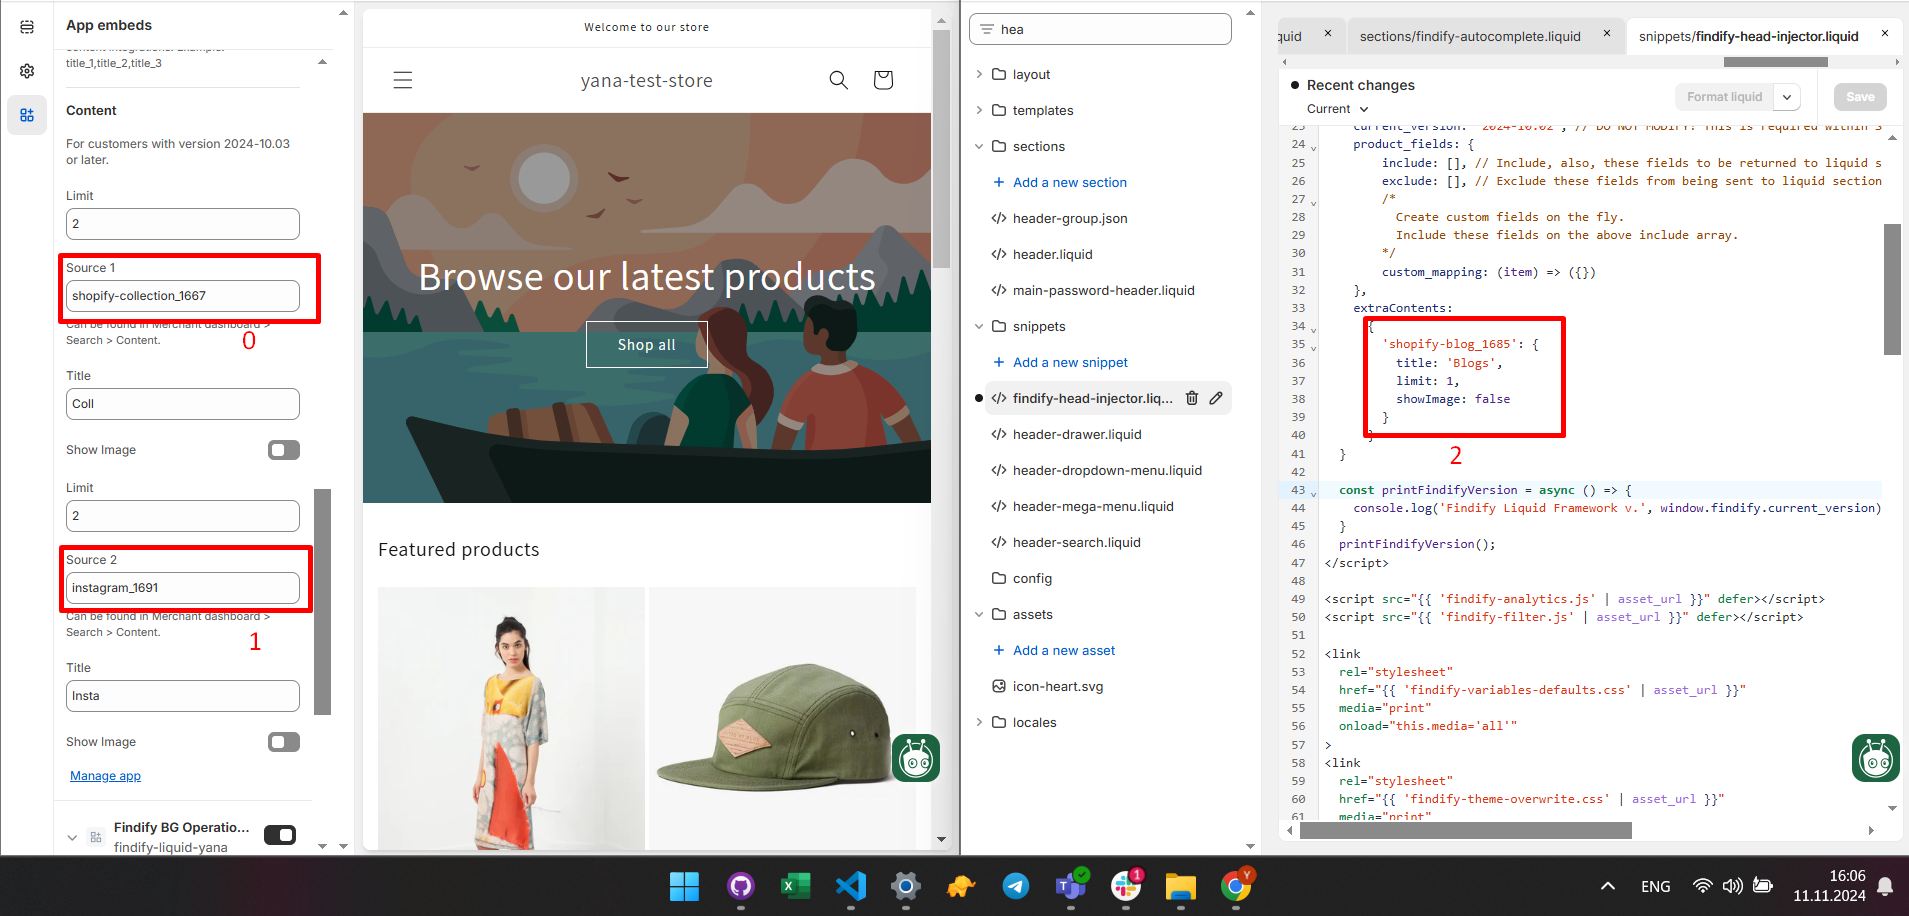
To include more than two content widgets, you need to configure them manually in the findify-head-injector.liquid file.
Steps:
- Open the
findify-head-injector.liquidfile. - Add the additional content widgets in the
window.findify.extraContentsobject using the following format:
extraContents:
  {
    CONTENT_ID_3: {
      title: TITLE_3,
      limit: LIMIT_3,
      showImage: true/false
    },
    CONTENT_ID_4: {
      title: TITLE_4,
      limit: LIMIT_4,
      showImage: true/false
    }
 }
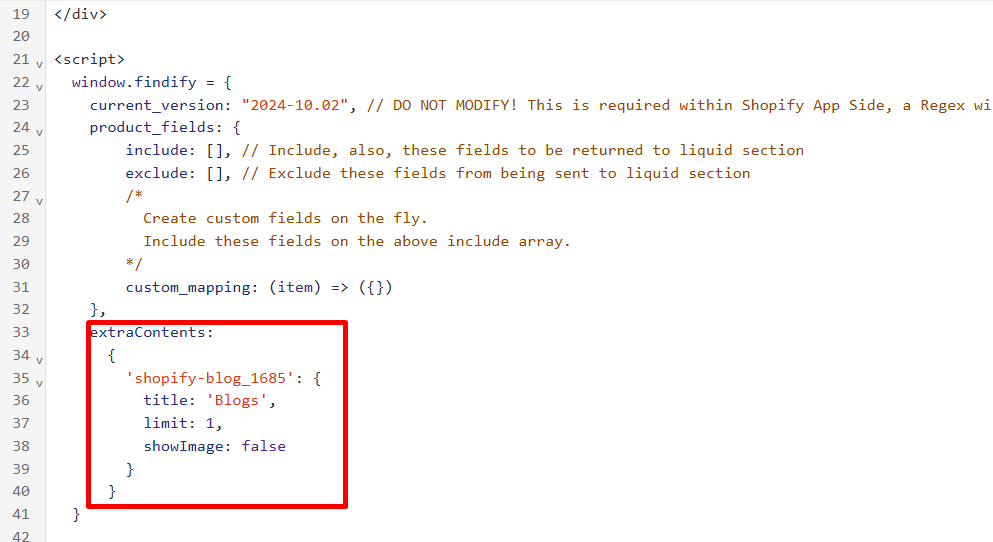
Example:
extraContents:
  {
    'shopify-blog_1685': {
      title: 'Blogs',
      limit: 1,
      showImage: false
    }
  }
Placement:
-
To adjust placement, add the following code in
findify-autocomplete.liquidwhere needed:{% render 'findify-autocomplete-content-block', contents_param: contents_param, content: contents[INDEX] %}- INDEX starts from
0. - The first two widgets are added through the Shopify Editor (index 0 and 1). Manually added content begins at index 2.
- INDEX starts from
Example Placement Code:
For further assistance, please don’t hesitate to get in touch with us by emailing [email protected].
Updated 9 months ago
