Compare App
This guide will walk you through the steps to enable and configure the Compare App Integration in your Shopify store.
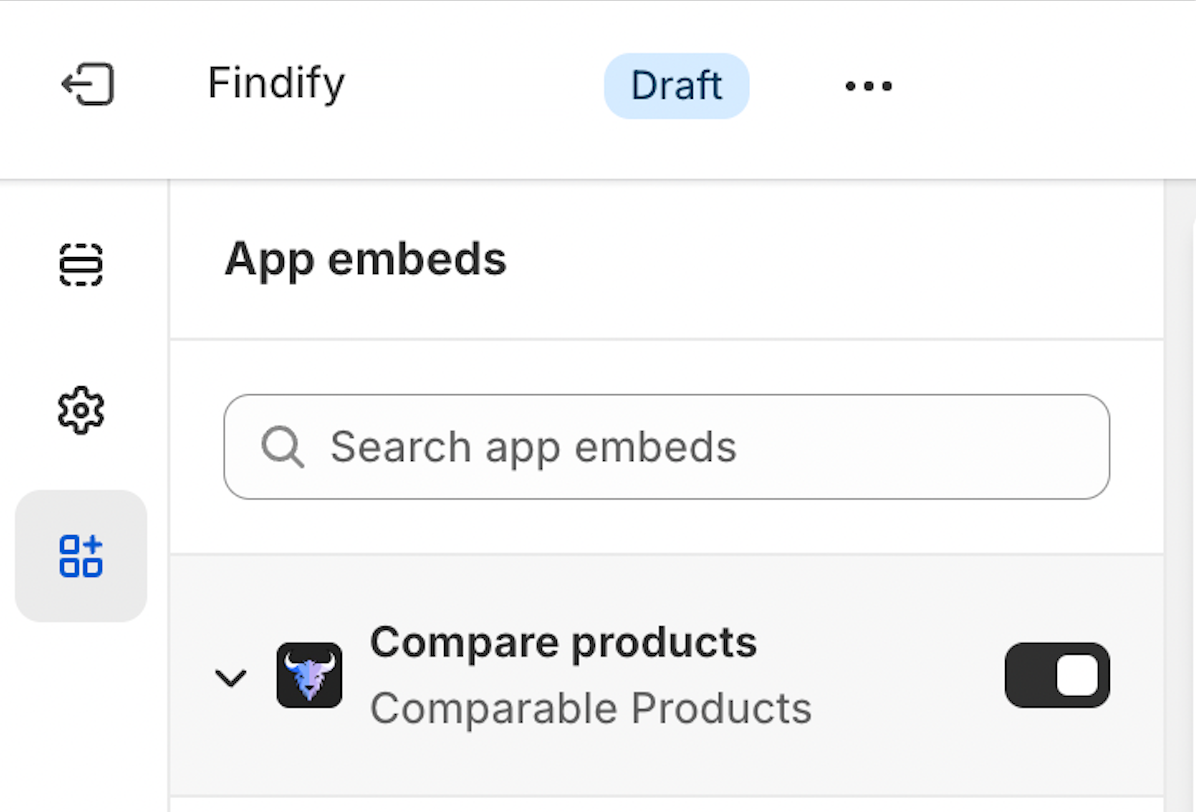
Step 1: Enable the Compare App in App Embeds
- Go to your Shopify Admin panel.
- Navigate to Online Store > Themes.
- Click on Customize.
- In the left sidebar, select App embeds.
- Find the Compare App and enable it.
Step 2: Configure Collection and Search Pages
- Open the Compare App from your Shopify Admin panel.
- Go to Customization and click on Configure pages with controls.
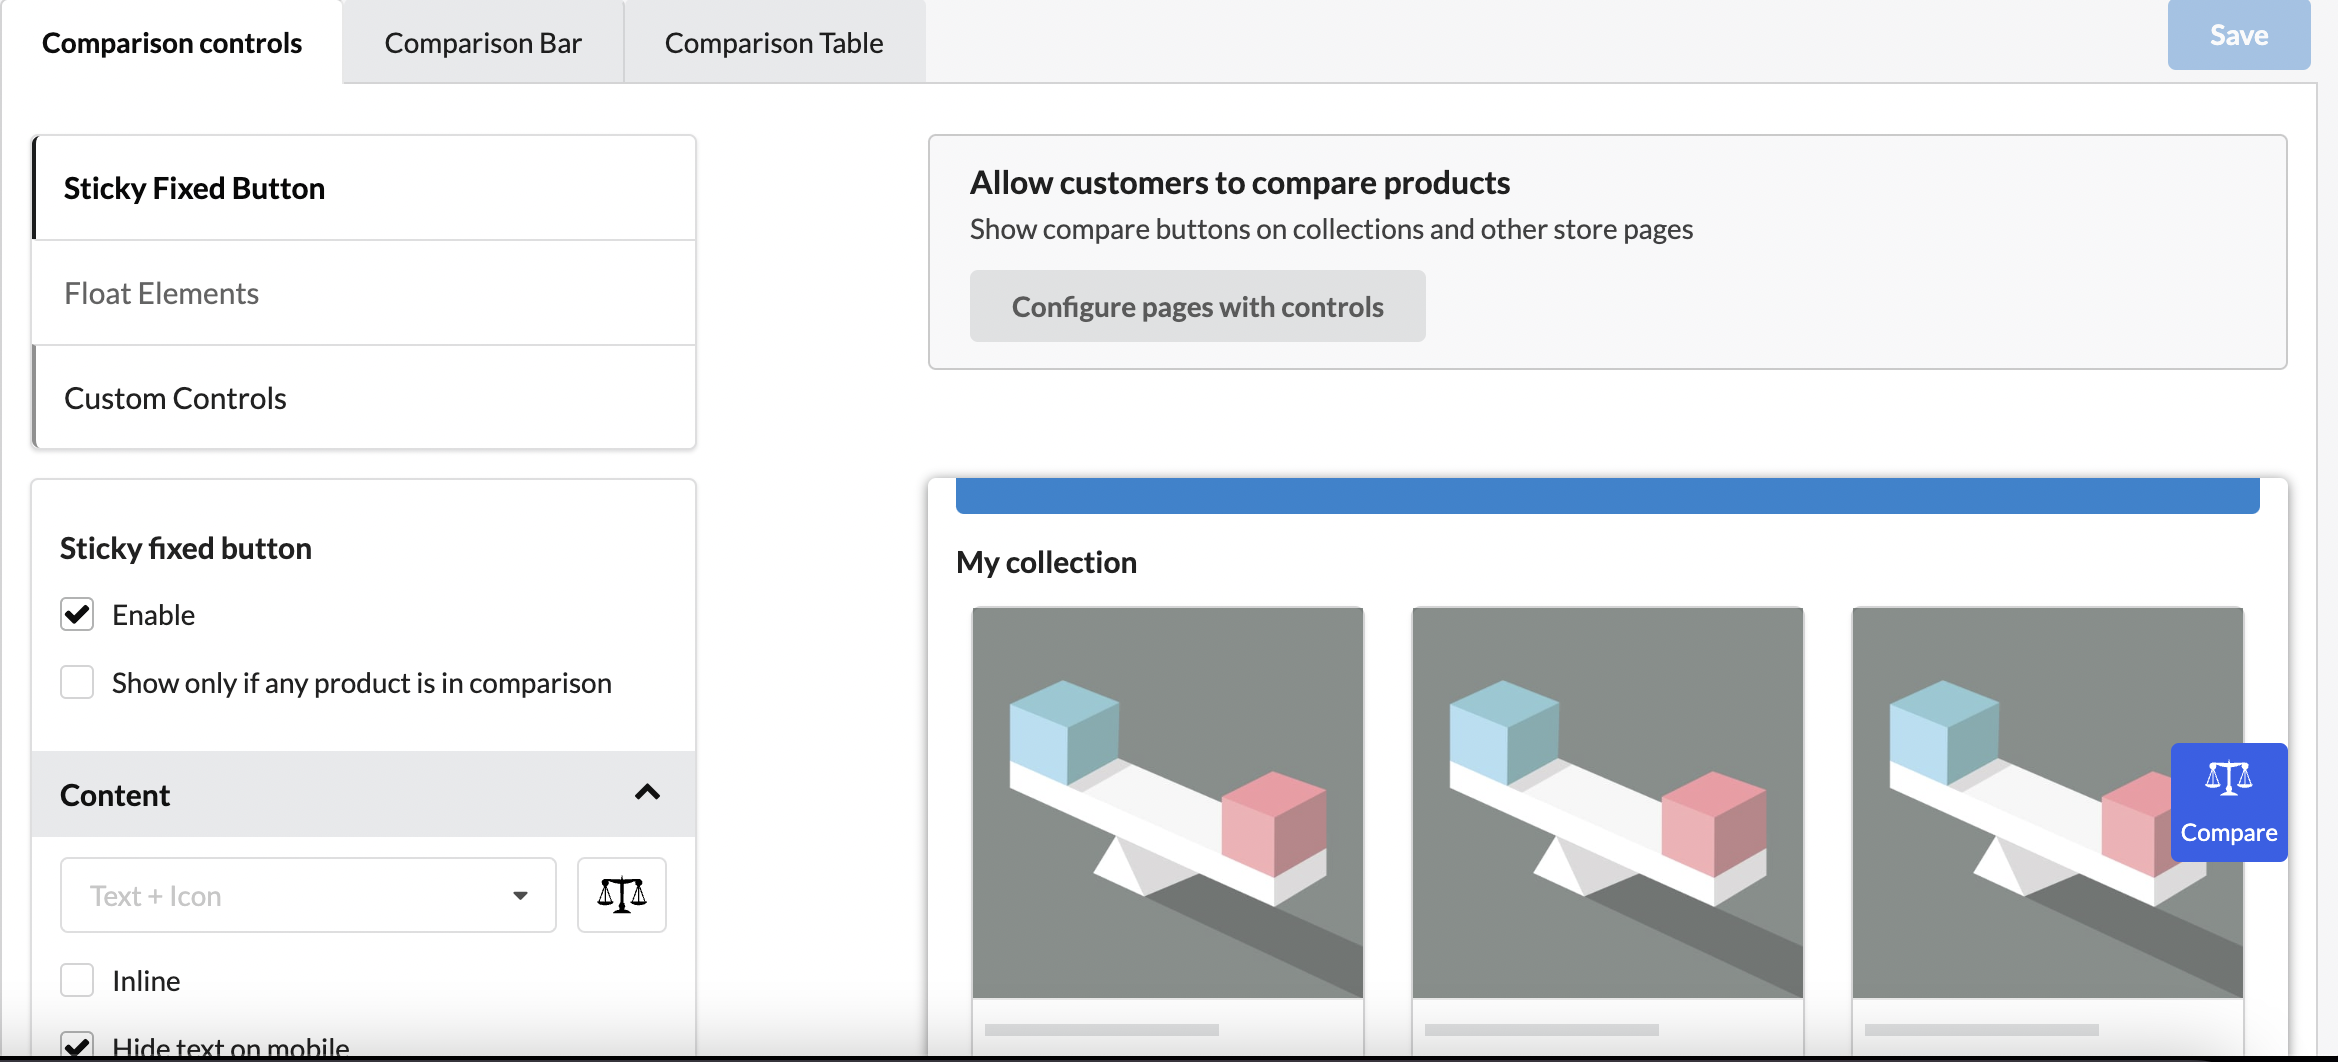
- In the configuration menu, select all checkboxes to ensure the Compare feature is enabled on all relevant pages.

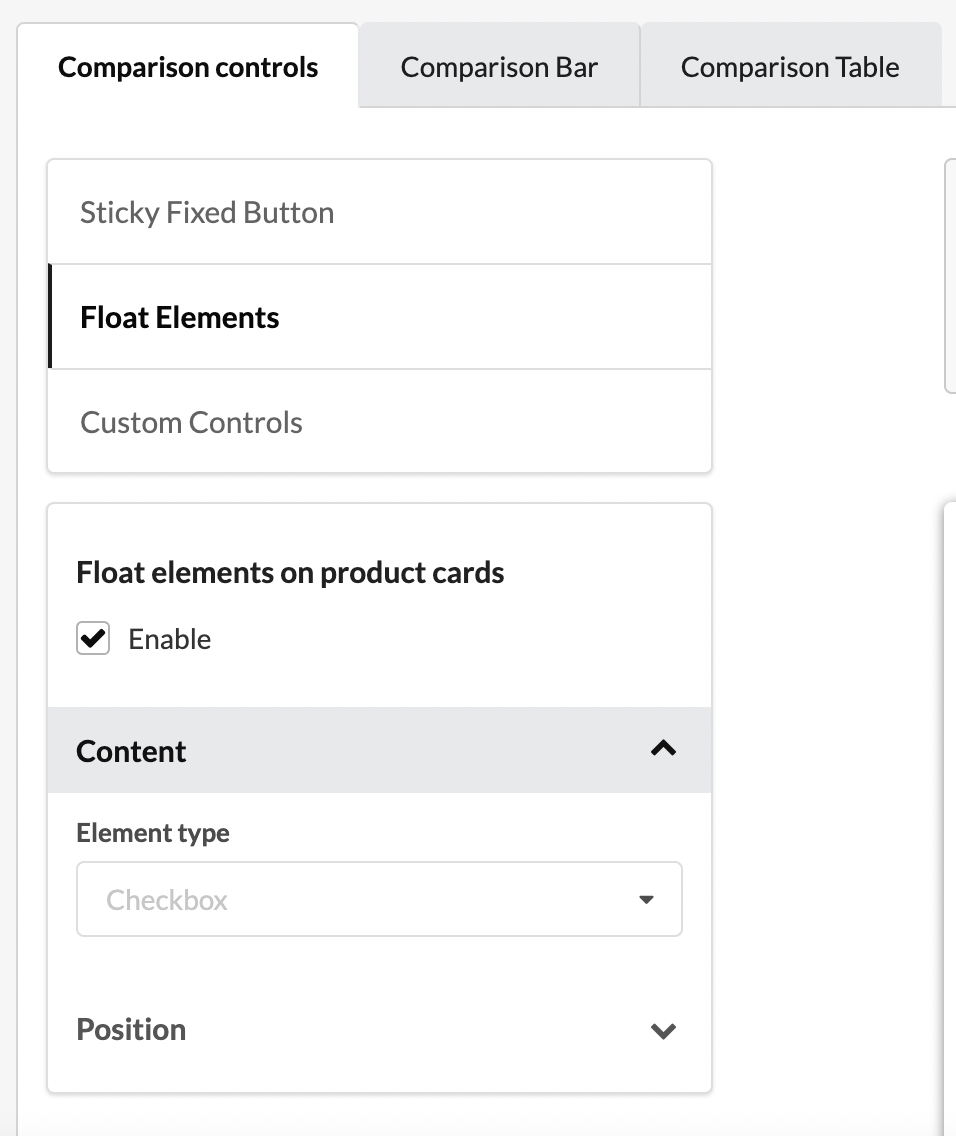
Step 3: Enable Floating Elements
- Still in the Customization section of the Compare App, click on Float elements.
- Enable the floating elements option to ensure the compare button appears on the product grid for every product.
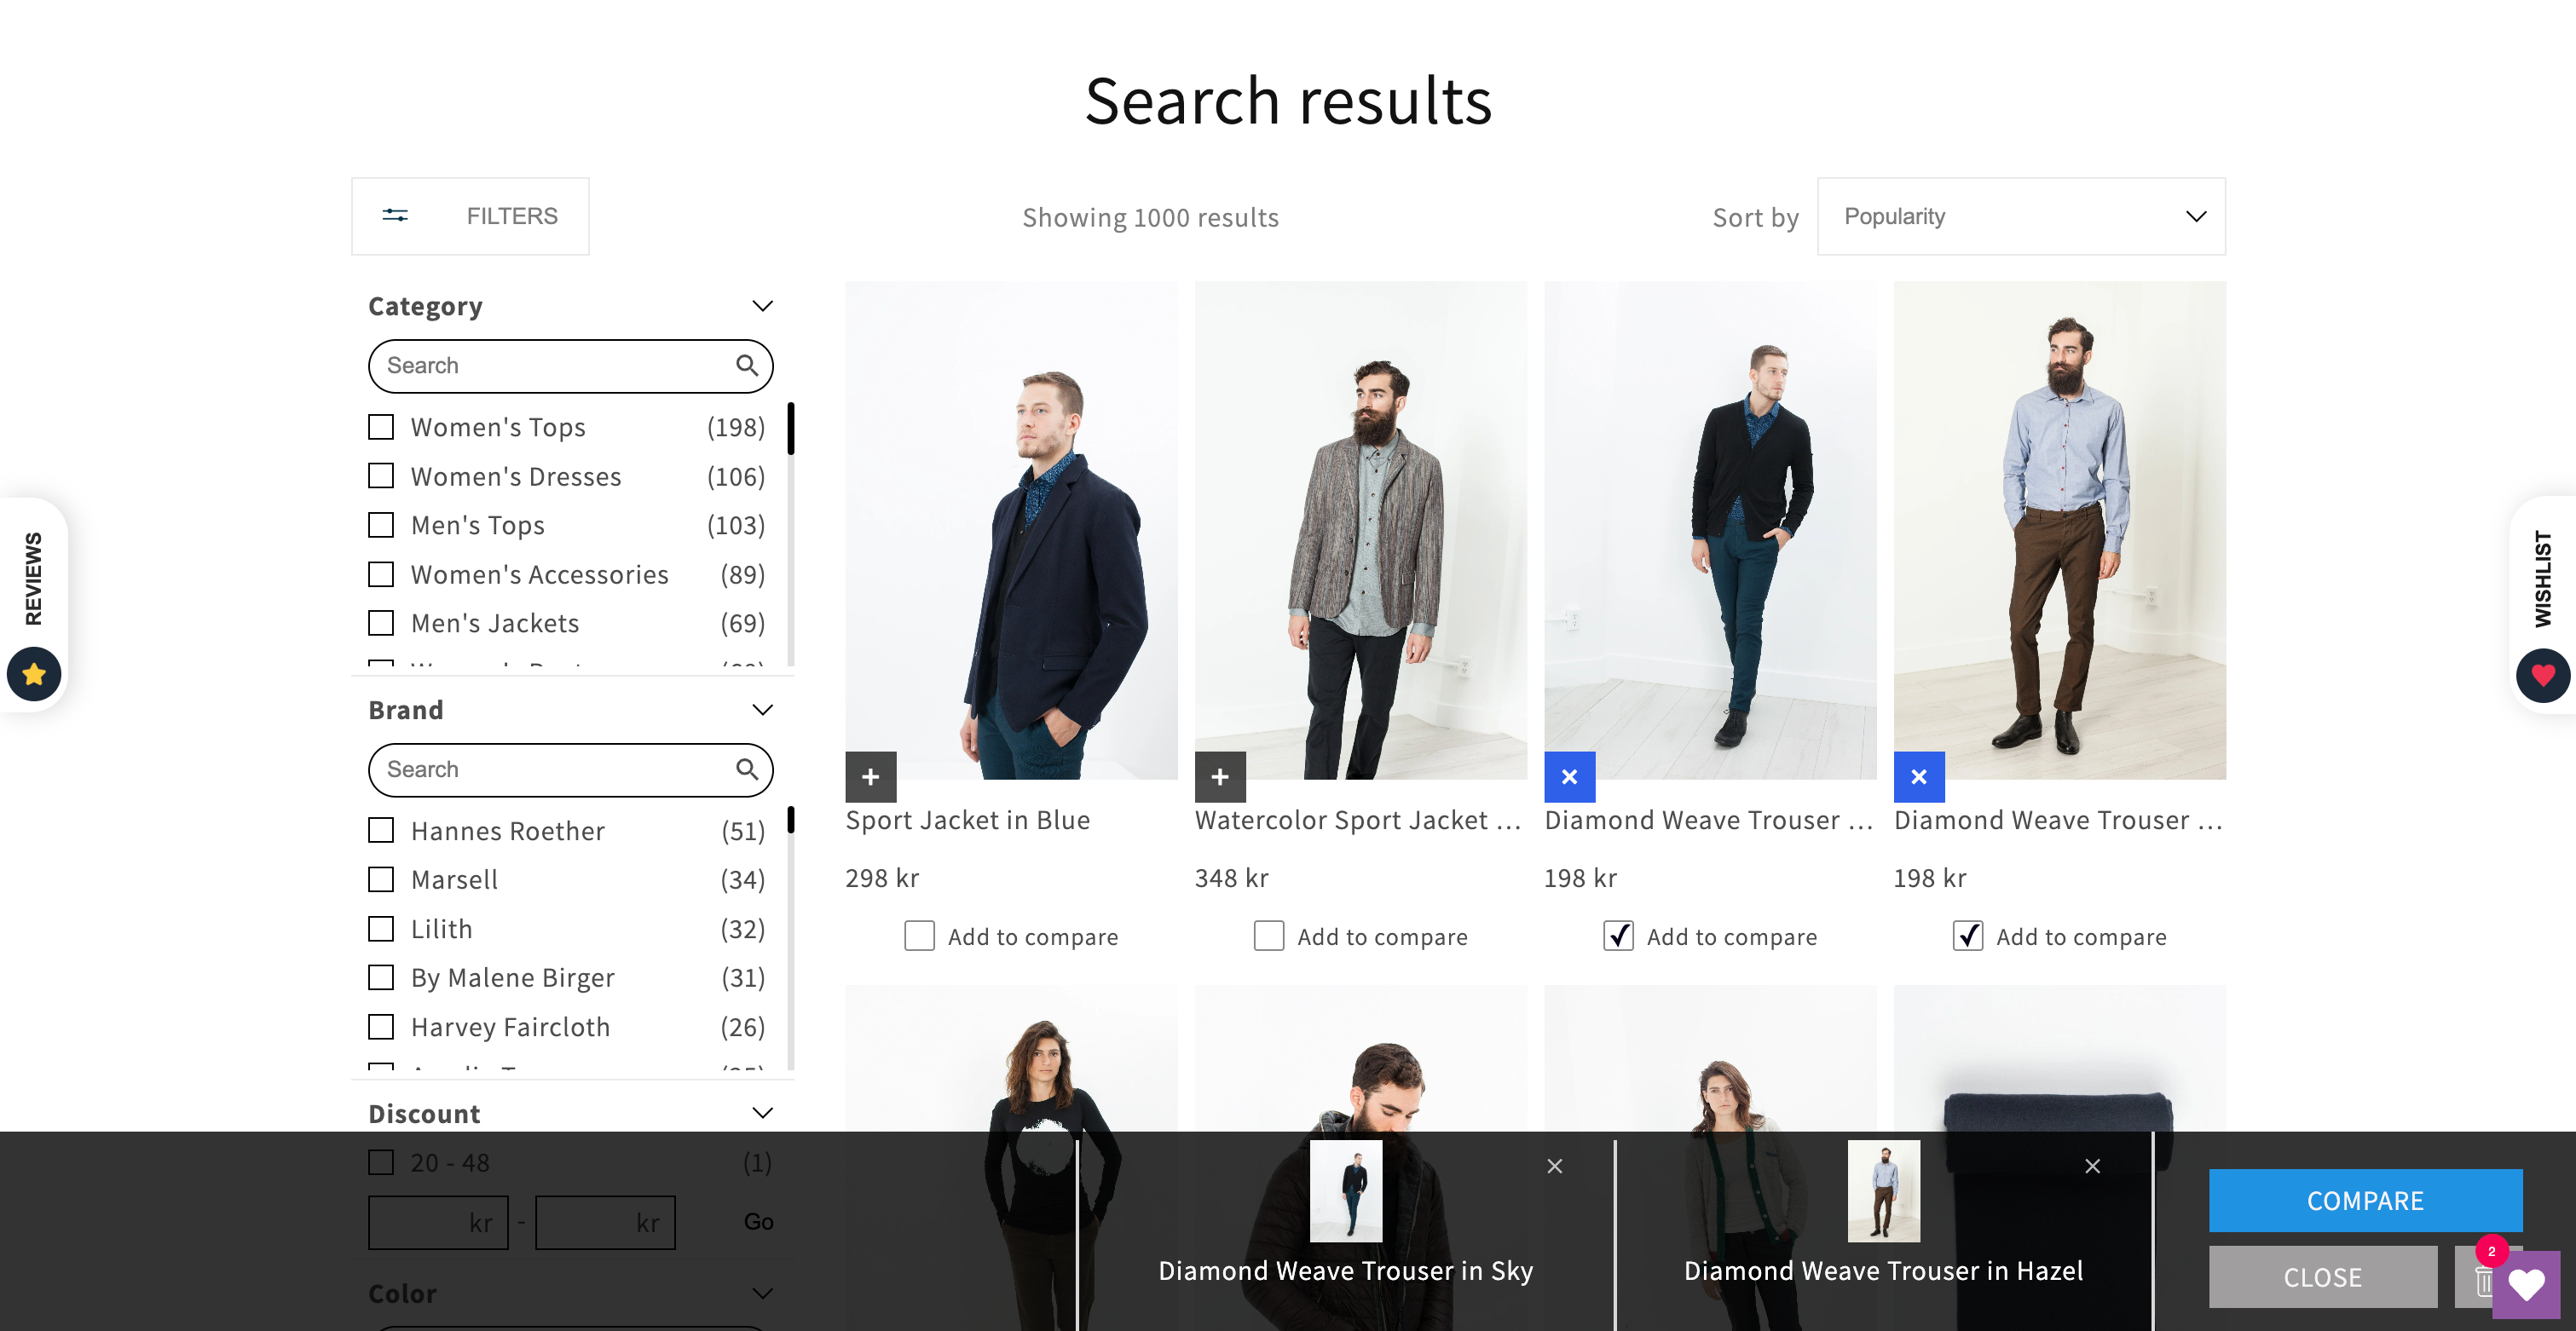
Step 4: Style the Compare Buttons
Once the Compare App is enabled and configured, the add-to-compare buttons will appear on the product cards. These buttons can be styled to match your store's design preferences. You can add custom CSS in your theme's stylesheet to adjust the appearance of these buttons.
With these steps, you can easily integrate and configure the Compare App in your Shopify store using Findify. This feature will enhance your customers' shopping experience by allowing them to compare products effortlessly.
For further assistance or inquiries, feel free to contact us at [email protected] .
Updated about 1 year ago