Merchandising Rules & Pinning
Understanding the three levels of Merchandising control
Default Merchandising Rules: These rules will be applied by default to all search queries or collections that no specific merchandising rules have been created for.
Merchandising Rules: These rules are created for specific search queries or collections and will override any default rule that has been set up.
Pinning: This function bypasses Findify's AI algorithm, allowing the merchant full control over very specific products and the order in which they appear.
What are Merchandising Rules?
One of the several merchandising capabilities offered by Findify is the useful function to create Merchandising Rules.
This gives merchants even further control over their store’s product grid, affording them the ability to push strategic goals. Merchants can assign weights to any product (or even variant) attribute – which will influence the order in which they are shown in either collections or search results. Merchandising rules can be applied for a single query/collection, multiple, or across the board as a default rule.
At Findify, we believe in a number of key values. We believe in smart automatization to free up valuable merchant time, but we also believe in full merchant control.
While at first glance these two aspects may seem to be at odds with one another, creating a symbiotic relationship between automatization and merchandising is an essential factor when it comes to ecommerce success.
On one hand you have the personalization & trend scoring working in the background, learning the preferences of shoppers and reordering product grids accordingly in order to improve UX and maximize conversion.
On the other hand, you have the ecommerce merchant determining which products should be featured most prominently.
While the personalization software will maximize conversion, we realize that this might not always be the main goal. Sometimes, merchants need to prioritize other strategic objectives.
There are many ways Findify enables this. You can use any field (including a custom field) to create a specific merchandising rule unique to your business. You can also control the importance that popularity has in the product rankings.
Key examples of prioritizing merchandising over personalization
Let’s say, for example, you’ve secured a brand collaboration with a well-known influencer. You want to push this collab far and wide across your store.
Or, in another scenario, perhaps there has been an ordering mistake and you suddenly have 100 red dresses instead of 10. You want to sell the excess as soon as possible.
With Findify’s powerful merchandising suite, you never have to choose between the power of personalization and your own strategic goals. These two objectives can now peacefully (and impactfully) co-exist.
While the items in your store will continue to be ranked dynamically, with Findify’s personalization algorithm showing your shoppers the products it knows they are most likely to buy, merchants also have full control to merchandise the products they need to.
Merchants can choose to boost or bury based on any data in the database, such as color, material, size, stock levels, price, and more.
Default Merchandising Rules
Specific Rules Takes Precedence
The purpose of merchandising rules is to easily push broad actions without limiting specific actions.
A key requirement is that they don't affect specific merchandising rules. To achieve this, default rules are only affecting collections or search terms with no specific rules set to them. Whenever a specific rule is setup, it offsets the default rule for those search terms or collections.
With this capability, you can easily push the products you most want to sell, WITHOUT sacrificing the power of personalization.
You can use this capability in a multitude of scenarios. You can apply any dimension to the field, utilizing any property that best fits your strategy - including the boosting of products with higher margins, and those that are on sale, for example.
With the Findify dashboard, you simply go to ‘Merchandising Rules’ and click “Create Default Rule” or ‘Edit Default Rule’. You can then select to 'Promote', 'Pin', 'Only Include', or 'Exclude'. Then select the attribute you want to base your rule on. You can choose to apply the rule to a product, a variant, or both. You can also use the sliders to determine to what degree you want to apply the rule compared to the personalization, and to determine how heavy a factor you would like popularity to be. When you are done, hit 'Save'.
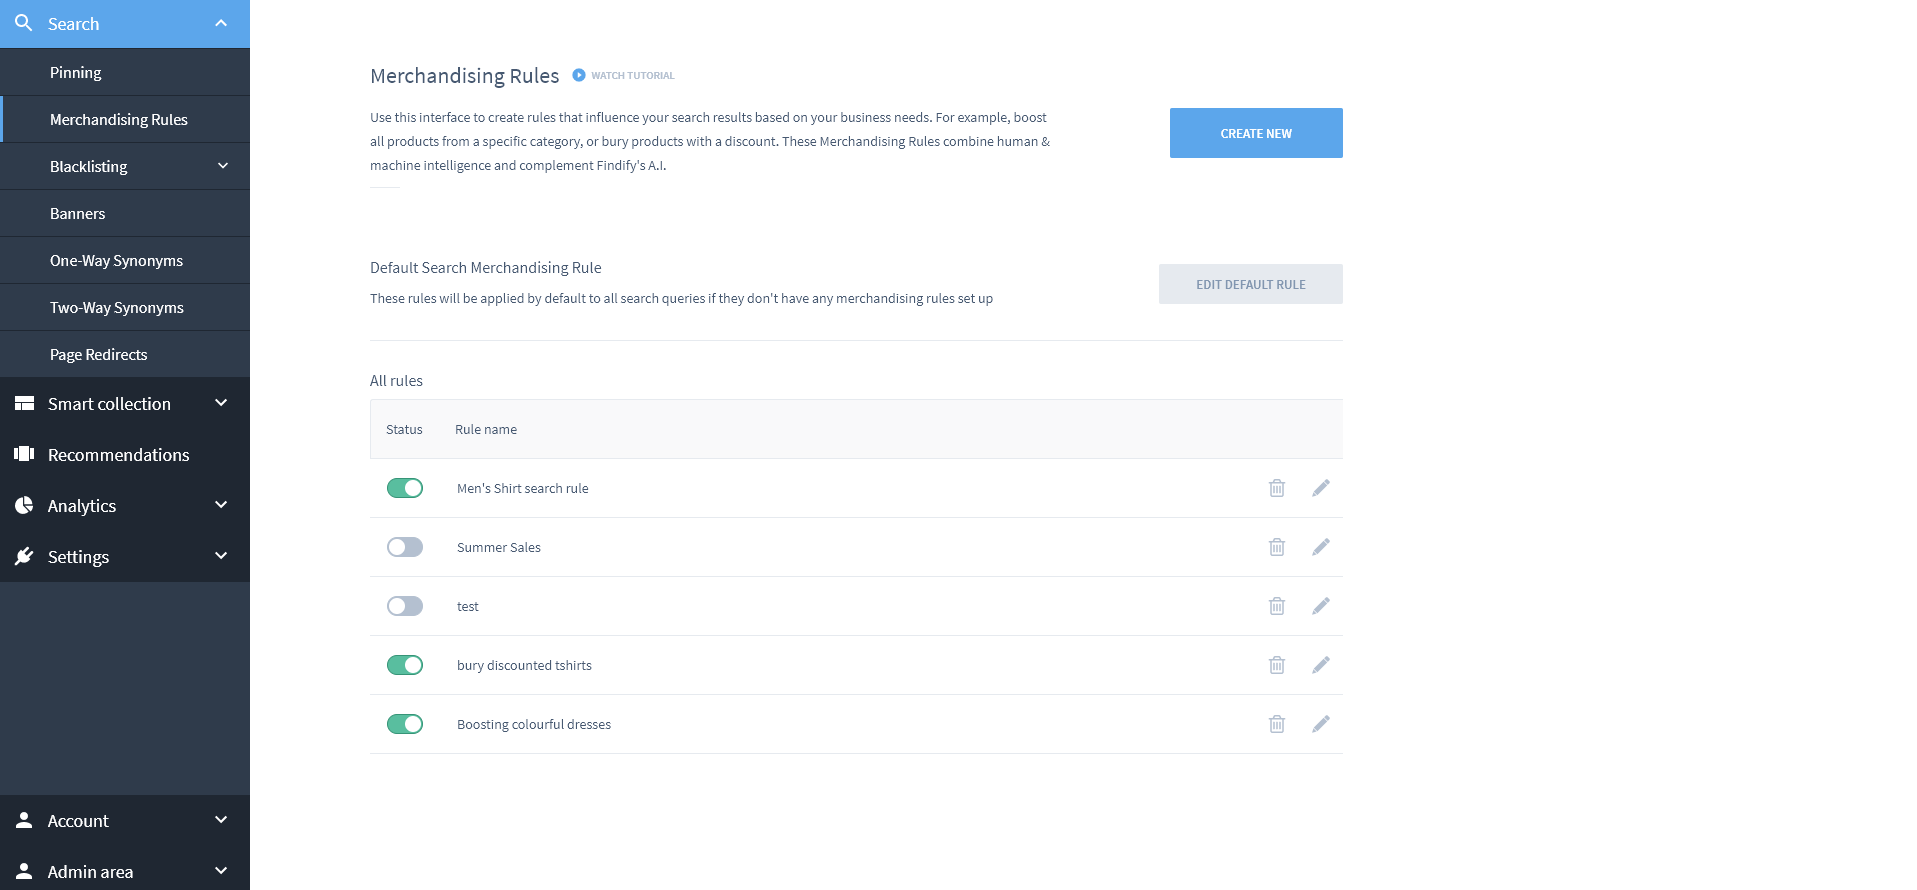
Merchandising Rules
Search Merchandising Rules
Let’s go through an example. Let’s say you want to bury discounted products within the search functionality. You are pushing these products in certain marketing channels, but you don’t necessarily want these discounts to be the first thing your other shoppers see when they go to your site. This is where you would create Search Merchandising Rules.
To access this feature, go to the Findify dashboard and navigate to Search, and then Merchandising rules.
Then create a new rule. First you need to name your rule. This is used for internal purposes to easily navigate across rules.
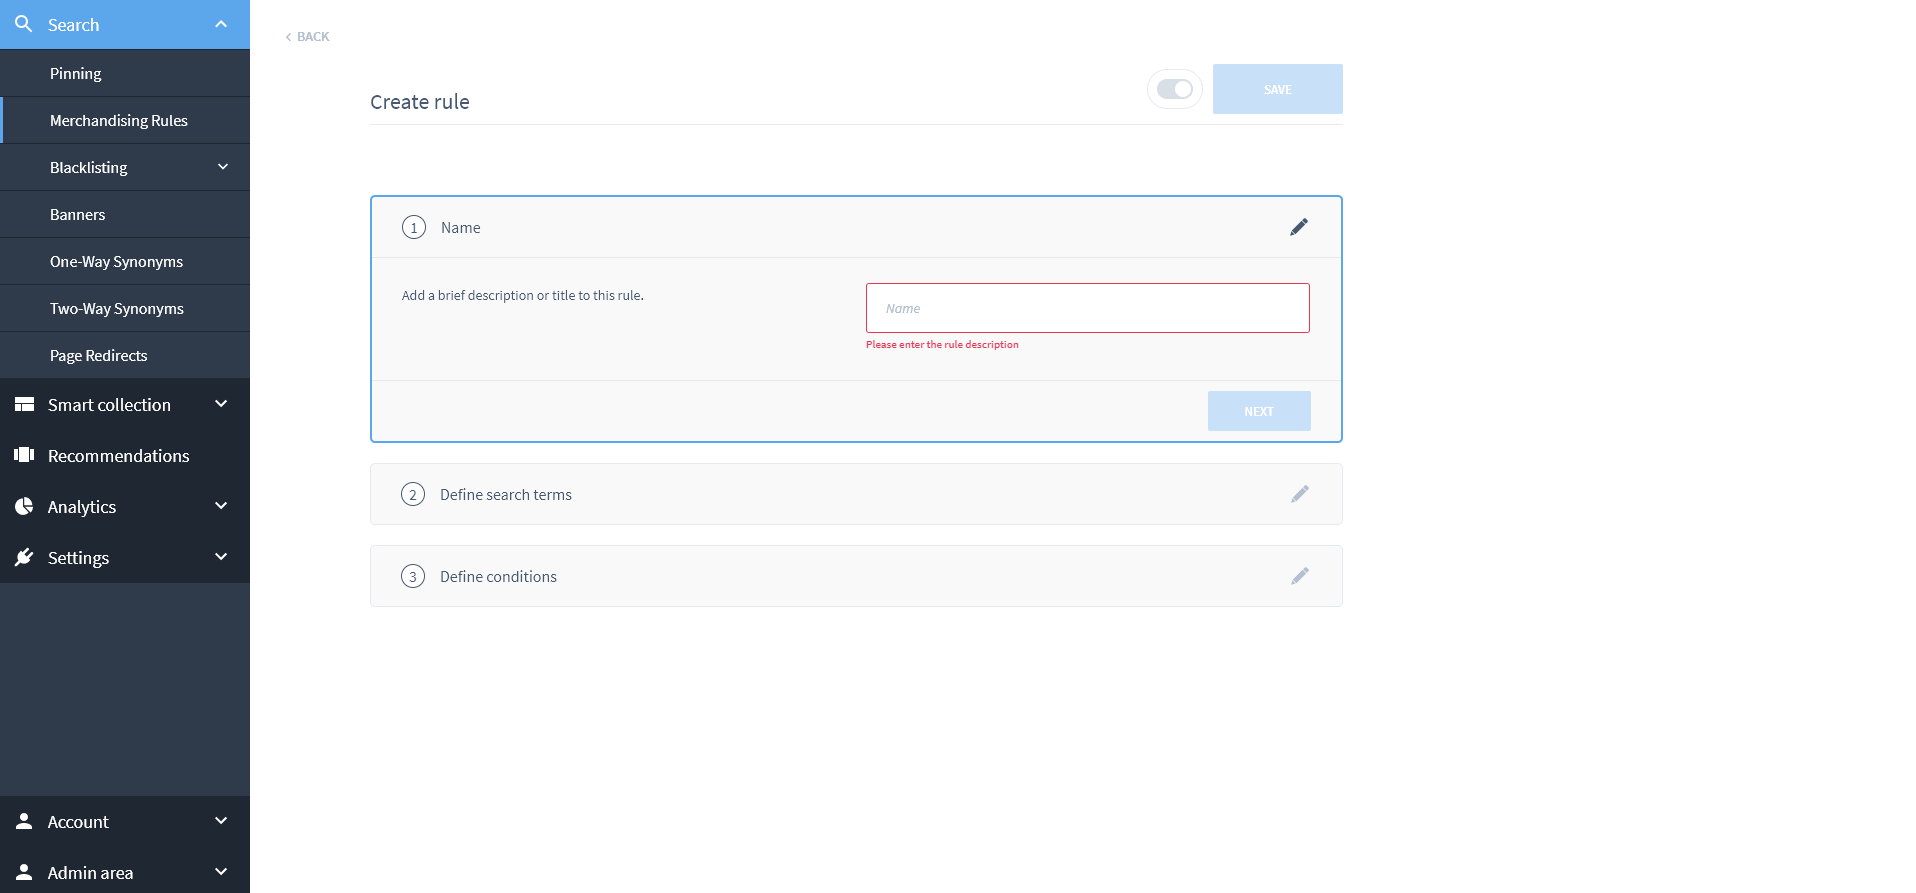
Next we need to input the search queries we want this rule to apply to.
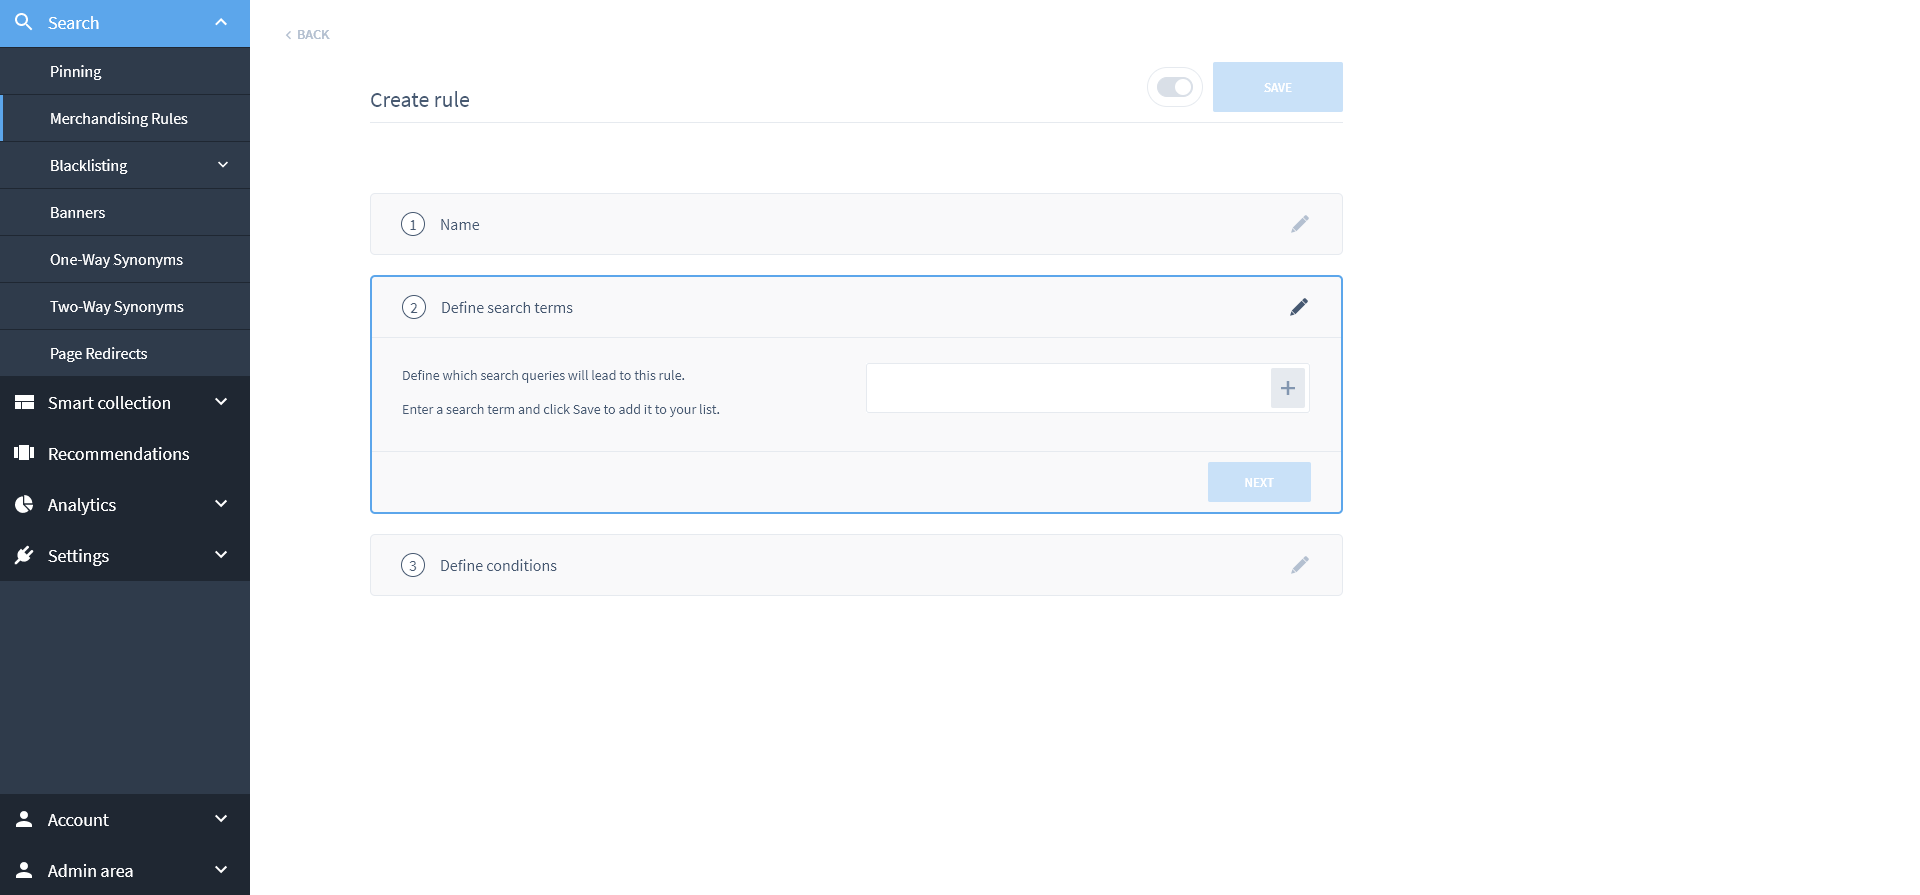
Next, you would define the condition, and then we want to select a product field upon which to base the specific merchandising rule.
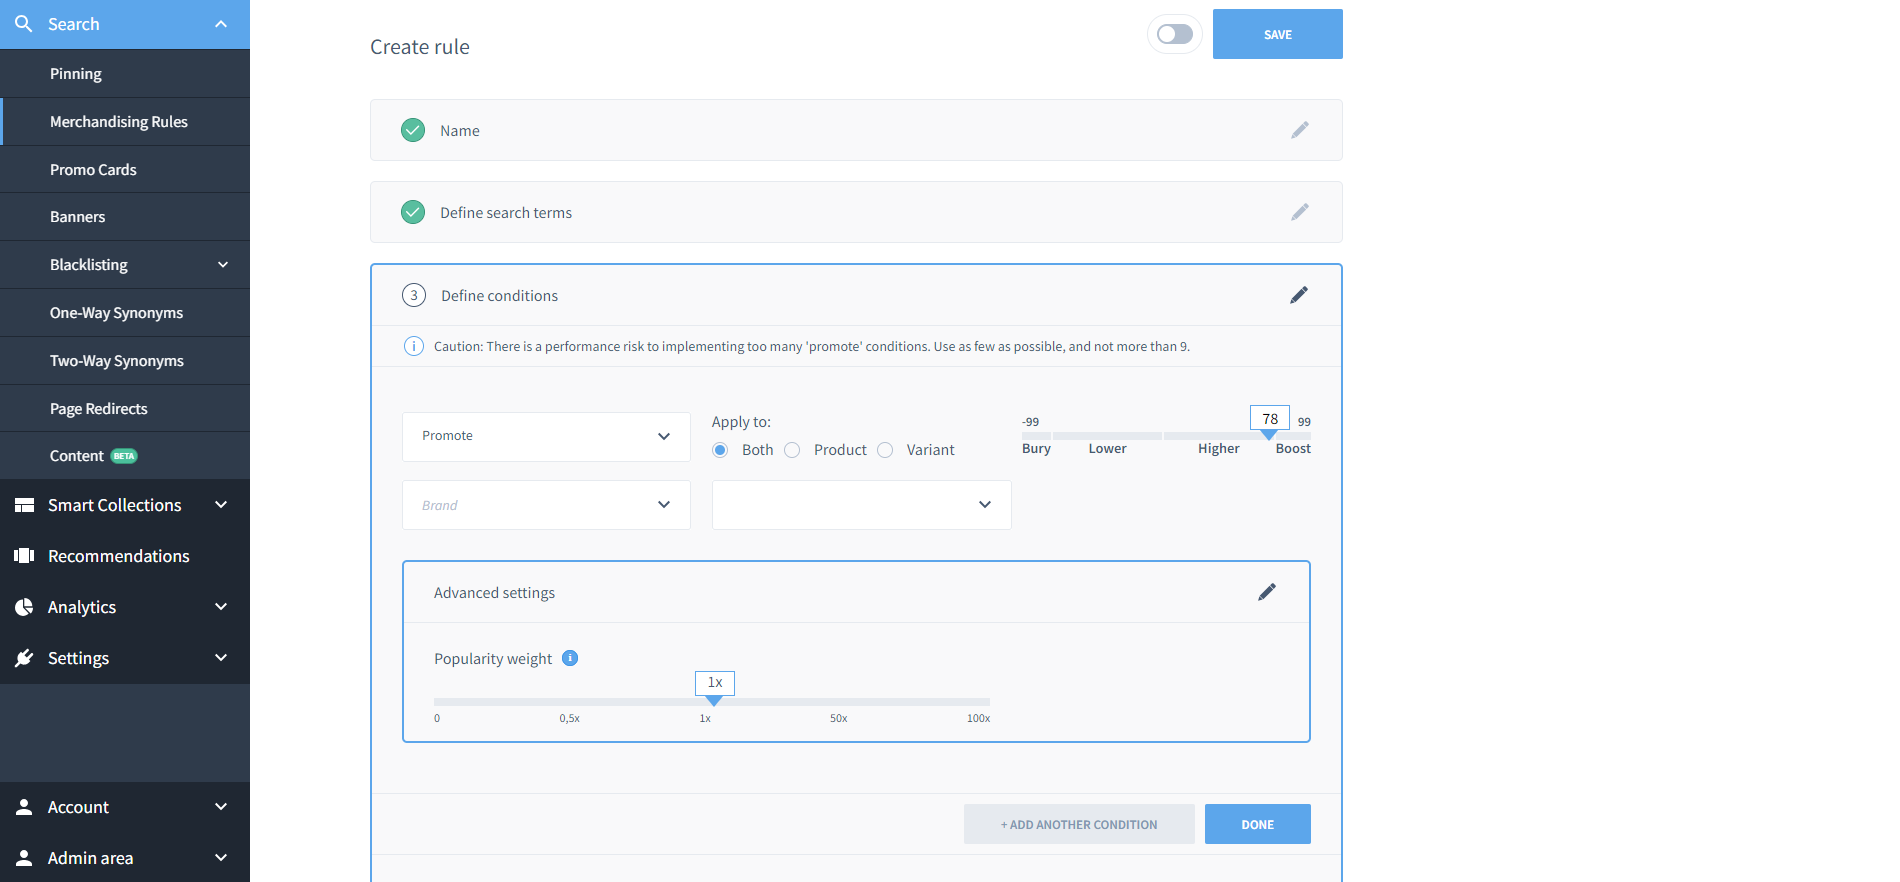
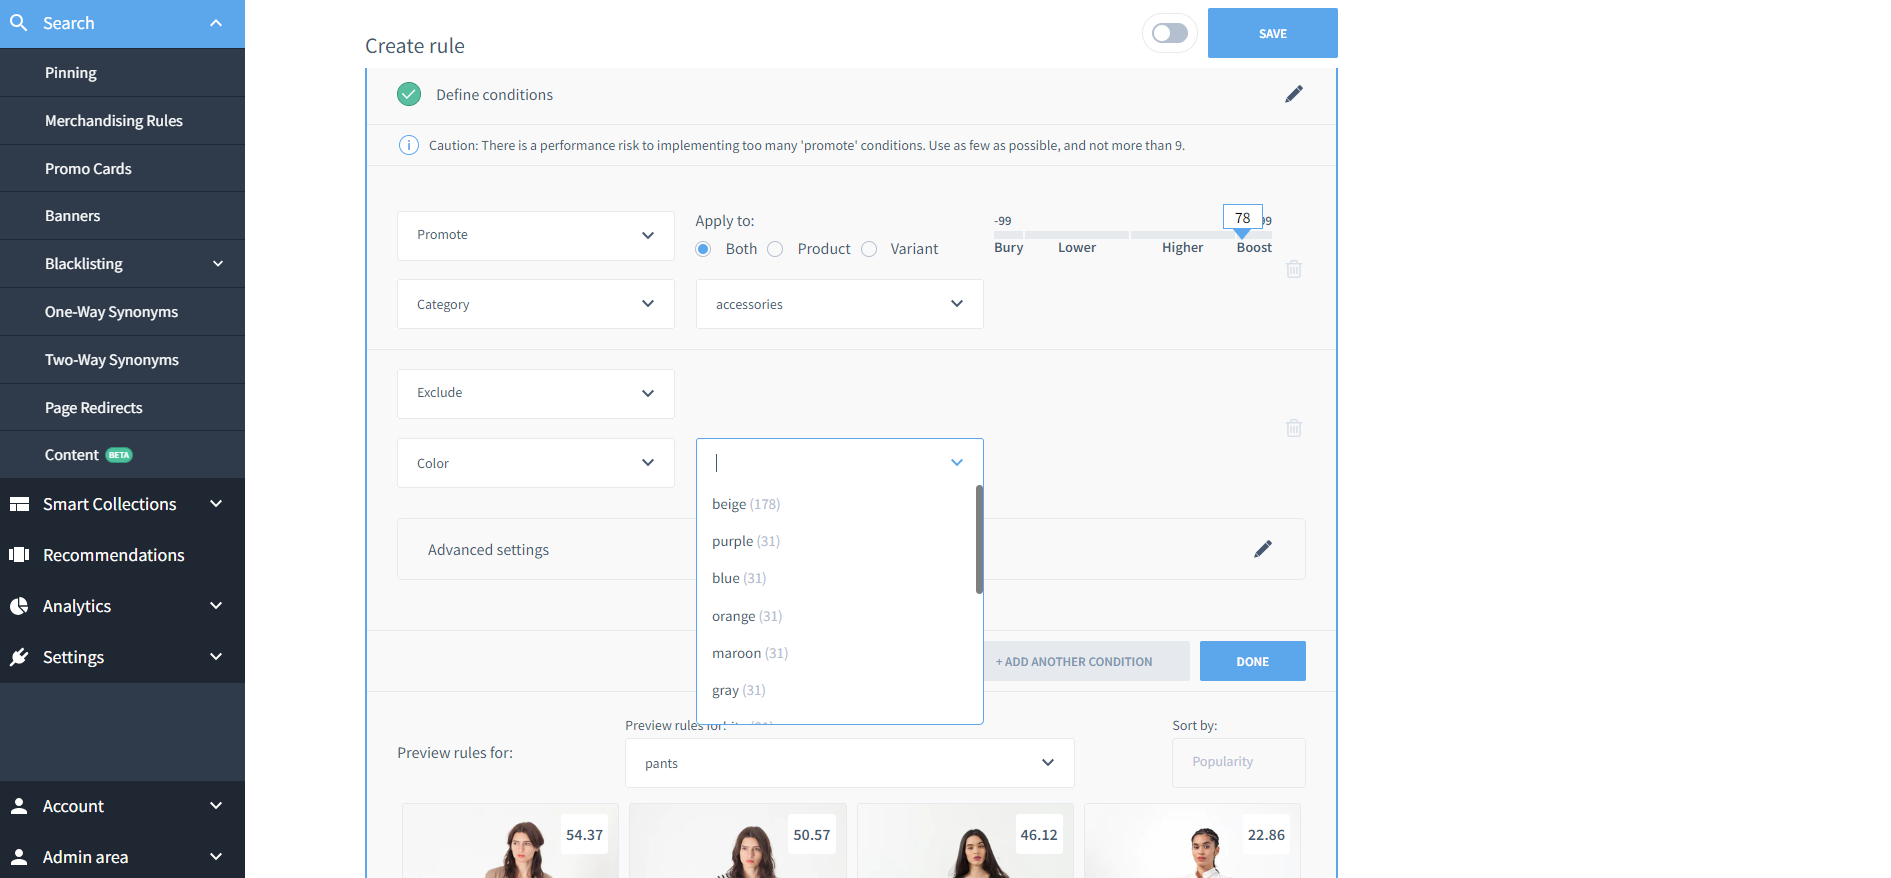
You can also add multiple conditions - for example boost certain products, but exclude a specific brand.
You can even control the weight of importance placed on popularity as a factor in the product rankings by using the slider which appears under the 'Advanced Settings' section.
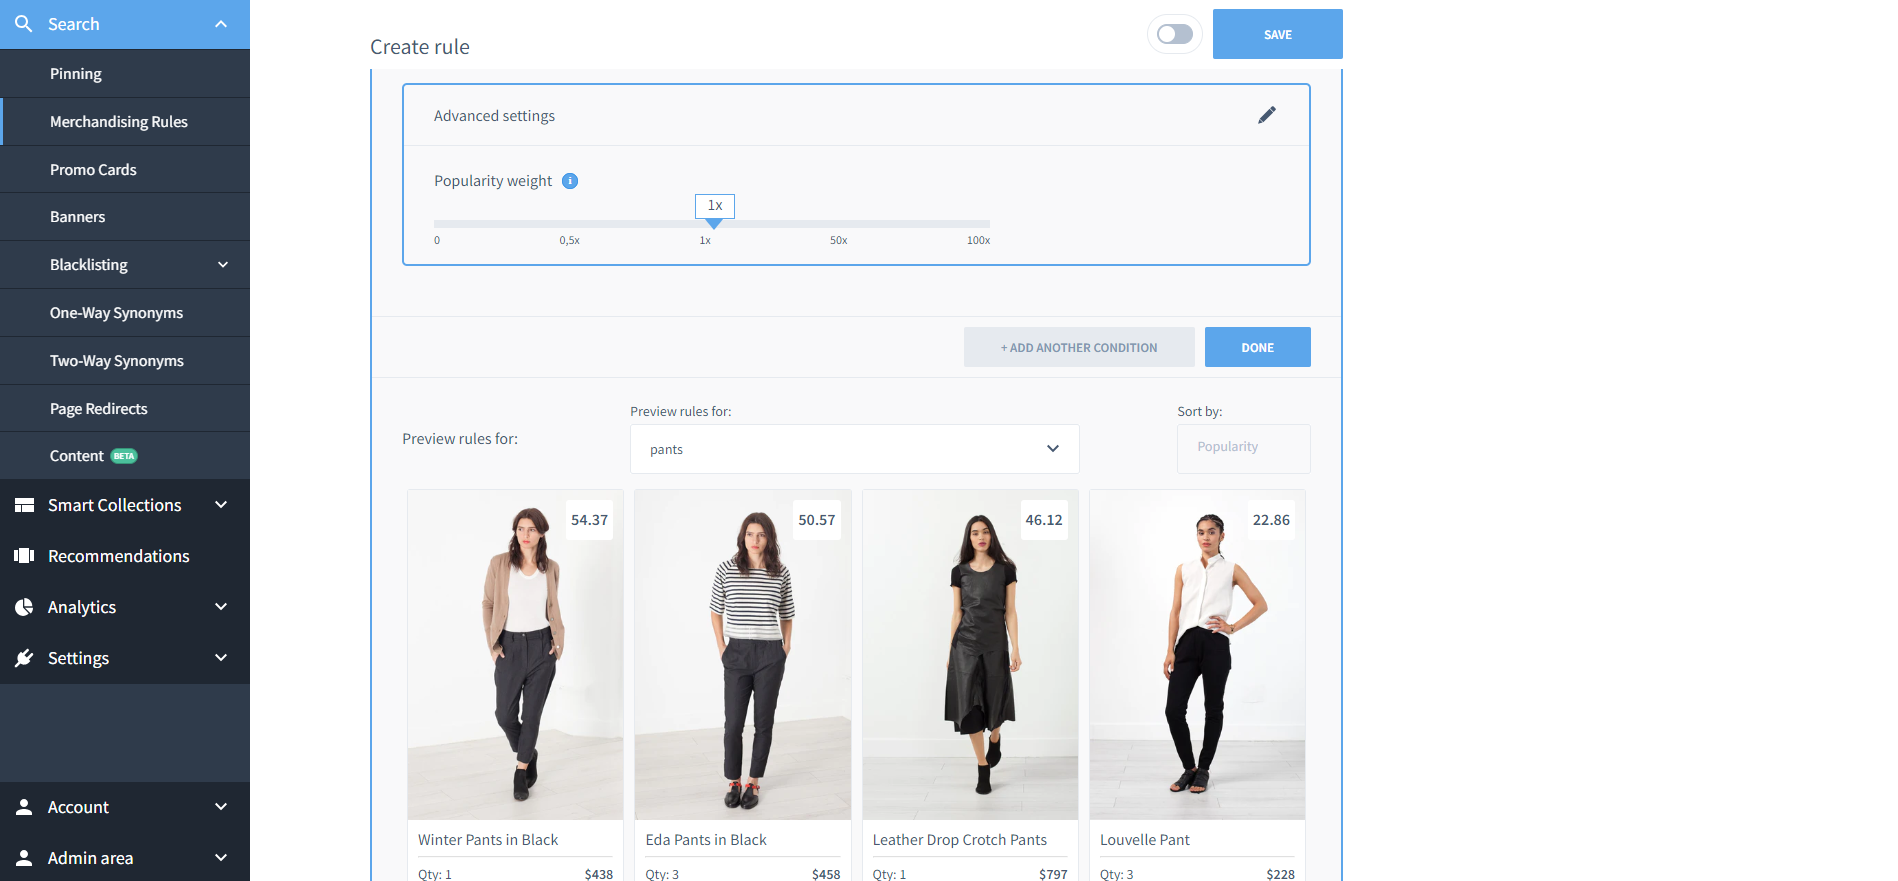
In the preview below the conditions you will see what this would look like on your site. Then it’s only a matter of hitting the save button.
Findify’s personalization algorithm will apply within any bulk actions taken within this feature.
Collection Merchandising Rules
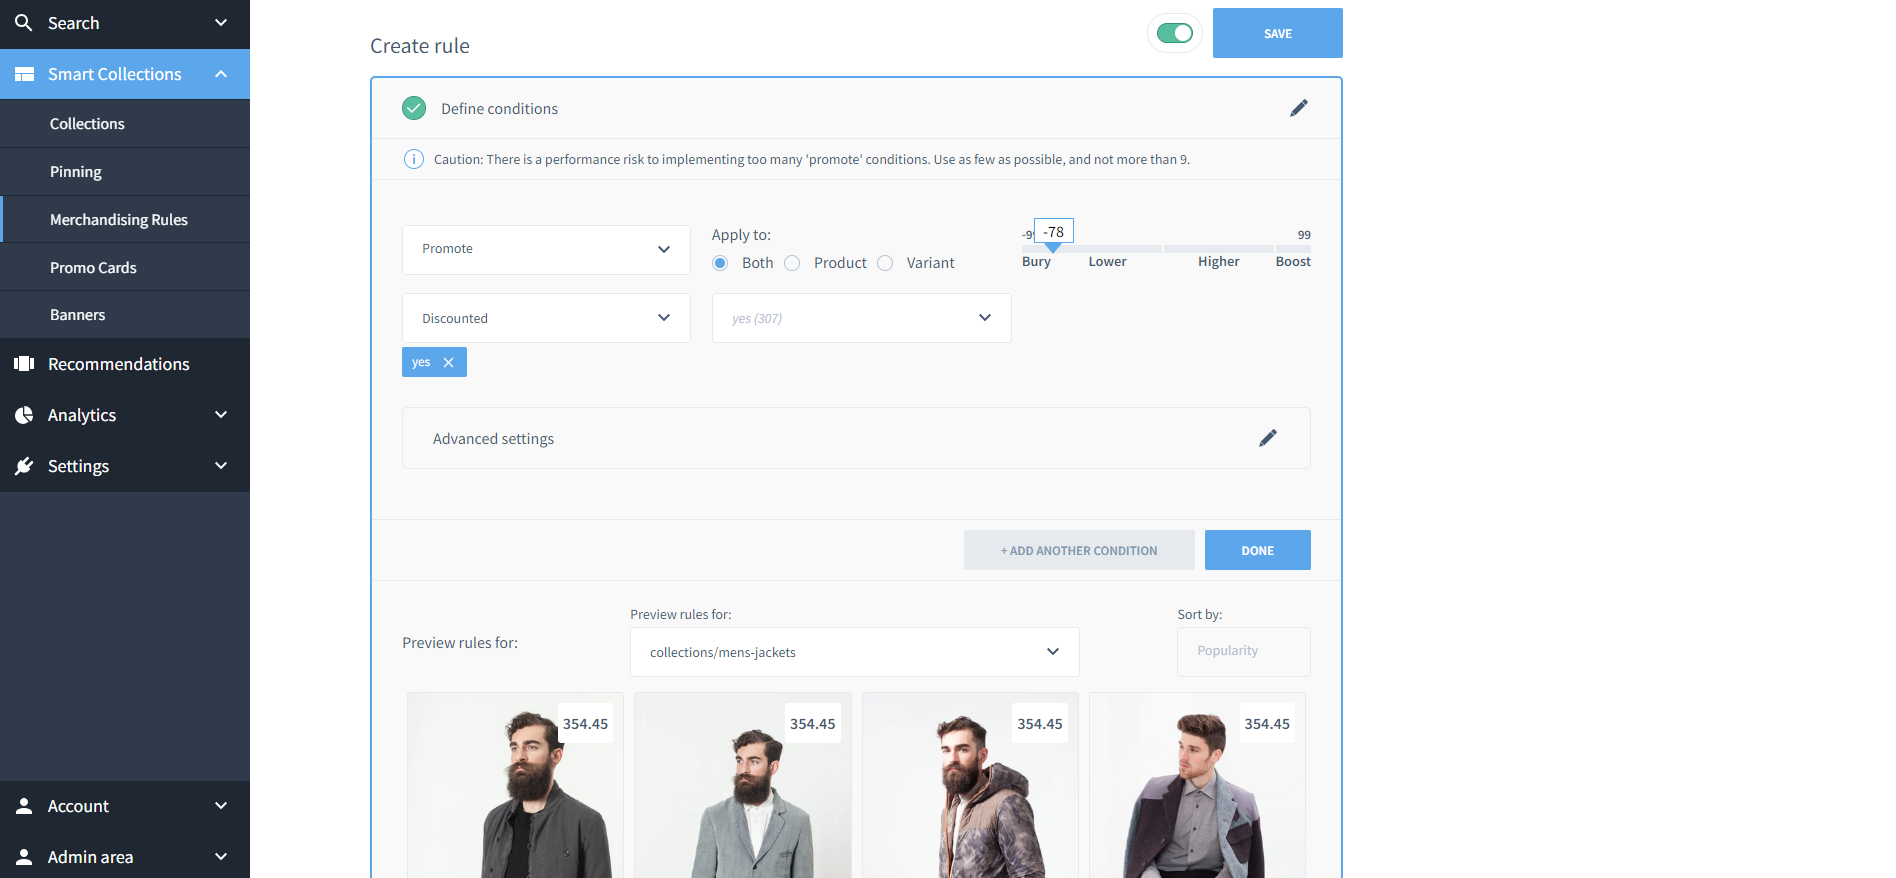
For this example, let’s say you want to bury discounted products that appear within a specific collection or collections.
You are pushing these products in certain marketing channels, but you don’t necessarily want these discounts to be the first thing other shoppers see when they click into your collection. This is where you would create Merchandising Rules.
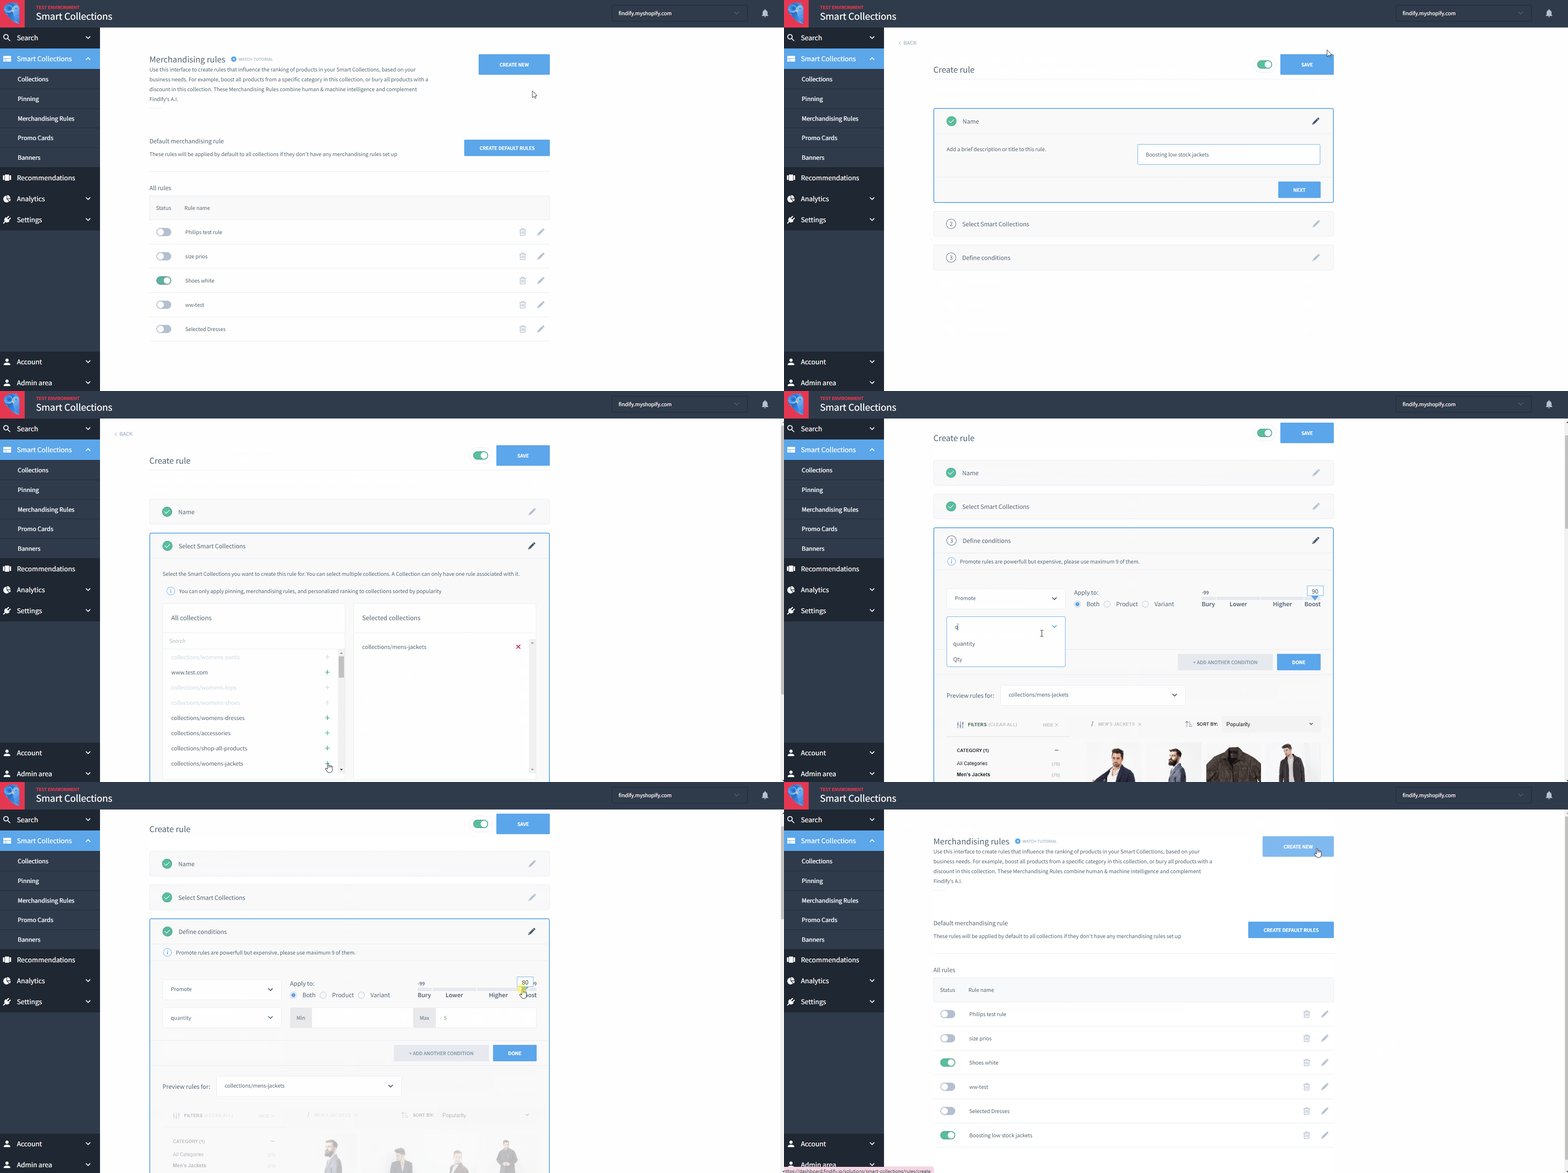
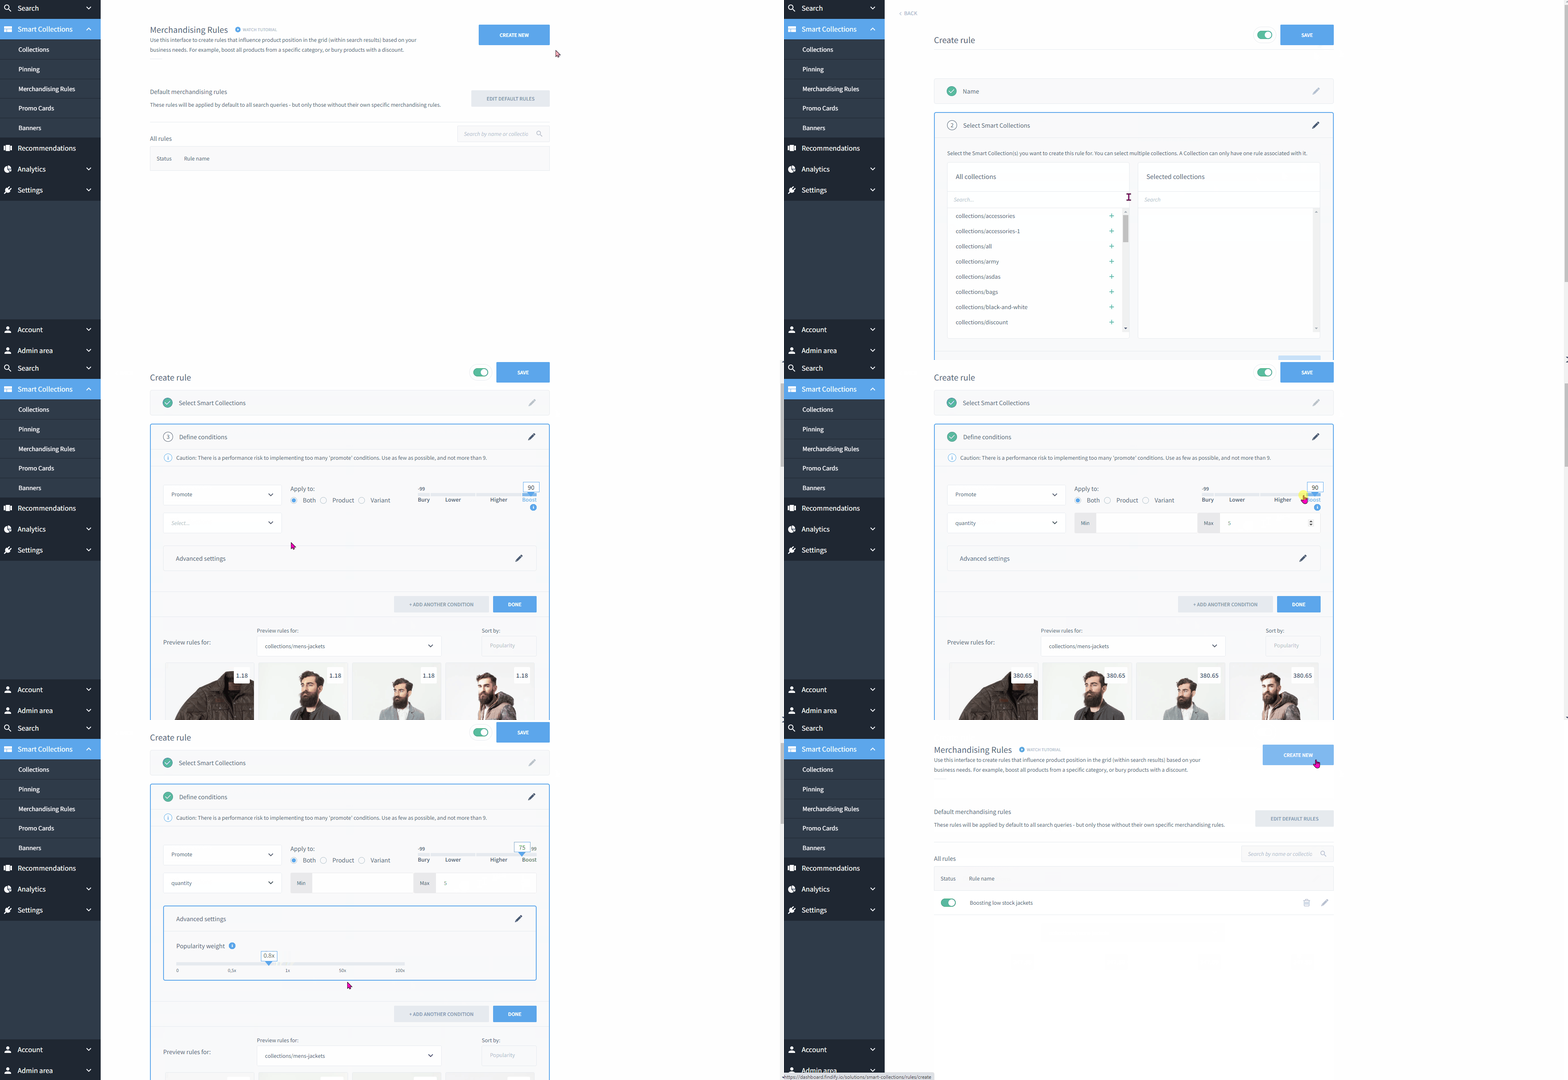
To do this, go to the Findify dashboard and navigate to Smart Collections, then Merchandising rules.
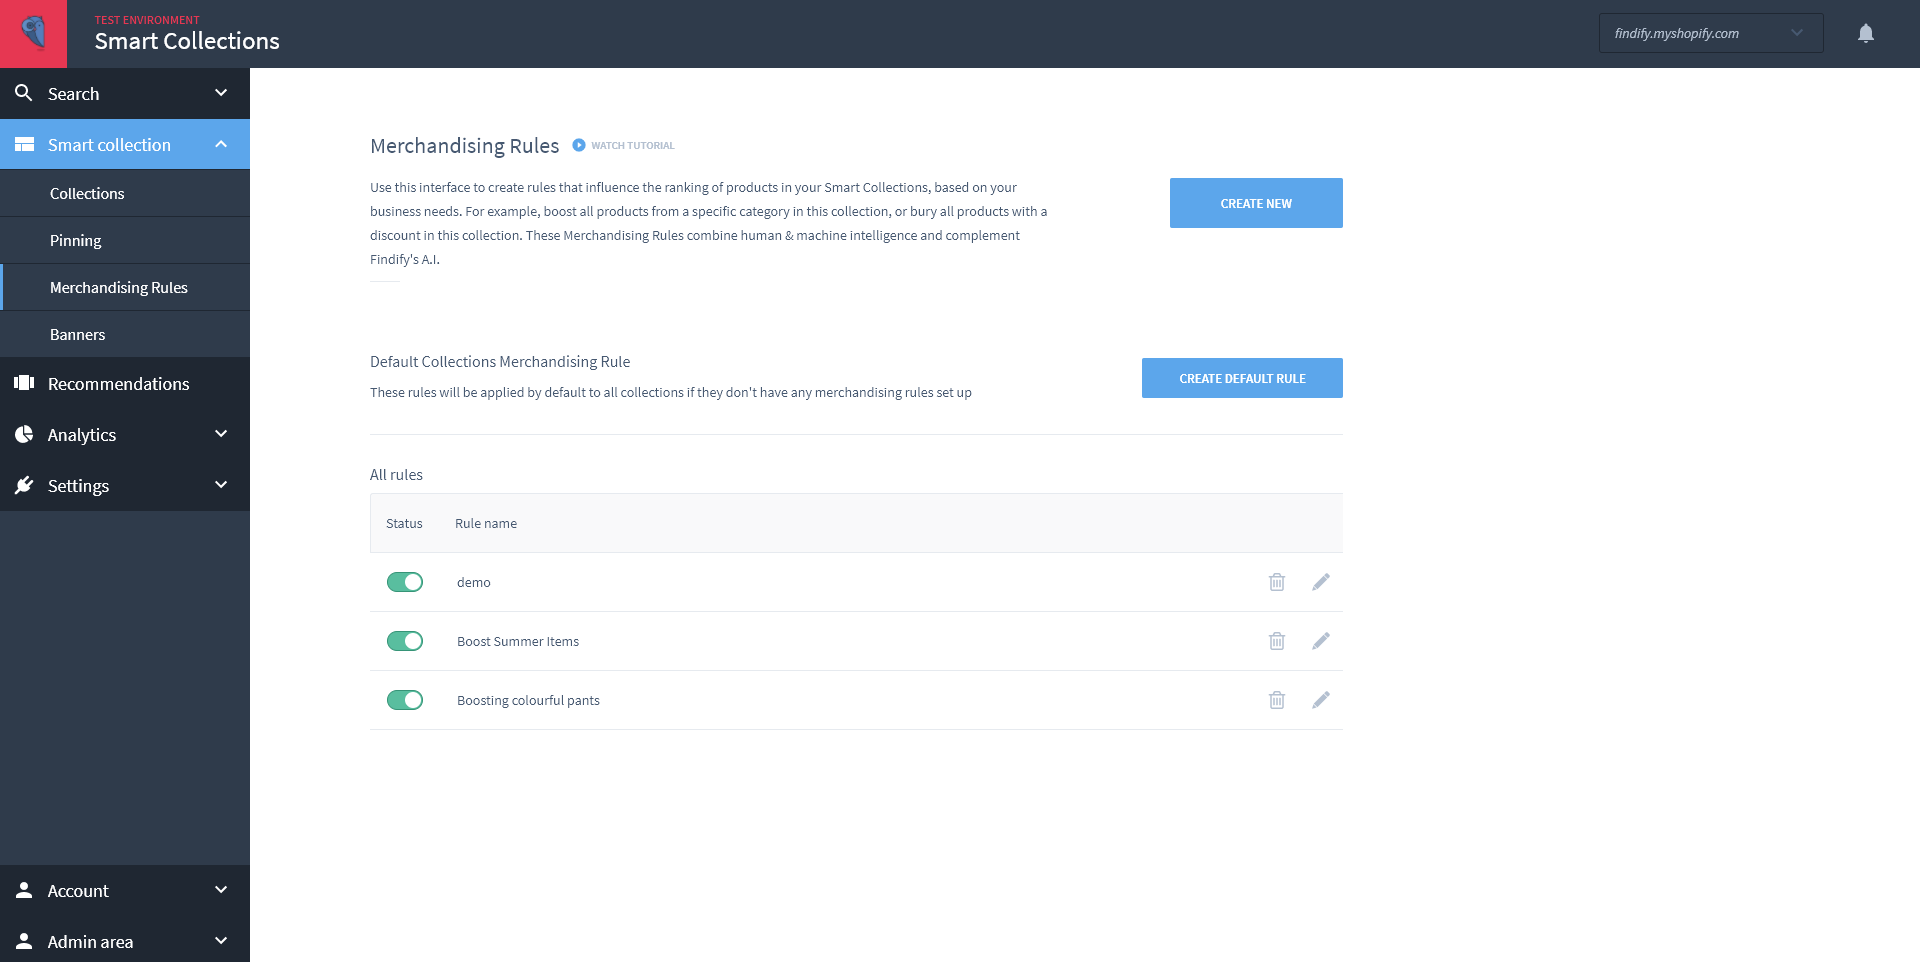
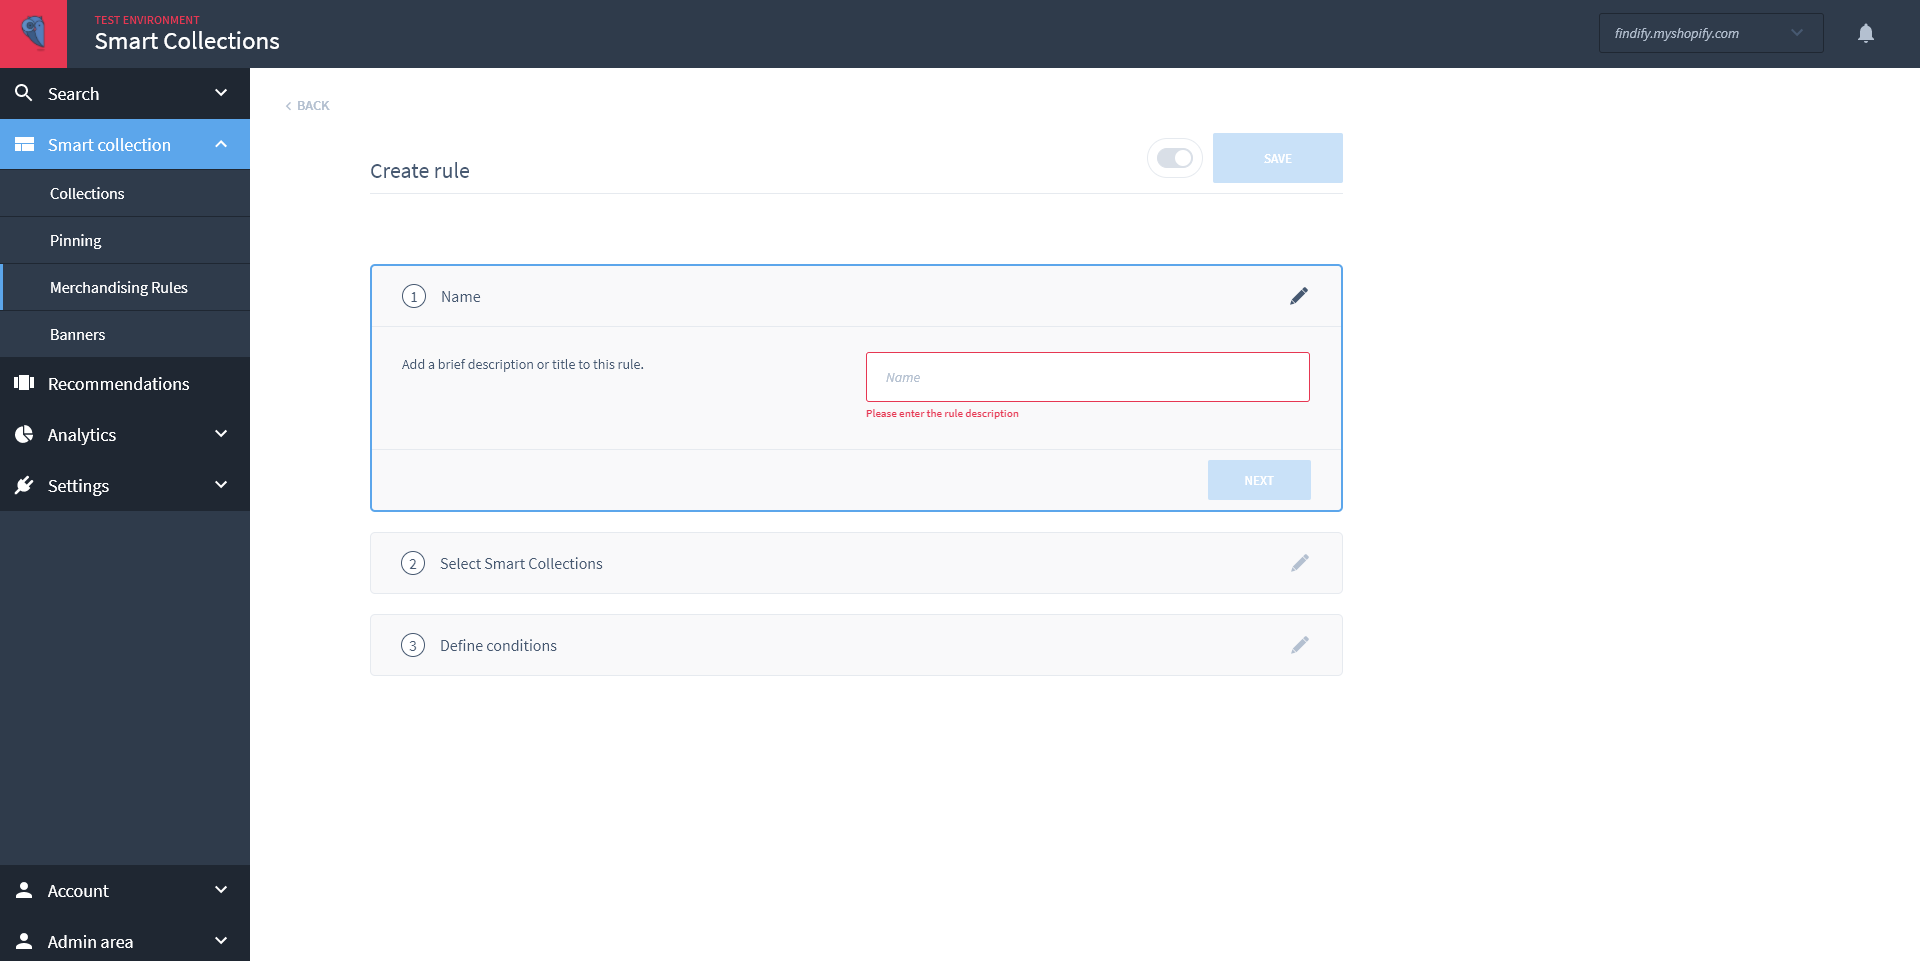
Then you create a new rule. First you need to name your rule. This is used for internal purposes to easily navigate across rules.
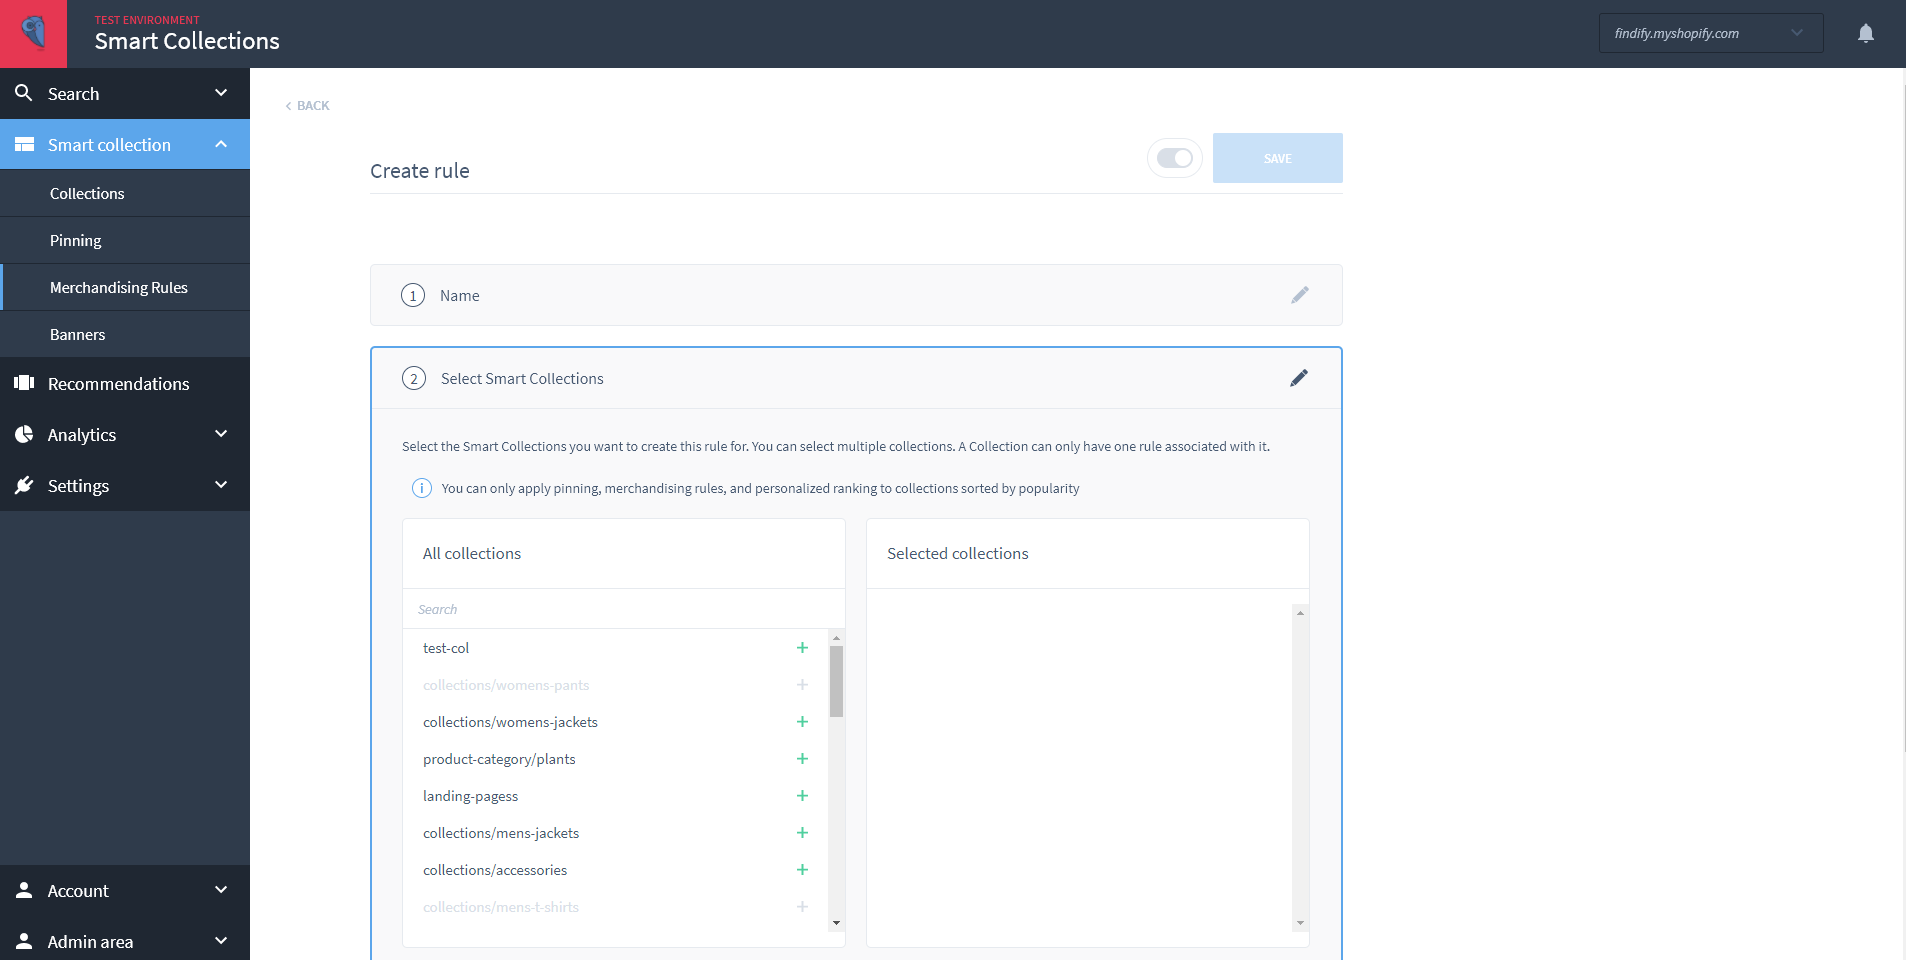
We then need to select the collections we want this rule to apply to.
Next, you would define the conditions and then merchandise based on the desired product field.
You can even control the weight of importance placed on popularity as a factor in the product rankings by using the slider which appears under the 'Advanced Settings' section.
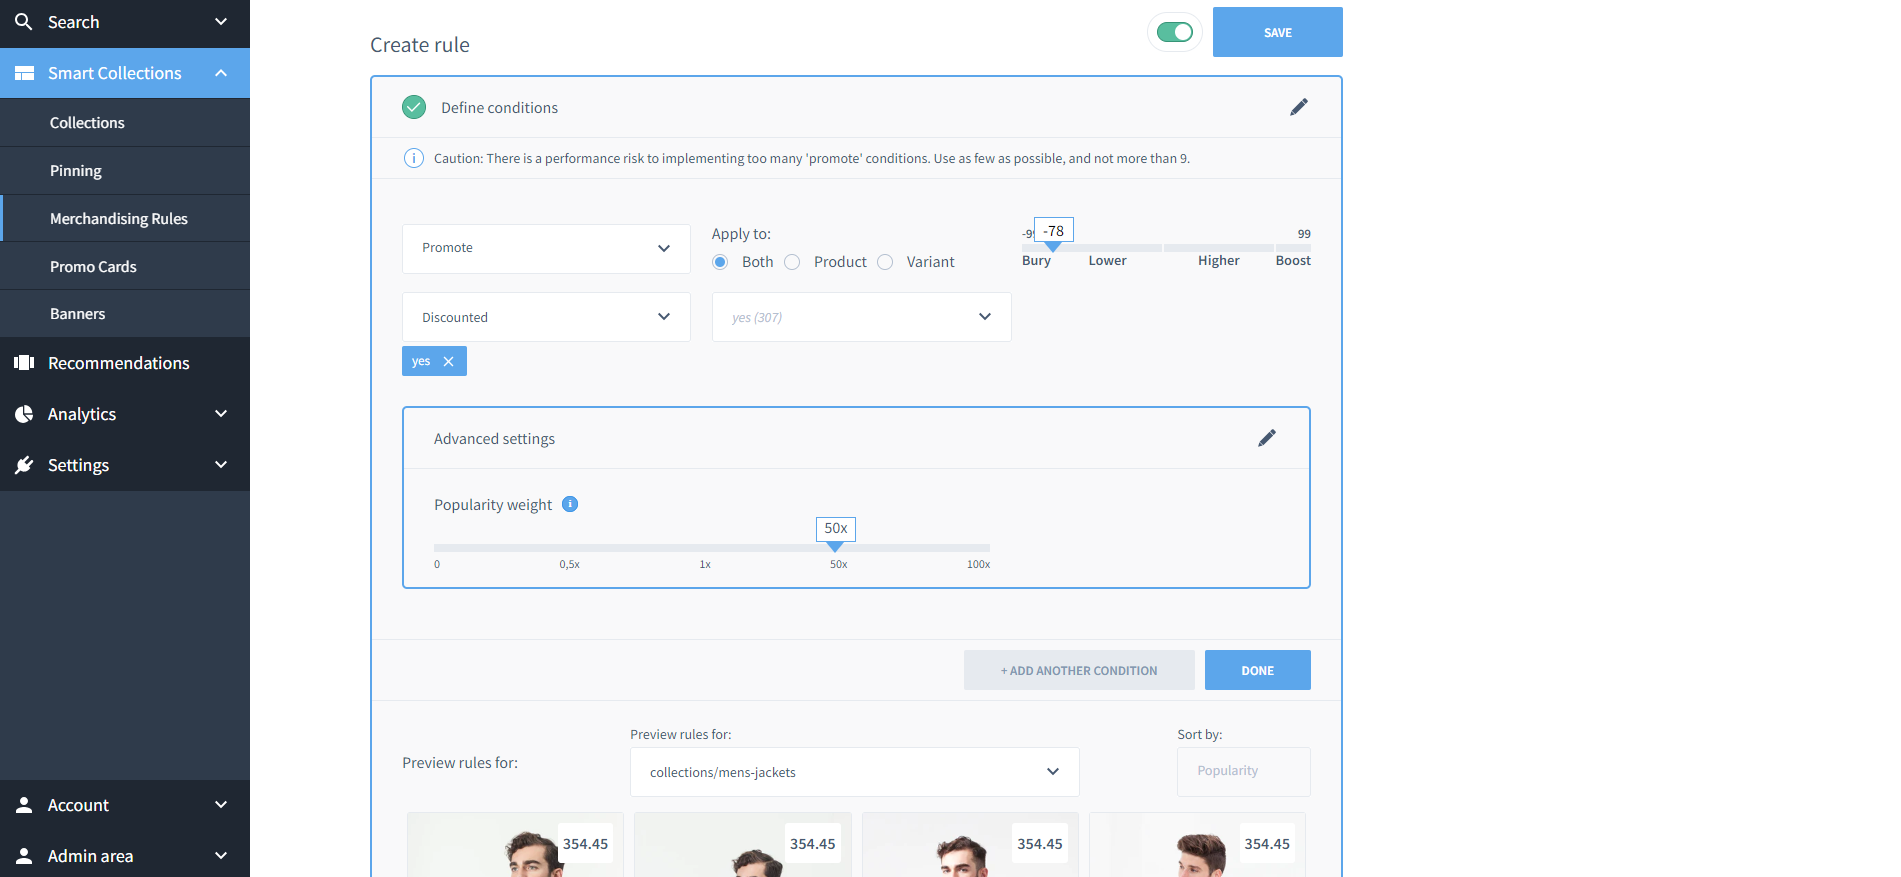
In the preview below the conditions you will see what this would look like on your site. Then it’s only a matter of hitting the save button.
As mentioned above, Findify’s algorithm will apply within any bulk actions taken within this feature.
Pinning
The pinning feature allows you to choose specific products and effectively pin them to the top of search results or to certain placements within collections, bypassing Findify's machine learning ranking.
Merchants might use this feature when they have a product they have a lot of, and would like to slim down these inventory levels. Pinning could also be used effectively when you want to sell more of a specific product for other reasons - let's say there is a new version coming out next month and the price of the current model will drop.
Since most customers only ever look at the first page of results, pinning can be quite an effective function. Use it with caution, however - Findify's powerful machine-learning algorithm is always best placed to individually rank items for each and every customer, personalizing the results to maximise conversion. While pinning is an effective merchandising tool, it should be used with a clear purpose and strategy in mind.
Pinning Within Search
Within the Findify Merchant Dashboard, navigate to 'Search > Pinning'.
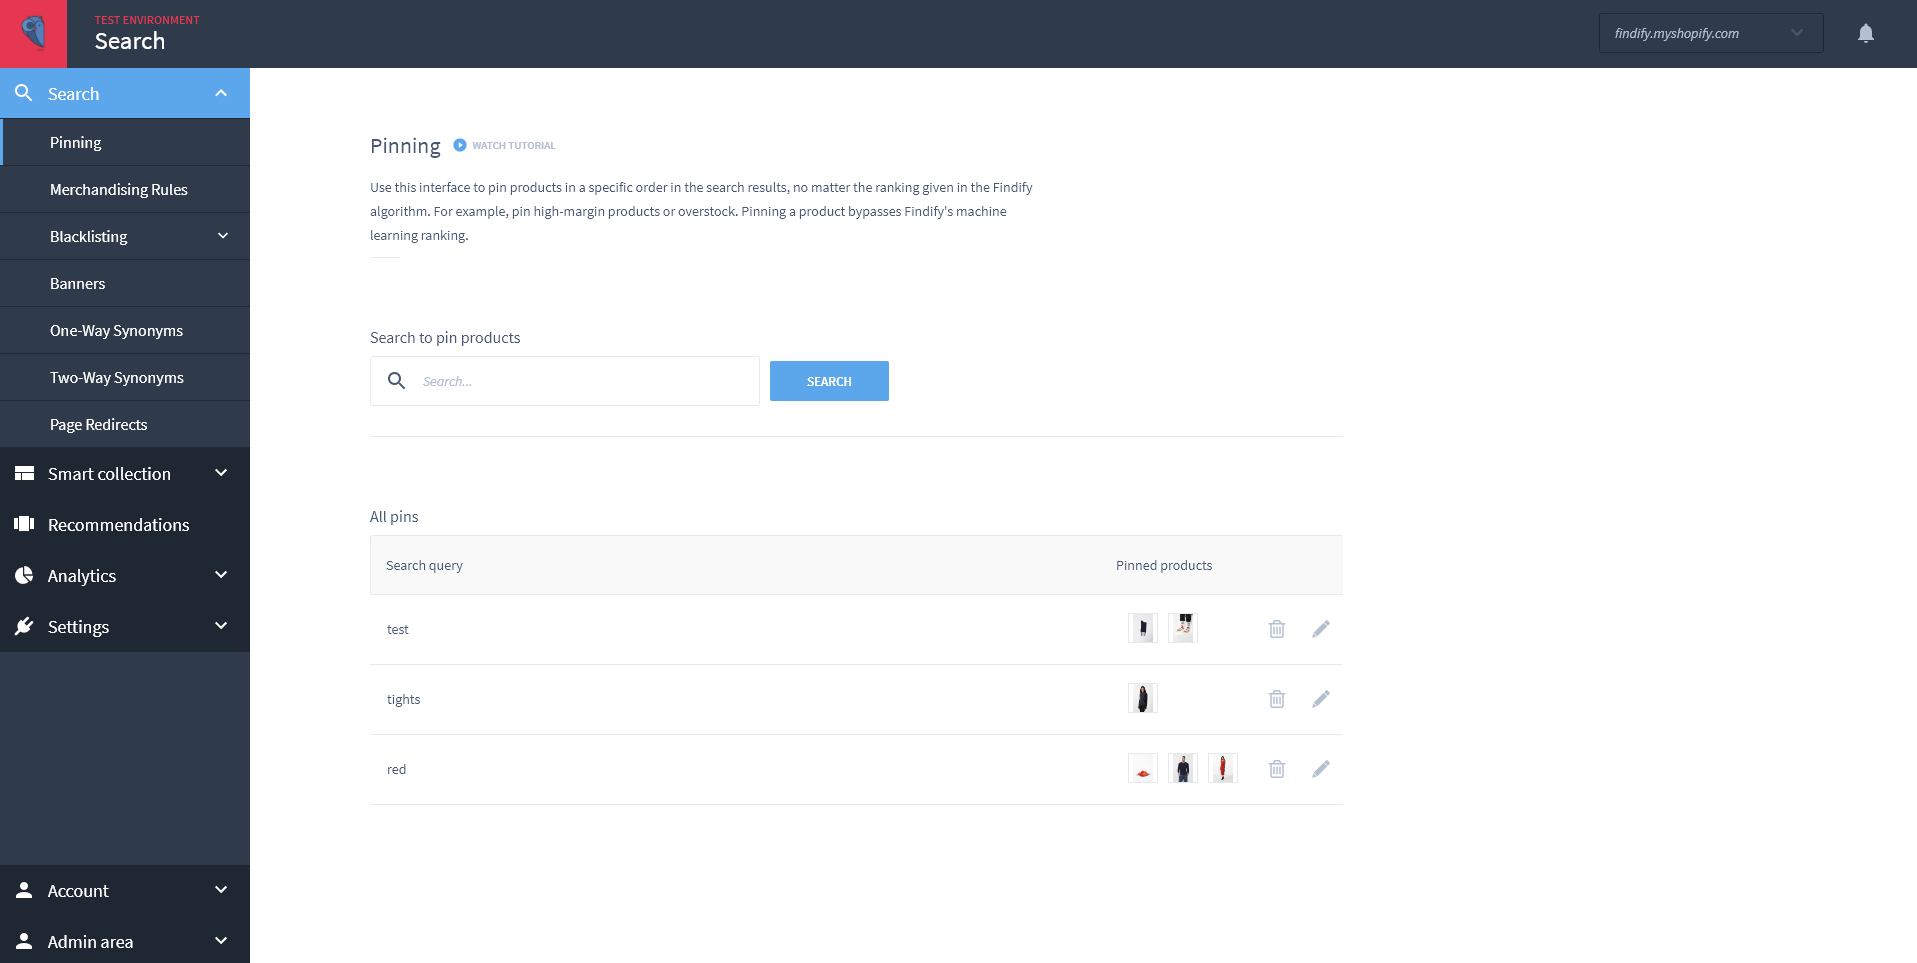
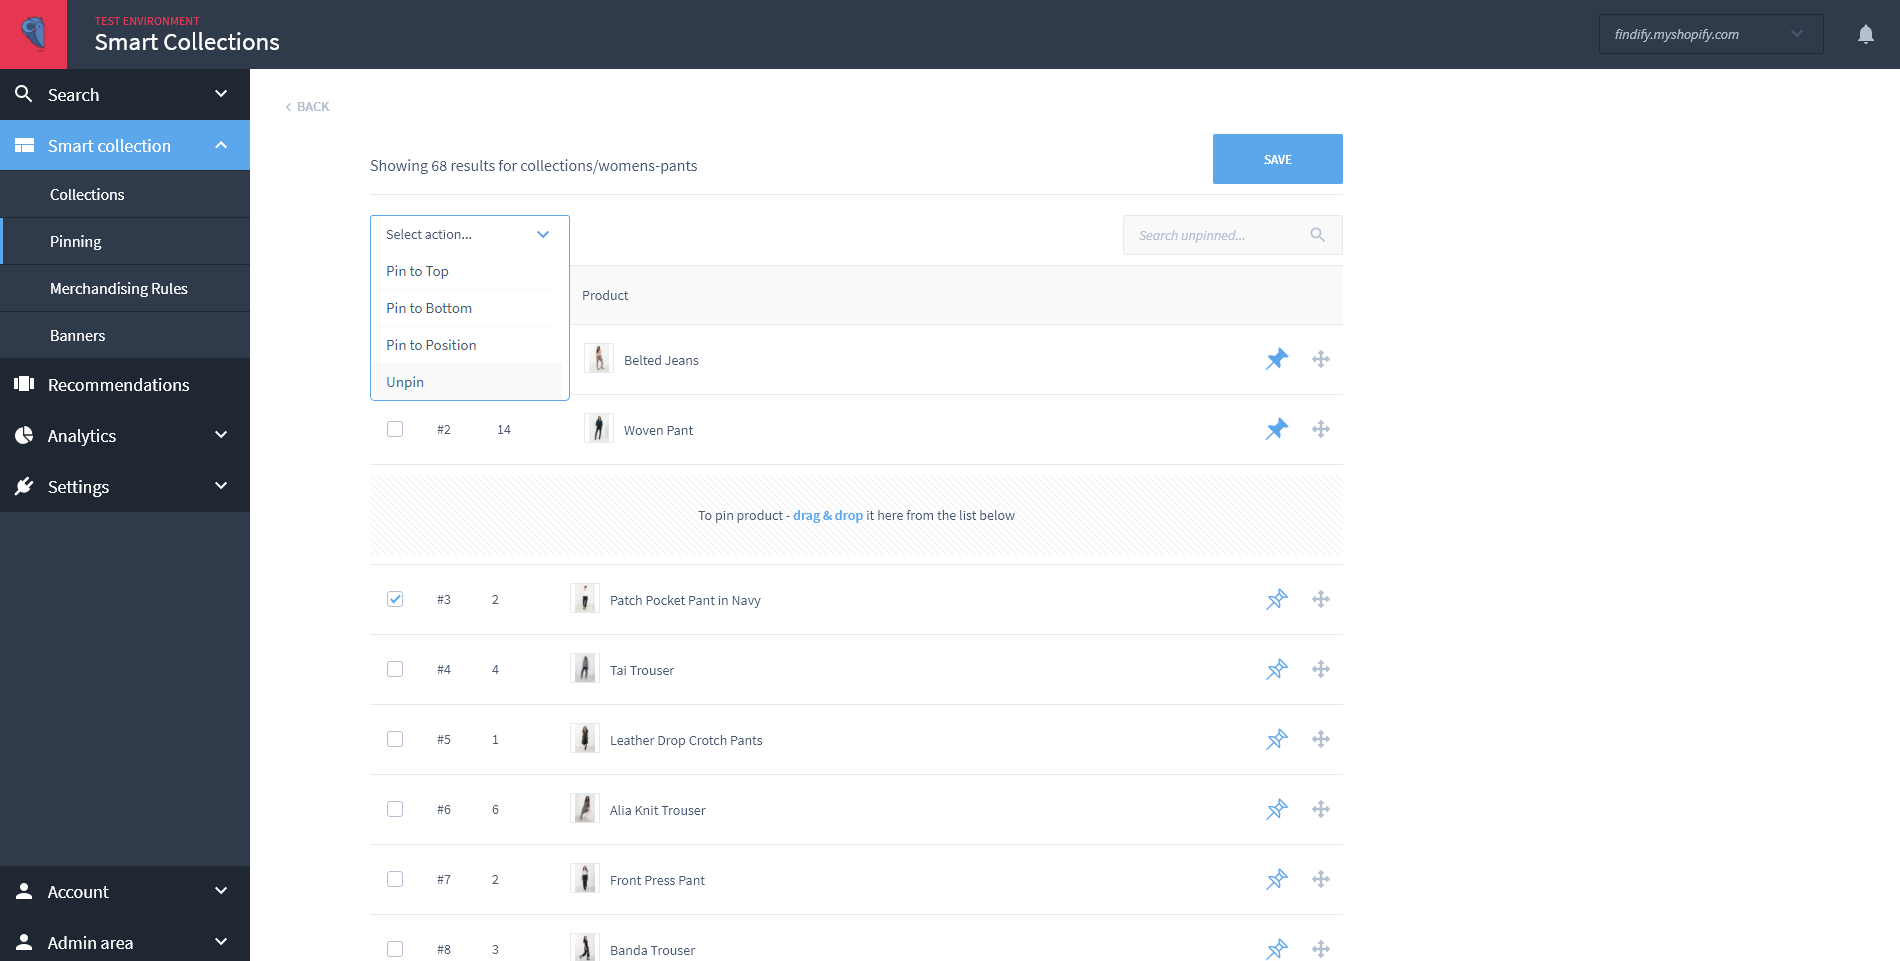
Next, type the query that you would like to pin for, and hit enter. A list of results will be returned for this query. You can then click on the specific product or products you want to pin, and tell the software where they should appear: Pin to Top, Pin to Bottom, Pin to Position, or Unpin. Once you are done, click save.
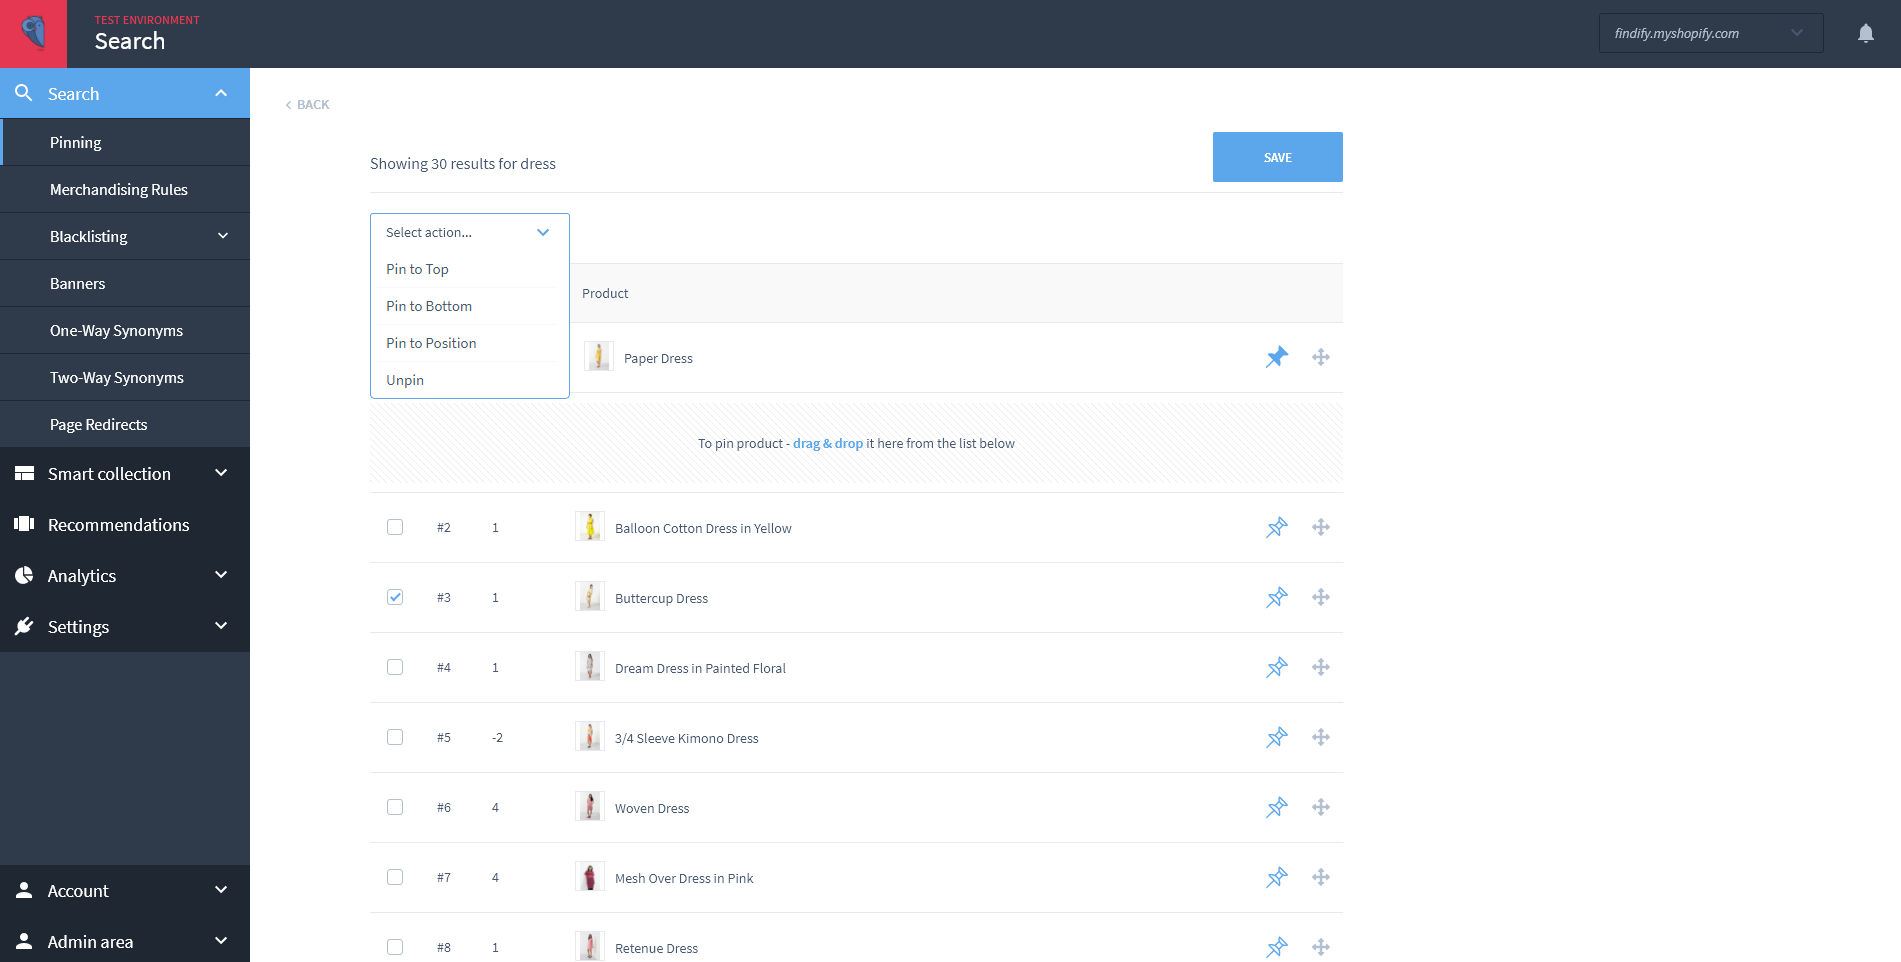
Pinning Within Collections
This functionality works almost exactly the same as outlined above, except for this function you navigate to 'Smart Collection > Pinning'.
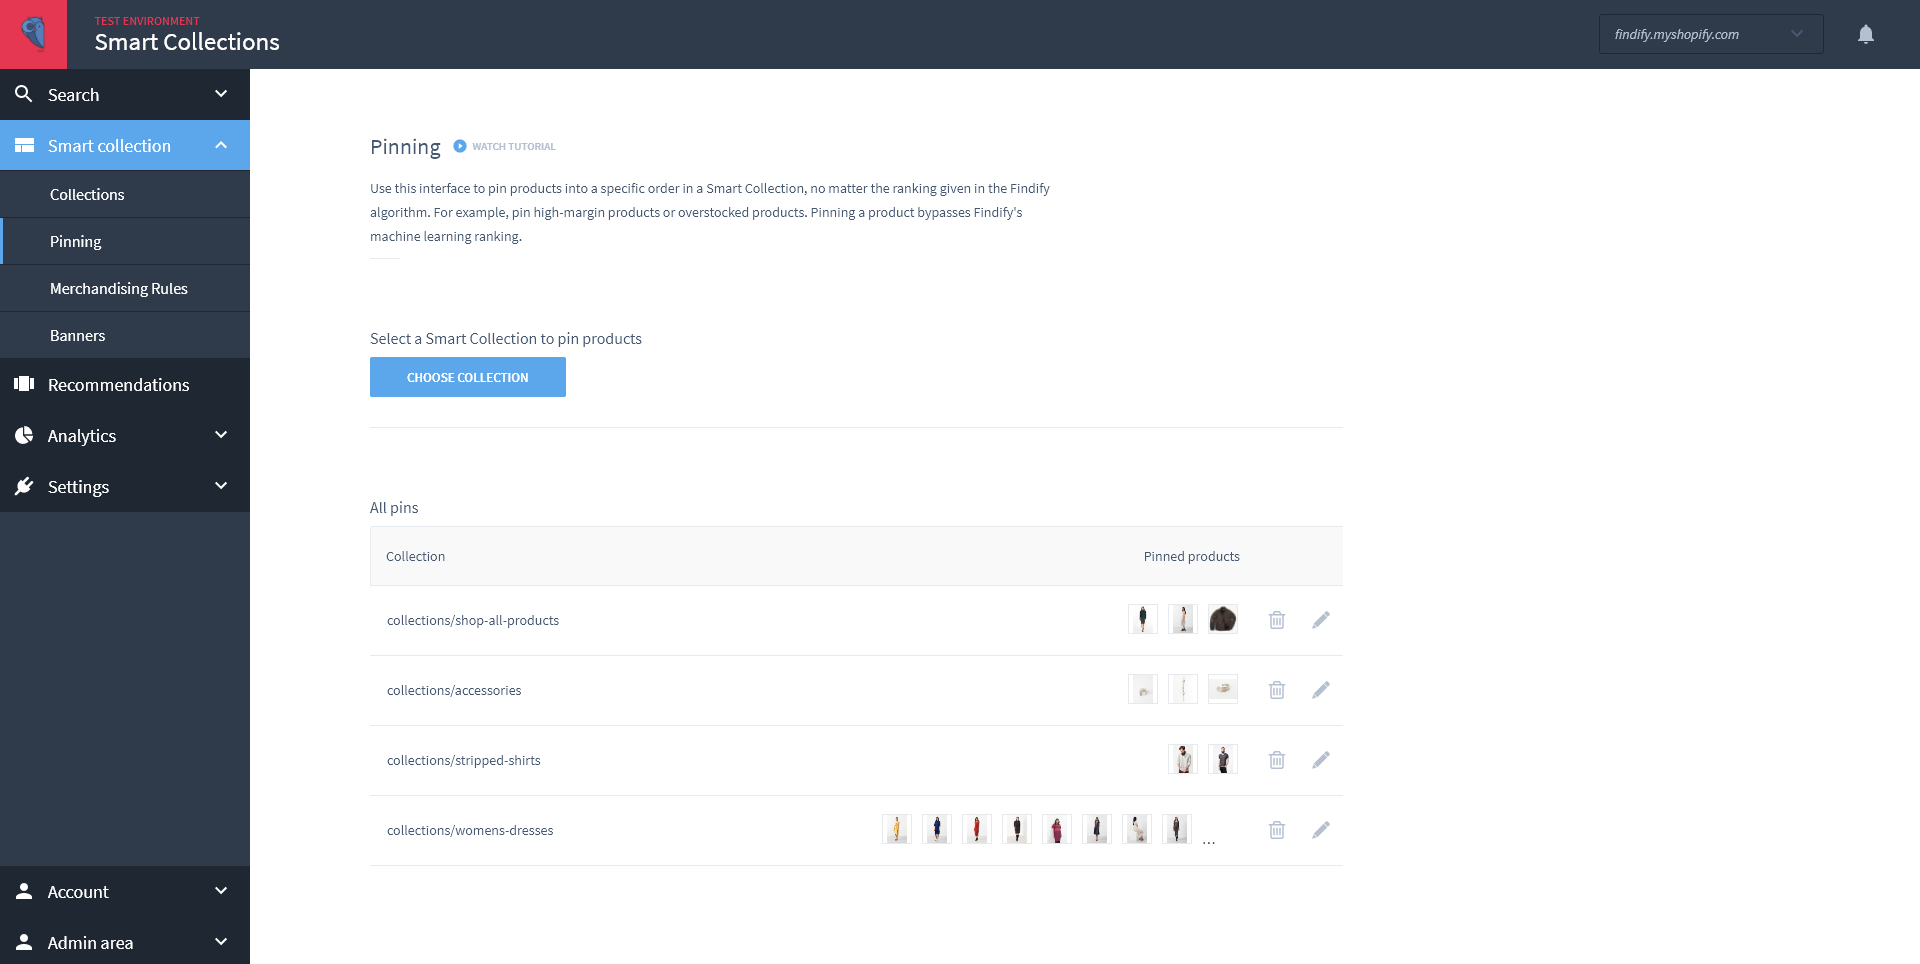
Next, select which collection you would like to create Pinning rules for.
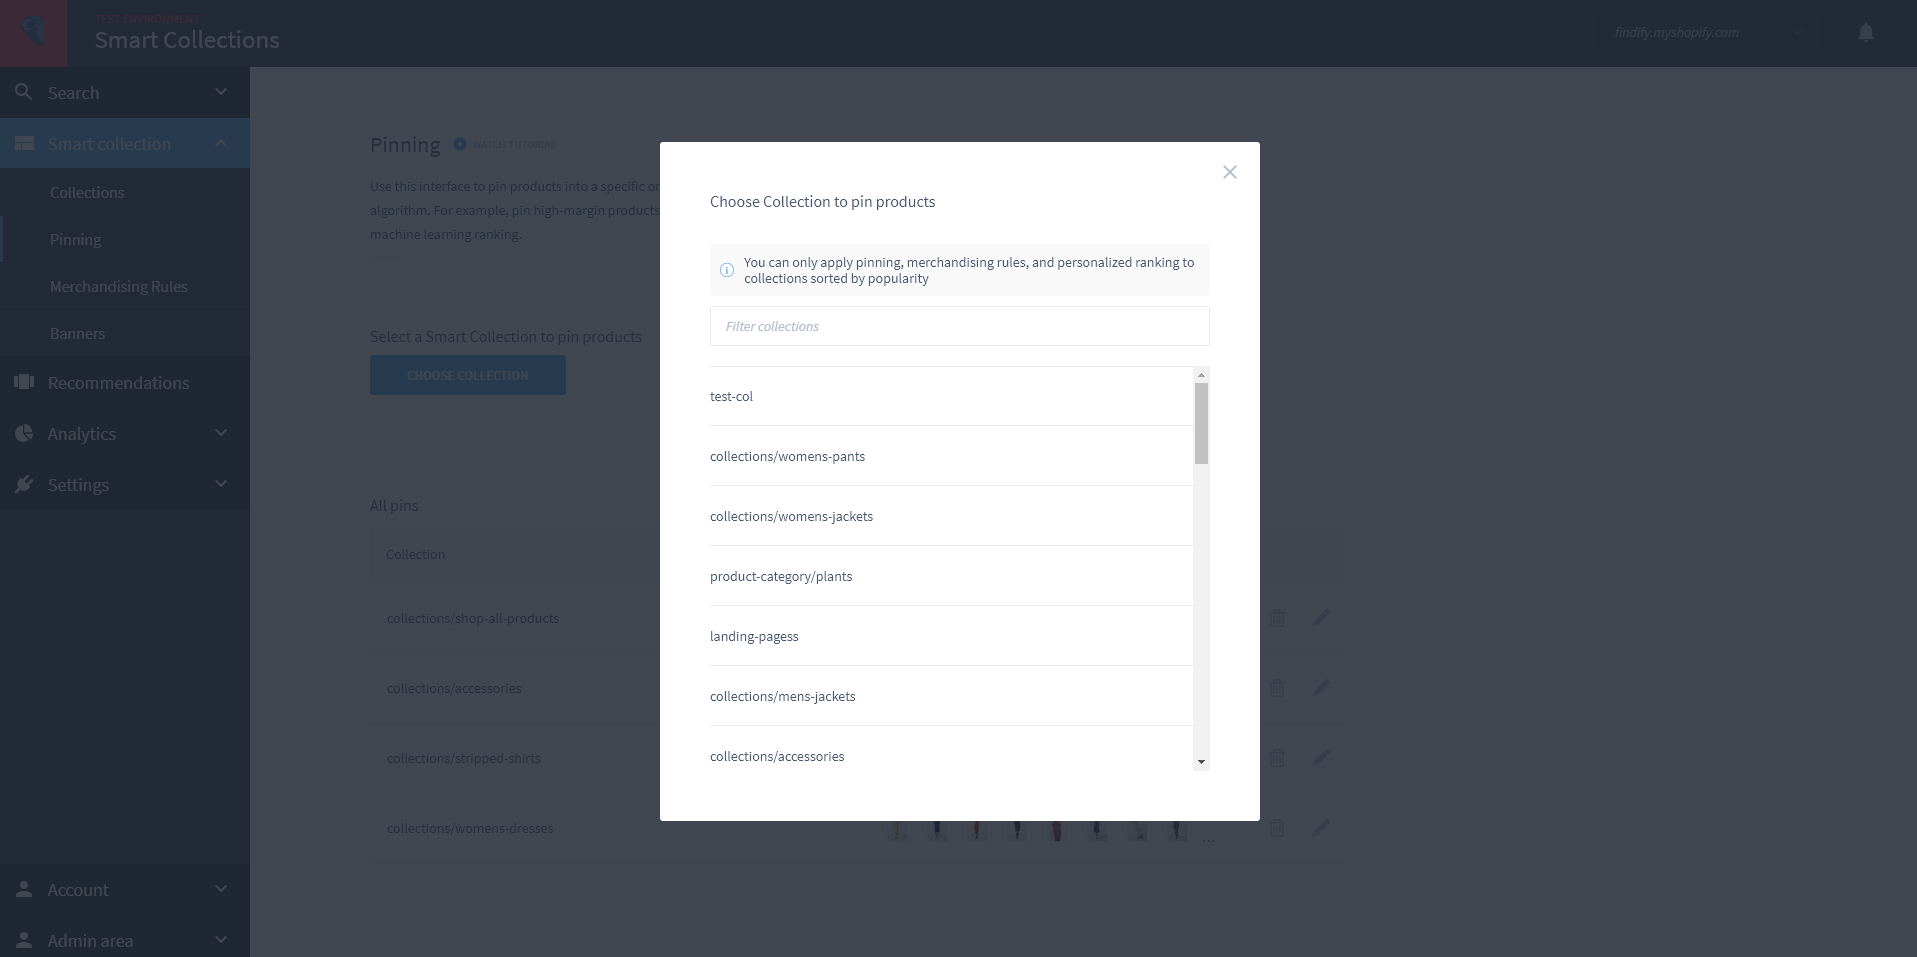
Then the process is as outlined above - simply choose which products you would like to pin, and select which order you would like them to appear in. You can choose to pin products to the top of the collection, to the bottom of the collection, or to pin them to specific positions within the collection. Of course, there is also the option to unpin pinned items.
Updated almost 2 years ago
